Thursday, October 18, 2007

The jacket continued

green wool suit skirt
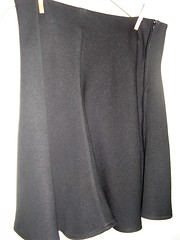
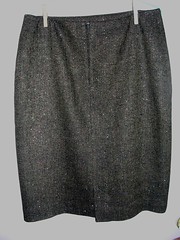
Today, I added some notes to my pix at Flickr, so if you want to see detail and have it pointed out, click on the pix and then you can see more at Flickr. As you can see, I have finished the skirt - that's the easy bit. I made it shorter than the long skirt that I often make for Winter and longer than the skirt I have been making that hits above the knee cap. Once a woman reaches a certain age, I don't think many people want to see more kneecap, even if mine still look pretty good. Also, it's about proportion.
green wool jacket
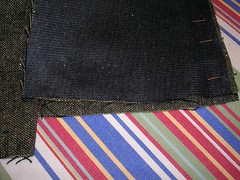
So I knew going in, because I have made this jacket a few times before, that I was going to have a struggle with the front facings. And I did. As usual, when it came time to pin the facings to the jacket, the facings were more than a quarter inch shorter. But, again I followed instructions and eased the jacket front along the facing edge.
green wool jacket
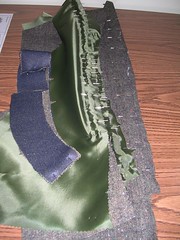
In this photo, I've exaggerated the easing up of the jacket - it wasn't that much ease. I pinned it down using LOTS of pins (so it wouldn't shift and pile up) and then sewed the whole thing.
green wool jacket
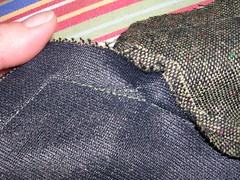
You sew one seam around the collar and then you sew another seam down the front. These two seams meet at the point where the collar and lapels meet. I never can quite match all those "large dots" and so I have to turn the garment over and see on the other side where I went wrong and then sew it again. It usually works out in the end.
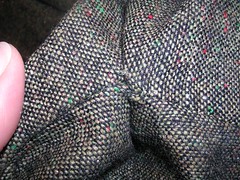
green wool jacket
Sometimes, after I am finished the jacket and it's all pressed, I might decide to take a few small stitches by hand to close up the tiny hole where my seams didn't quite meet.
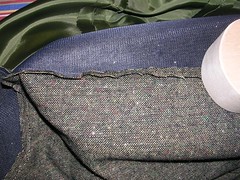
green wool jacket
Pressing is everything! I can't emphasize that enough. Once the facings are on, I press the seams open from the wrong side, even though they eventually get pressed back together. By pressing the seams open, you flatten the sewed part along the stitching line and so, when you turn it right side out, it comes out to where it should be, instead of caving in to a dent. If you haven't ever pressed a seam like, this, it may be hard to understand. But if you have done this before, next time, press it open from the wrong side and see how easy it becomes to press it once you get to the right side.
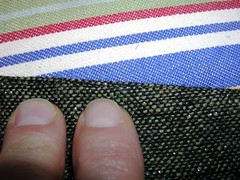
green wool jacket
Here is the edge of the lapel, just before I press it. It's a bit hard to see the seam line but it's there and with my fingers, I'm about to "roll" it slightly (or push it into place) just as I come in with the iron. This way, the seam line ends up exactly on the fold.
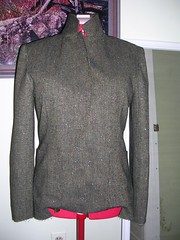
green wool jacket
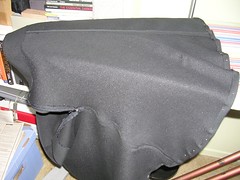
Unfortunately (and as usual) the front of the jacket has ended up being pulled slightly to the inside of the jacket by the slightly shorter facings. I'm going to let the jacket rest on the dummy for now (tonight's an "Ugly Betty" night anyway) and then fix it with judicious pressing, but I am always annoyed that it doesn't work out better than I think it should.

Monday, October 15, 2007

Green suit continues

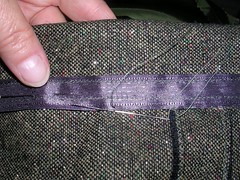
I have attached sleeves to both the jacket and the lining. I have added the collars too and am about to sew the lining to the jacket - big excitement! In the meantime, I needed some hand sewing to do while I watch Heroes so I added seam binding to the bottom edge of the skirt and turned it up 1 and 3/4 inches to give me a nice generous hem that stops right below the kneecap.
green wool suit details
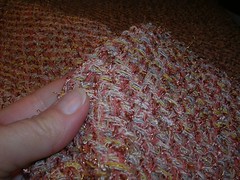
I take up one or two threads of the weave of the fabric at a time and move forward about 1/4 inch at a time (maybe 3/8) so the stitches are firm and sturdy but invisible on the right side.
green wool suit details
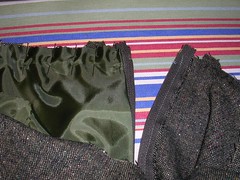
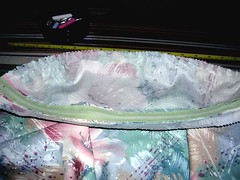
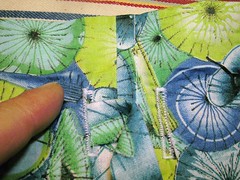
Prior to this, I lined the skirt by sewing the lining to the top raw edge of the skirt, before attaching the facing. Here is the inside of the skirt, showing the lining on one side of the zipper and not on the other. I also decided to convert darts into ease (which concept I got years ago from my couture sewing book) and so the lining is eased also (i.e. ruffled a bit to fit into the skirt).

Saturday, October 13, 2007

The green suit continued

Forging ahead with the green suit, now that I have incentive to sew with the cheap raw silk.
green wool suit
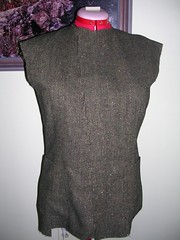
I have sewn together all the body pieces of both the lining and the jacket and have also sewn on the patch pockets. You can see a little bit of the silver thread sparkle here but it shows up better if you click on the photo and make it bigger at Flickr. Of course, it looks even better in real life. The sleeves (all four of them) are sewn together and the skirt also, including the lining. Now for more assembly.

More fabric - imagine that

Okay, call me crazy. Yesterday, I wanted to get my hair cut which meant biking over to Merivale Road. Since I was already all the way over there and I had the bike, I thought, "why not continue on to see what Fabricland might have for sale?" I had just got the green wool and am only halfway through making the suit but I thought I would toddle over there anyway. When I got there, I remembered that my stamp-and-save card was full and so whatever I might buy might not cost that much.

I looked at the Butterick patterns which were on sale for only $3.49 that week (every week, one of the pattern manufacturers is on sale) but I didn't find any that turned my crank. Then I wandered back to the "get rid of it fast" tables at the back, where the fabric is piled and you have to dig to find anything. Right away, I found a bolt of peach coloured cotton with 3% Lycra and I snatched it up in a hurry. I have been thinking I would like to have more solid coloured shirts because all the patterns I have are too hard to match to the patterned skirts and things. And then I saw this other, funny-looking fabric. Initially, I didn't realize that it was the wrong side of the fabric but something drew me to it anyway. I looked at the label on the bolt and it said "80% silk" and I couldn't recall ever having seen this fabric in the store before. I unfolded it and looked at the right side and it spoke to me. It was marked down to $5 per meter and I glanced from side to side to see if anyone else was interested in it. No one was. I took it to the cutting table, together with the peach cotton. It was 140 cm (55 inches) wide and when measured, came to 2 meters in length. I smelled it and it smelled like raw silk. I took what was left on the bolt. (I also bought the 2 meters of cotton left on that bolt.)

The when I got it home, I washed it. Yes! Raw silk, into the washing machine on the delicate cycle. When it was finished, I took it out and it looked a little "fluffier" but still good. I hung it on the rack to dry and later, put it into the dryer for only ten minutes. It still looked okay. When I took it upstairs to iron it today, I discovered that it had shrunk mightily, and just from the washing. Where it had been 55 inches wide, it was now only 45 inches wide! That's what I call shrinkage. But now I can cut a suit out of it (or at least a jacket) and clean it very carefully but not with the fear that it will be ruined.
some raw silk
I got 2 m of cotton, 2 m of silk, 2 m of lining and 2 zippers and 2 threads, all for $21.45. Because of all the stamp-and-save points, the whole thing cost me $1.45. Amazing.

Tuesday, October 09, 2007

Continuing with the green suit

It took quite a while to get ALL the pieces cut out, as there was lining and interfacing too. Then I had to iron on the interfacing and finally I was ready to start the assembly.
green wool suit
I did my usual thing which is to say I pinned together as many pieces as I could, regardless of where they were in the order of instructions. Once I had used up all my pins, I sewed all the pieces I had put together in one big assembly line, spitting them out the back of the feed dogs and running a new piece in. Then I ironed all the seams I had made and started in with more seams.
green wool suit
Because the sleeves are two-piece and there is no matching underarm seam on the sleeve to correspond with the body of the jacket, I have to make the sleeves into tubes and then fit them into the jacket. I do this with both the jacket and the lining sleeves. I also make the outer jacket and the lining jacket and then put them together around the front edge, which we'll get to later. I also zigzag stitched all down the seam allowances on the skirt because I will be pressing the seams open and not finishing them in a flat fell. The skirt is also fully lined so I don't feel the need to finish the raw edges more than that.

Thursday, October 04, 2007

Green Wool Suit

green wool suit
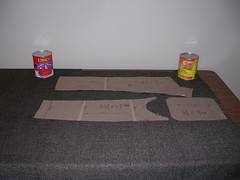
I finally put away some patterns I had scattered all over my sewing room and found the jacket and skirt patterns I want to use for the green wool. I ironed the paper pieces and organized them and then I looked at the fabric, which I had laid out on my cutting table, folded in half lengthwise. I knew then I should cut out each piece in a single layer, not two pieces at a time as it would be if the fabric were folded in half. So I unfolded the fabric and staked it down with 48 oz. cans to prevent it from sliding off the table.
green wool suit
I was going to write about how much extra work it was, to cut out each piece twice, but as I cut, I realized that it was just a bit of extra time and not extra work, really. As I cut each piece, I realized how nice and precise it felt, to only cut one layer at a time. I knew that each piece lined up exactly with the stripes in the fabric, and that the under piece (because there wasn't one) wouldn't be slightly skewed. I also knew that each piece would be flaw-free.
green wool suit
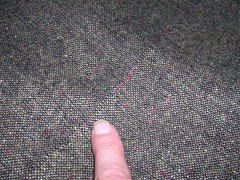
There were several flaws in the fabric, which I noticed and marked with contrasting thread as I ironed the fabric originally. Now that I'm cutting out each piece, one at a time, I can position the pattern piece carefully to avoid the flaws. It's actually less stressful to do it this way, than to cut two pieces out at once, on folded fabric. And easier on the hand too, because you are only cutting one layer of fabric. Which is not to say that I won't ever cut two layers at a time, ever again. But I am not minding this step at all, this time.
green wool suit
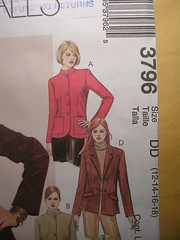
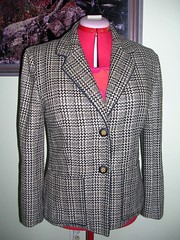
I know I've posted this jacket before, but it was easier to take a new photo, rather than find the old one. This is the McCall's 3796 pattern made in a raw silk. I won't be doing piping with the green wool but everything else will be the same.
green wool suit
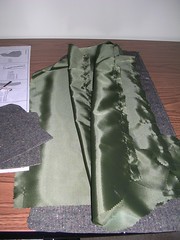
For fun, I draped the front jacket pieces on the dummy, over the silk jacket, just to see how they will hang. I am quite happy with the fabric so far.

Saturday, September 29, 2007

Back to posting!

It has been far too long but I am finally blogging again. No real reason - just distraction.

Back on August 3, I was making a black jacket and I just finished it today. Now I am "allowed" to start a new project. But first, the jacket and a few other things.
black cotton jacket
So cute! Even if it is just plain black. It is the same pattern as some other jackets I have made (Simplicity 4698) and I went with the "no lapels" variation because I didn't have enough fabric. I decided to make it less plain by adding a bit of satin piping around the front edge and a not-too-boring button. The sleeves are 3/4 length so I will wear it with a sleeveless or short sleeved top. That works for me because when I teach, I am always very warm, waving my arms about and standing in front of the class. Plus the jacket is only partly lined so it will be nice for Summer too.
flat felling an armhole
Because of the way the jacket is constructed, with a partial lining, I decided to sew the sleeves into their tube shape and sew the body of the jacket together, and then set in the sleeves and finish the raw armhole edge with a flat fell. It does make it more tricky and fiddly, especially when the fabric frays a bit, but with patience, you can tuck in the raw edge of the sleeve all the way around the armhole edge and then sew it down to the body of the jacket to encase all the raw edges.

Anyway, I am quite pleased with it and think I will get a fair bit of wear out of it.
blue jacket and skirt
This is a shot of that blue twill jean jacket I made a while ago, with the complimentary patterned skirt. I find both patterns very comfortable to wear and thought I'd illustrate that I really do wear the clothes I blog about - in this case, at a family gathering this Summer.
red linen
I had a student from last year become a friend and when she went home to China for the Summer, she came back with a couple of meters of red linen for me! She says the Chinese characters on the fabric are very old and not in use as "letters" these days, so chances are they don't really spell anything and won't offend anyone. Now I have to decide how to prep this fabric - should I wash it or will the gold come off? She said it was linen and it feels like it, which means it will shrink. But even if I only ever dry clean it, I worry about the gold. We debated about what I might make with it and I thought "jacket" and she thought "dress". I am leaning more toward something that I won't have to clean very often, which rules out dress.

A Dress A Day had a post recently about fabric stashes and deciding what to use next, and I related to it a lot. So I think this red linen will join the stash for a while. In that same vein, I am putting the expensive navy wool aside, while I make my next project.
suit ingredients
I plan to make a two piece suit with this green wool. It's only partly wool and has a bunch of other fibers in it, including a thin silver stripe which you will be better able to see in later photos as I make the suit. I pre-washed and dried it in the dryer and it came out perfectly, much to my relief. It was originally $20/metre but I got it on sale for only $5/metre, which is why I dared to wash and dry it. I will use the same patterns that I plan to use for the navy wool, as a sort of practice run. I have used the patterns several times before but not since I got my dress form (whose name I still don't know in spite of what I wrote earlier). There is a troubling tendency of the front facings on the jacket to seem shorter than the outside pieces and therefore, curl the front up slightly. I don't know why this happens and can "cure" it by pressing and pounding the heck out of it. But maybe with the dress form, I can see what is happening. I'll know soon.

Wednesday, August 08, 2007

Handlebar bag finished

And we're ready to rock and roll. I got a length of soft braid (they had shinier stuff but mine seems to be made of something cottony) to act as the shoulder strap.
handlebar bag
I had to figure out how to insert it between the zippered top and the body of the bag so that it would end up on the outside where it belonged but that wasn't too difficult. Here I've pinned the zippered top to the bag and the shoulder strap is inside the bag about 2 inches so I can sew it down for extra strength.
handlebar bag
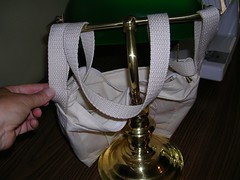
The handlebar itself is packed so I used a lamp to simulate the bar. It doesn't show very well here but my plan is to loop the whole strap over the handlebar and then snap the loops onto the bar as well, creating a redundancy. This bag will contain all the little things we want to keep handy while riding (like the camera and money) so I don't want it to fall off.
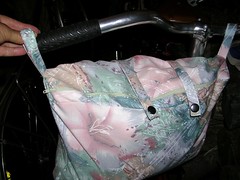
handlebar bag
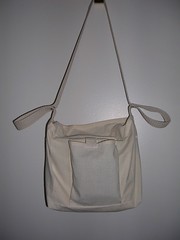
I figured that I could use an 8 inch loop over the handlebar on each side so that's where I placed the hammer-on snaps. Here is the bag hanging up, with the loops snapped shut. I'm pretty pleased with it even if I won't get to test it in action until we get to Halifax. I've put a few notes on the photo if you want to go see them at Flickr - nothing exciting.

Tuesday, August 07, 2007

bike bag redesign

Well I am cleverer than I look because the bike bag worked with the measurements I gave it! It only connected with my knees when I was pedalling into the wind or when we hit a really big bump. We biked about 30 kms with it and I loaded stuff into it and was pleased with it. I think I'll use it again on treks to the market or elsewhere.
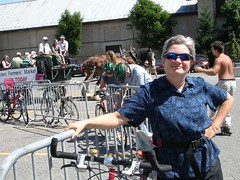
at the Lansdowne market
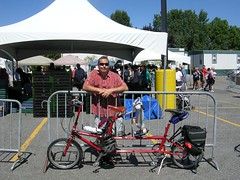
As I did on Sunday! Here I am in one of my rayon bike shirts. You can just see part of the bag behind my right hip. More importantly, there are horses in the background!
at the Lansdowne market
Here's Peter in one of my shirts, and you can see the bag hanging from the stoker's handlebar. In spite of its success, I had decided to redesign it anyway, especially as the zipper was not easy to operate one-handedly.
handlebar bag
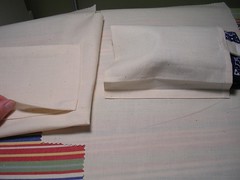
So I am basing the bag on the tote bag pattern I have used many times (especially for gifts). I am using the smaller of the sizes and modifying it a fair bit. I wanted an exterior pocket that was easily accessible so I could whip out the camera at a moment's notice while pedalling. I decided to make a gusseted pocket to accommodate the bulk of the camera and prevent the bag itself from being distorted when the camera was in the pocket. Of course, I couldn't make a pocket on only one side so I did a matching one for the other side of the main bag. In this photo, on the right-hand side, I have stuffed a kerchief into the pocket before the bottom has been sewn down. On the left, I have sewn the bottom of the pocket down.
handlebar bag
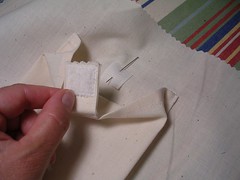
After I tested the pocket, I realized that the camera would not be totally secure and decided to close it with some velcro. I tried closing the pocket top with the velcro attached directly to the inner edge of the pocket but the top of the pocket buckled too much. So I sewed the bit of Velcro to a bit of a tab and then I could secure the open edge of the pocket to keep the camera from falling out (if the bag tipped badly) but still have easy access to it.
handlebar bag
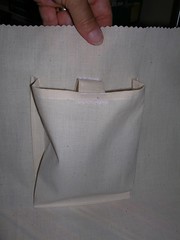
Here is a finished pocket, stuffed with the handkerchief. Then I applied two interior flat pockets and sewed the sides of the bag together.
handlebar bag
Here is the bag before I put on the zippered top and attach the handle. The handle is going to be the really clever part, although I have only designed it in my head so far.

Friday, August 03, 2007

Bike bag template finished

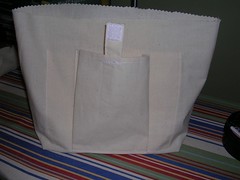
Wow, that bike bag is HUGE.
handlebar bag
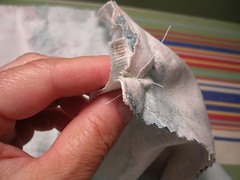
First, I got all balled up at the corners because I was fitting half moon pieces into straight pieces. Not my usual "so tidy on the inside" at all. When I turned the bag right-side-out however, it looked fine so I guess I can live with it.
handlebar bag
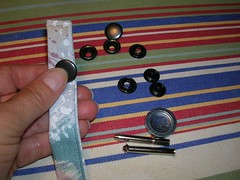
Next, I saw that the straps or loops were too small to put buttons on so I went for some left-over snaps I had. I think I may go for snaps in the finished product also. Then I stuffed the bag FULL of every hand towel I own (it is very capacious) and went to the garage.
handlebar bag
As I planned, I slid one fixed loop over one end of the handlebars and then slid it to the middle to get the other loop over the end of the bar. That went well.
handlebar bag
Then I centered it and snapped the middle loops shut and there it was - the biggest handlebar bag I've ever seen. I think it will connect with my knees as I pedal but I won't know for sure until we go for a ride or at least until Peter holds the bike for me while I sit on it. It sure didn't seem very big with the dimensions I wrote down, nor while I was making it. So I am glad I made this template and will go back to the drawing board after a test drive.

Brief bike interlude

So there I was, sewing away on the black 3/4 sleeve unlined jacket and thinking that black is sure hard to photograph, when it occurred to me that I needed to make a handlebar bag for the tandem. First, where I have got to on the jacket.
four front pieces with interfacing
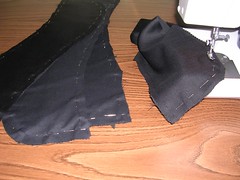
The instructions call for all four front pieces (two fronts, to facings) to be interfaced. All I had in black was sew-in interfacing but I thought it would be best to use that in any event, as the iron-on stuff still seems to bubble and I am not convinced it is the best choice for large pieces like these. Plus, I am going to use it (sew-in) for the navy wool (whenever I get to it) and it's good to practise.
unruly flat fell
I'm sewing all the vertical seams and flat felling them in the modified fell, mostly because the jacket is only partly lined. Even though it is cotton, this fabric doesn't take a crease very well, and it frays and sheds, so the flat felling has been awkward. Here, you can see two seams, one unfinished at the top and the other is the seam between the interfacing front piece and the front side piece. I had to resort to pinning the curves after I ironed the seam allowances. Anyway, it is coming along but first, the bike bag.
sketch of bike bag
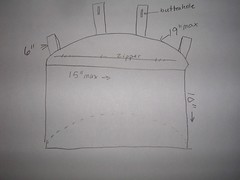
I made a sketch of what I wanted and filled in dimensions after going into the garage to measure distances between handlebar ends, stems and water bottle cages. I figure I can slip the sewn-in loops over the ends of the handlebar (first one side and then the other) and then secure the middle tabs or loops once the bag was hanging from the bar. A zipper the entire width of the bag would allow easy access.
bike bag with zip
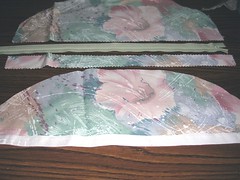
The bag is effectively a muslin because I'm going to have to use it on a ride to determine what changes might have to be made. I'm also going to have internal pockets and an external zipped pocket on the finished model. Here are the top and bottom of the bag. You can see I have split the top and added seam allowances in order to allow a zipper along the front (close to me the rider) edge.
bike bag top and bottom
Here are the top and bottom again, without the zipper yet. The bottom (I left the white selvage on it) is folded back on itself.
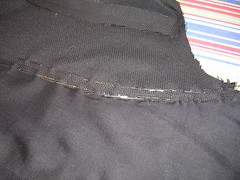
upper seam where I forgot the tabs
After I installed the zipper, I cut a piece for the curved back and without thinking, sewed it on to the top. I was so concerned about how I was going to fit a curved piece onto a flat piece that I totally forgot I wanted to sew in the four tabs that are needed to secure the bag to the bar. Stupid. Now I have to pick the seam apart in four places and insert the tabs. Grr.

Tuesday, July 31, 2007

Skirt and Jacket

I wasn't going to blog about this because it was just "left overs". However, the fabric I had left over was more than I thought and now it has turned into a project for which I have actually bought something new (i.e. piping and a button). So here it is.

A while back I made a jumper using some nice black cotton with a waffle weave finish. I used a pattern that was apparently in my size but when it was finished, the jumper looked more like a tent and as the hem grazed my ankles, I thought, not even taking it up will help. I really needed to be about 6 feet tall to make that pattern work. So I am going to give it away to the Sally Ann when I can bear to part with it - never-been-worn and nicely made. Ah well.

When I got the fabric, I bought yards of it because - that's right! - it was on sale. I decided that I could now use a serviceable black skirt so I hauled out what was left and cut out the skirt in the pattern I love - New Look 6462.
skirt and jacket
Having cut out the skirt, I realized there was still a lot of the fabric left over and it struck me that I could make a little jacket that would work like a cardigan.
skirt and jacket
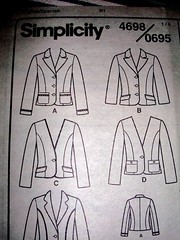
I trotted out the "shrunken jacket" pattern Simplicity 4698 and decided to see if View C in the 3/4 sleeve would fit on what was left. I've made this pattern before and if I'm not too fat, it looks pretty cute on me. Because it is unlined, I thought it would feel more like a cardigan.
skirt and jacket
Veiw C and D don't have lapels and I didn't have enough fabric for them, so I decided a little piping would liven the jacket up.
skirt and jacket
Here's the skirt, ready for hemming. The fabric has a dull side and a slightly shiny side and I put the dull side as the right side. In spite of it being cotton, it also doesn't make a narrow fold very well and so I had to use pins to hold the hem down before sewing it.
skirt and jacket
Here it is, finished and hanging up. I have a boom box parked in front of my sewing room door and am too lazy to move it so the photo looks odd. I have been listening to CBC French radio in the hopes that the language will impart itself to me by osmosis and am using the boom box instead of my usual radio because the old dial on the usual radio is very fiddly and I don't like to change it from the English CBC, otherwise all I get is static.
local crow
Finally, when I was in my sewing room yesterday, I heard the sound of toenails on metal and looked out the window to see a local crow picking at something in the rain gutters. Although they are noisy (especially at 6 am) and they pick holes in my garbage bags, I like the bold birds and so I took his picture instead of shooing him away.

Monday, July 23, 2007

PJs finished

PJs
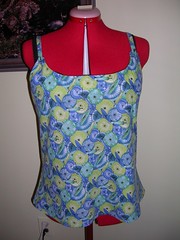
I've been finished this for a while but it just takes so long to blog it sometimes. Sorry. Here is the top with the straps pinned to the front to adjust for length.
PJs
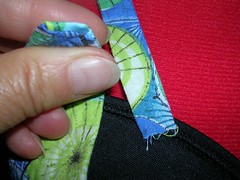
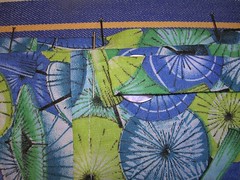
The instructions say to sew the front end of the strap to the inside of the facing but I left an opening in the seam so I could insert the strap and then sew across it.
PJs
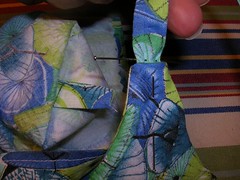
After I figured out how long I wanted the straps to be, I stuffed them into the top at the gap in the facing seam. On the left side of this photo, I have turned the other strap/facing inside-out so you can see how the strap looks in the inside.
PJs
The shorts are just plain with an elastic/drawstring combo waistline. Unfortunately, I forgot to read the instructions and so did not leave a gap in the front seam for the drawstrings to come through. Since I had already finished all the seams with a flat fell, I wasn't about to pick them apart either. Luckily, I had not started to sew down the casing for the elastic and so...
PJs
I made two buttonholes wide enough for the drawstring! Then I sewed the casing and just threaded the drawstring and elastic through the buttonholes and presto - I was finished.