Monday, August 28, 2006

Totes are Done

square bags
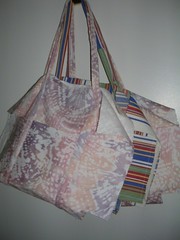
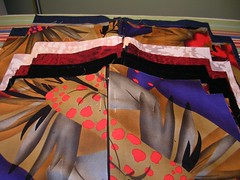
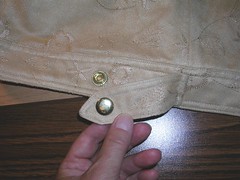
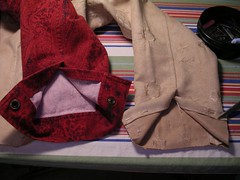
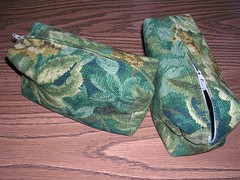
The bags were a hit! I gave away all six large totes and some of the smaller zipped bags and people seemed happy to have them. Back tracking a few days -- I also made the two little rectangular bags above, just for fun. I thought because they were dark, some of the men might like one. Some of the men did take a couple of the small bags as I hoped, for small tools and things. One even mentioned allen wrenches, which is what Peter keeps in his.
little bag assembly line
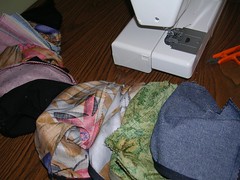
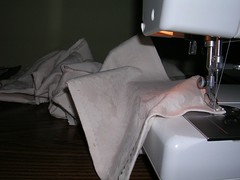
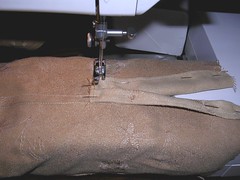
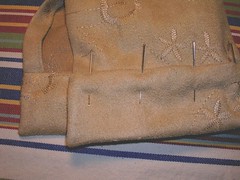
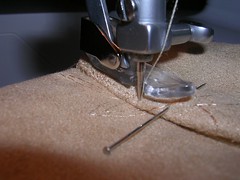
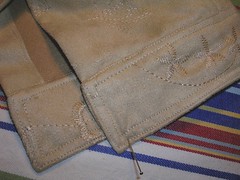
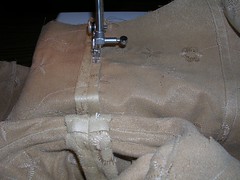
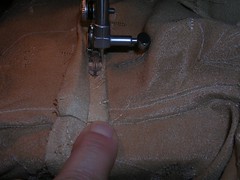
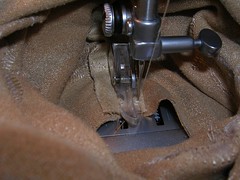
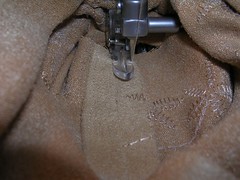
All the little zipped bags are built the same so I just sew one part on all of them at once, like an assembly line. Here, I am sewing a corner at the bottom and I don't bother to cut the threads between the bags until I am finished all of them.
trimming
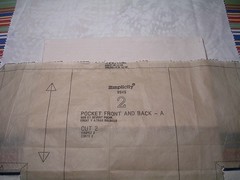
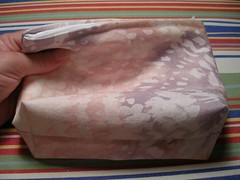
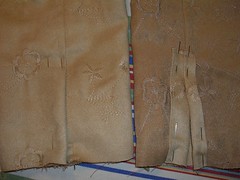
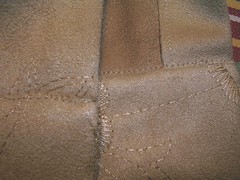
I cut the bags out with pinking shears so the raw edges wouldn't fray too much. On the small bags, because I cut them out a couple of years ago, I hadn't used pinking shears so I trimmed all the edges after I sewed them. My sewing room is now buried under layers of tiny pills or puffs from the pinking. I am going to have to do a thorough vacuuming before I start my next project.
3 dark bags
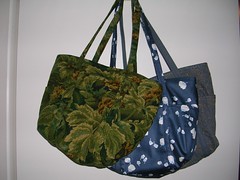
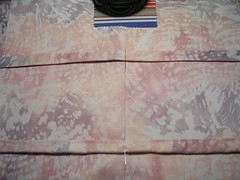
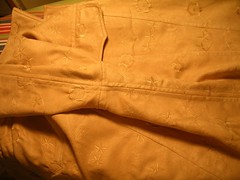
Here are the other three large totes that I made, after I changed the thread from white to black in my machine.
all the bags
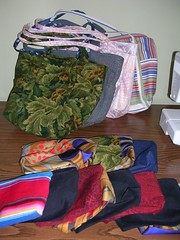
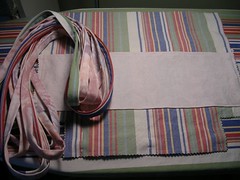
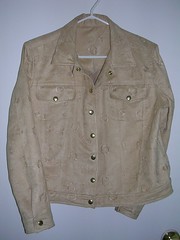
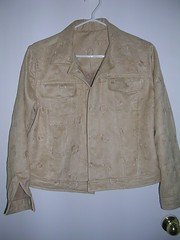
And here are all the bags at once, ready to be taken down to the family reunion. I had a fun time making them and a fun time giving them away. I also gave the "suede" jacket to my niece and she seemed to like it very much. She even wore it later, when it got a little cool. But I totally forgot to take a picture of her wearing it! I can't believe I did that. Next time.

Tuesday, August 22, 2006

Still working on the totes

inner pockets assembly line
The pattern for these bags doesn't call for inside pockets but I like to add some because it makes organizing the inside so much easier. The totes are quite large so small things get lost inside them. I used strips of fabric left over after amending my bedspread. The fabric is 100% cotton damask in the palest of pinks. I had odd lengths of strips of fabric and cut them to fit the bags, with one pocket running from side seam to side seam and the other side having a smaller piece. I ironed over and finished the top edge on all the pieces. When I sewed down the finished edge, I sewed all the pieces in one long chain and then snipped the threads to separate them.
inner pocket
I'm placing one of the smaller pockets here, on the inside of the tote bag piece. I overlaid the pattern piece so I could place the inside pocket so the stitching would be hidden by the outer pocket.
bottom seam
Once I had the inner pockets in place, I sewed the bottoms of the bags together. On the large totes, I like to sew down the pressed open seam on the bottom. It makes it neater on the inside and slightly easier to sew the handles without inadvertently folding up the seam allowance.
making a handle
The handle is one long piece that you sew into a loop. Then you have to fold in the long cut edges and sew the whole thing closed all the way around the loop.
inner pocket and handles
I'm making the three light coloured totes (using white thread) first - then I'll do the three darker totes. Here is one striped tote with the bottoms pinned ready to be sewn together. I have piled the three handles on the left because they are finished too.
placing handles
Here I am placing the handle on one of the totes. It has to line up with the pattern markings and then it gets sewn down each side of each handle piece, right through all the layers of the tote, including the inner and outer pockets. In this fashion, the pockets are subdivided.
half finished bags
These are the three totes hanging up. I love it when a bag starts to take shape. Now for the side seams and tops.

Friday, August 18, 2006

Tote Bags

So I finds myself two pairs of needlenose pliers and I sets to tryin' to reef that defective snap outta there... Oh wait. Sorry, I was just listening to the Halifax Comedy Festival on CBC Radio. Ahem. I tend to pick up the accents wherever I go.
Anyway, I worked at that snap for a while and realized that it wasn't going to come quietly. Since it still functioned and went together as a snap, I straightened it out as best I could and decided to leave it alone, rather than risk damaging the fabric. Live and learn.

My next project is tote bags and more bags! I'm going to a family gathering next weekend and I thought I would take some bags to give away. I have already given these totes and smaller bags to my sisters and niece and I'm not sure about my Mum. I thought I would make some for my two aunts and three cousins, especially as one cousin is hosting the gathering and it's one aunt's birthday.
bags pattern
I have used this Simplicity 9949 for quite a few totes but also some of the smaller bags. It's simple and straightforward and I really like the zipper in the top of the tote for security. Underneath the pattern envelope are a few of the fabrics I am going to use.
some fabric
Last year some time, I cut out a bunch of the small zippered bags but never finished making them. Now I plan to finish them and have a selection for family to choose from. Three of them are black pinwale corduroy so maybe some of the men will want one. Peter uses one of the small bags in denim for his bicycle tools and it keeps the securely corralled.
assembly line
In this stack, I have pinned the zippers in to the small bags. I plan to use only white or black thread unless some topstitching will really be noticeable and then I only need to change the top thread in the machine.
first bag!
I am planning to put the pieces together like an assembly line, for the most efficiency but it was too tempting and I made one little bag, just because I could!

Wednesday, August 16, 2006

The Jacket is Finished

I am finished the jacket and I think it looks great. I'll have to ask her mother to let me know if my niece wears it as much as I hope she might in the Fall. If it were mine, I'd be wearing it every chance I got!

First I finished the sewing part by putting on the tabs. Technically, these tabs should have another snap bottom on the band so you can really adjust the width of the bottom band. But since mass produced jackets don't have them, I'll leave them off here too.
tab 1
Here's the tab pinned pointing the wrong way (to the front).
tab 2
I've sewed it to the band and trimmed off the little bit of excess.
tab 3
Now I've folded it so that it points to the back of the jacket and will sew it down in that position along the folded edge.
snaps
Time for the snaps! I only need 13 of them but I laid them all out so I could eliminate faulty ones.
tab snap 1
Following the manufacturer's directions, I mark the spot where I want the first snap head to go on the first tab. I use a piece of hardwood underneath the working area to absorb all the hammering as well as the small holes that are created for the snaps.
tab snap 2
In this photo, I have assembled the snap head and then I pressed it onto the band where the snap bottom will go. I made a slight impression in the fabric and then I hammered a hole where the snap bottom will go.
tab snap 3
And here it is, all assembled.
pocket snap 1
The pocket snaps are a little tricky. You can't just hammer the hole-maker without a piece of wood behind it. I have a little piece of the hardwood that I can slip into the pocket itself so I can get the snap bottom in place. In this photo, I have already hammered the hole where it will match the snap head on the pocket flap.
pocket snap 2
Here, both halves of the pocket snap are assembled and ready to go.
the front
I line up the snaps on the front of the jacket by first hammering on all the snap heads on the one side and then putting the top and bottom snaps in place. Then I can continue making impressions on the fabric with the snap head to line up with the snap bottoms are supposed to go.
snap gone bad
Unfortunately, one snap had to go bad. It must have slipped off the metal template and one half slid sideways as I was hammering the two halves together. It's the one on the left in the photo. Now I have to figure out a way to pry the practically welded halves apart and hammer on a new snap bottom. I had some tiny needle-nosed pliers in my sewing room but even they don't seem small enough to uncurl the hammered metal. I'll have to think on it some more.
finished jacket
So aside from that one snap, here is the finished jacket. I am quite pleased with it. I used up nearly one large spool of thread (250m) which included winding 4 and 1/2 bobbins full. It took me about 13 hours in my sewing room which included the laying out, cutting, pinning, ironing, etc. and everything else that goes into making a jacket. The 13 hours didn't include blogging time. So now I know if someone asked me to make them a jacket like this, I would have to charge between $200 and $300 not including the materials. Not too many people would be willing to pay that, which is why I only sew for myself and for giving away presents to other people.

Tuesday, August 15, 2006

Band and Cuffs

contrast cuffs
I like to use a jacket I've made before as a help to see which part goes where. Of course, if it is the first time I've made a pattern, I have to follow the instructions. I just find looking at the real thing easier. Here I've got a red denim jacket showing which side of the vent opening in the sleeve is the one folded back a bit more than the other side. By laying both left sleeves down on the ironing board together, I can see how to fold the edges of the vent on the jacket I am currently making.
sleeve vents
Here, I've folded over the vent edges and then pinned the top edge down because I'm going to sew across the loose edges at the top of the vent.
vent
I've got the sleeve on the free arm of my sewing machine (the box that holds presser feet and things hinges back out of the way or I can take it off altogether) and I am about to sew across the top of the vent. You can see that one side is folded back a little more than the other. You can also see the wrong side of the sleeve and the flat fell leading down to the vent.
cuff pinned
Once I had the vent sorted out, I sewed the cuff onto the end of the sleeve, with the right side of the cuff attached to the wrong side of the sleeve. In this way, when I have sewed up the ends of the cuffs, I can sew the folded edge of the cuff to the right side with a line of topstitching so there will be no hand sewing. This is how I have made cuffs and collars on shirts in the past in this blog. In this photo, the folded edge of the cuff is pinned in place, ready for sewing.
cuff sewn
This is an extreme close up of the start of the topstitching on the cuff. I have left the needle down in the fabric and lifted the presser foot so you can see the detail.
cuff sewed
Here is the result of the first line of topstitching, attaching the cuff to the sleeve. You can see on the inside or wrong side of the sleeve that the topstitching line is slightly off the cuff and on the sleeve part. That's because on the outside I have tried to sew very close to the fold and make sure that the first line of regular stitching is hidden under the fold.
cuff topstitched
Once the cuff is securely attached, I can finish the two lines of topstitching all the way around it. This photo shows the inside and outside of the finished cuff. There is a pin in it only to hold that corner down for the photo - it is quite stiff and springy fabric.
jacket
The bottom band is attached just like the cuffs. Now all I have left to do is attach the tabs on the bottom band and hammer on all 13 snaps and I'm done! Woo hoo!

Thursday, August 10, 2006

The Sleeve Flat Felled

I have finally managed to spend 30 minutes sewing on this jacket! Between my last entry and this one, I made a dress for a funeral and then I also sewed the extensions of fabric onto the bedspread so it would fit my new mattress. I suppose I could have blogged the navy dress (I decided black was too much, especially for a summer funeral) but I had to get it done in record time so I just put my head down and sewed.

Today (so far) I sewed the underarm seams.
underarm seam
After sewing the seam normally, I turned the jacket inside-out and pressed the seam open.
sleeve first press
The annoying difference in colour is dependent on whether the flash goes off or not. This photo shows that even though I have pressed the seam open on the inside, it is not really flat on the outside. I press it again with the clapper and then again from the inside, to make the modified flat fell.
pressing the fell
On the inside, I use my clapper to try to get a crease in the folded over seam allowance. This is tough for this fabric - it doesn't want to crease. Still, I don't want to use pins so I am creasing as much as humanly possible.
sewing the fell
Once I've got both sides of the seam allowance pressed, I turn the jacket right side out again and start to sew the fell. I'm using my zipper foot and I am starting to sew down the right side, up from the bottom of the jacket. You can see I'm heading toward the armpit where the folds have already sprung open.
at the armpit
As I approach sections of the folded over seam allowance that have come unfolded, I stop - with the needle DOWN in the fabric so it doesn't move! - and fold the section back under and proceed, very slowly.
at end of sleeve
I continue sewing down the one side of the sleeve until I get to the end of the sleeve. This is the fun and tricky part, making sure you don't sew anything else that might get folded under the sleeve as you effectively sew down into the tube that the sleeve becomes. Here I am at the cuff end of the sleeve. All the wrinkled pile of fabric around the needle is the rest of the sleeve.
sewing back
Now I have turned the sleeve around 180 degrees and am about to start sewing back out of it, down what was the left hand side of the seam.
finished seam
Here is what the entire underarm seam looks like when finished. Now do the second sleeve...