So I have these four pieces of old-fashioned double-knit. Remember that stuff? Heavy weight, stretchy in both directions, looks knitted. Looks like it is made out of polyester (because it is). Indestructible too. Three were given to me by someone who got them from her mother and she didn’t know what to do with them and didn’t want to throw them away. One was given to me by my mother and ditto. I keep thinking that I will suddenly imagine some garment that I can make using the double-knit and it will look good when I am done! So those are the pieces I have been staring at for a while, trying to come up with what I will sew next.
I have also been looking at my patterns to help with the inspiration. Since it is the dead of winter, I am thinking about warm garments and I dug out a pattern I have never used. It is for a jumper. I don’t actually own any jumpers but I used to wear them as a child. They are comfy and roomy and you can pile several layers of turtlenecks under them. This one is so long it comes down to below mid-calf, good for fending off those winter winds if you wear tights and slips and knee high boots. It has a dropped waist bodice and so it is pretty much shapeless -- not the kind of thing men like but when you are trying to lose the weight you have gained over the winter, it makes for a versatile garment.
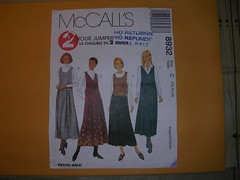
Note that it says right on the front that you can make the jumper in 2 hours! This one doesn’t have the disclaimer that the newer patterns have, that this is sewing time only, but I am sure that is what they mean. More on the timing later.
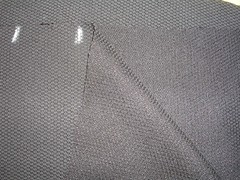
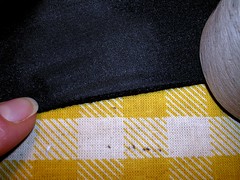
I had sort of settled on the jumper but not the fabric until I remembered some black cotton I had bought on sale. It is mid-weight with a slight waffle weave finish to it. One side shows the waffle more and the other side (the one I have decide will be the “right” side) has a bit of a sheen to it. Based on the last set of photos with the brown fabric, I had low hopes for getting any detail with this black stuff but it seems to work with the texture. I have already cut out the pieces and marked the pleats with chalk and took the next photo to show the difference between the right and wrong sides of the fabric.
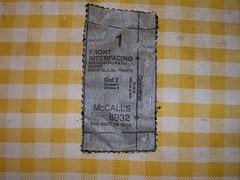
The pattern calls for interfacing just the spot where the button holes go on the bodice but I decided to put interfacing where the buttons will be sewn also, for a little added security. I cut out four pieces of the sew-in interfacing using pinking shears so the inside edge (the edge that doesn’t get sewn into a seam) won’t fray.
I started timing myself after all the pieces had been cut out, marked and unpinned, including the lining for the bodice and the interfacing. “Sewing time” has to include putting the pieces together and I include attaching interfacing in that stage.
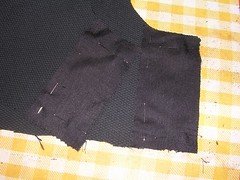
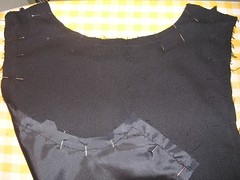
Here, I’ve got the interfacing pinned on to the wrong side of both the front and back pieces of the bodice.
Next, the pattern instructions say to attach the lining to the front and back of the bodice. The pieces are cut from the same pattern piece and so I put them right sides together, pinned them and then sewed them along the armhole edges and around the neck, according to the instructions.
After trimming the seams and clipping the curves, the next step is to turn the bodice halves right side out and press them. Because pressing is so important to a finished garment, I first press open as much of the seams as I can on the wrong side. This allows you to make the finished fold on the outside as flat as possible.
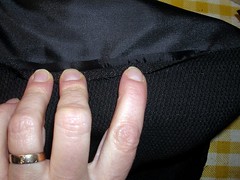
Once I turn the garment right side out, I continue to press the seam edges carefully, rolling the lining side slightly inside or under the cotton fabric side. In this way, the lining shouldn’t show on the outside. In the next photo, I show the opposite of what I want to achieve. The bodice is showed from the right side and you can see the lining coming out from under the edge.
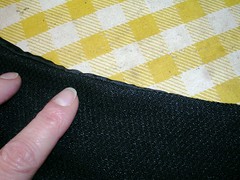
After I press on the right side, I turn the piece over to press it from the lining side. Now I can carefully pull the lining so that I make sure I see a bit of cotton all around the edge as I press. You might have to go look at the larger image of the next photo on Flickr to get the detail I am writing about. Note that I am also using the clapper to make sure this last press is nice and flat.
Up to this point, I timed myself as having taken 45 minutes and I haven’t finished pressing the front of the bodice, never mind the back of it. I fear their “2 hours” timing does not include pressing either. But since pressing is a major component in making a garment, I am including mine in the timing.
No comments:
Post a Comment