Tuesday, March 06, 2007

Hems and fitting a vest

A few odds and ends today. Someone asked in the comments, when I was making the purple coat, about what stitch I used on the hem. I tend to use any old stitch that works. The purple coat had really loosely woven fabric so I used a giant loose stitch. I decided to demonstrate on that dark brown stuff with contrasting white thread.
hem 1
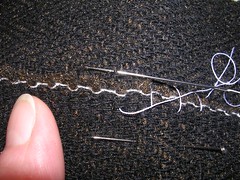
First, I turned up the selvage of the left over piece of fabric, so you could see the difference between the "hem" and the background. The selvage has a white thread running through it so if I had thought more, I would have used pink thread or something for the fake hem stitches. After anchoring the thread in the hem (the turned-up part), I take a stitch in the skirt or body fabric. The needle is still in the taking-of-the-stitch position.
hem 2
Next, I put the needle under the edge of the hem and bring it out far enough below the raw edge (in this case, the selvage edge) so the thread won't end up pulling out of the raw edge. I didn't have to worry about the hem stitch pulling away from the loose threads on the purple coat because I had previously stitched lining pieces to each coat piece and so I had in effect, a line of stay stitching running all along the hem.
hem 3
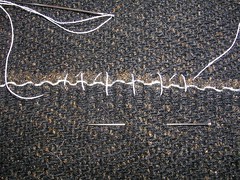
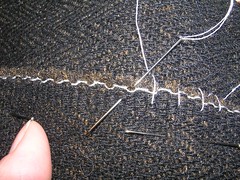
When I pull the thread out and get set to make the next stitch, this is what it looks like. Effectively, what you see from the inside of the garment on the hem are small vertical stitches. The stitches are at an angle behind the hem. On the right side of the garment, you shouldn't see stitches at all, because you should only have taken a very small bit of the fabric in each stitch. I think the next time I hem something by hand, I'll do a blurb on it so it should look better than this!
vest
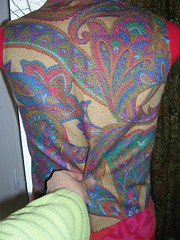
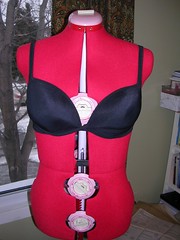
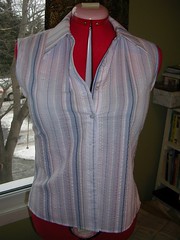
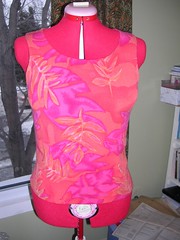
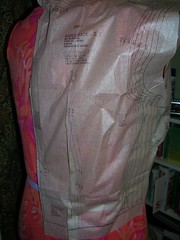
The next thing I decided to do with my dummy is retro-fit some vests with a back elastic. I really like wearing vests but I have wished for some of them to fit a little more closely. Now that I can work on a dummy, I can get the better fit.
measuring
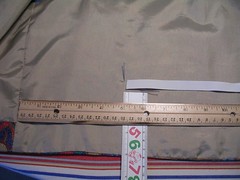
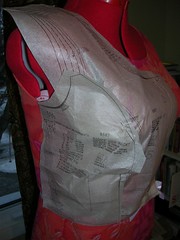
By putting the vest on the dummy, I was able to gauge where I wanted the elastic to sit on the vest. Then I measured each side and up from the bottom so the elastic casing would be even across the back. I stitched a rectangular casing where I had marked it on the vest.
cutting
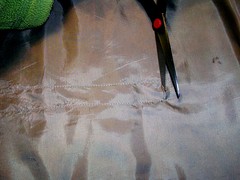
With the casing stitched, I cut a slit in the lining so I could insert the elastic.
elastic insert
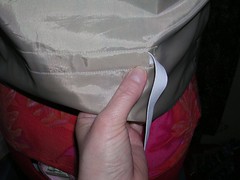
Because the elastic was a half inch wide, it was stiff enough so that I could just slide it into the casing and work it along by itself, without using a bodkin or anything to pull it. This way, I only needed to make the one slit in the lining.
sizing
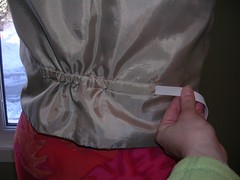
Once I had worked the elastic to the other end of the casing, I stuck two pins in it to anchor it (you can just see them in the photo). I put the vest on the dummy inside-out and pulled the elastic until the vest fit the waist more closely.
sizing 2
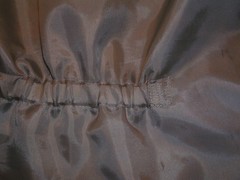
Then I cut off the excess elastic and zigzag stitched the slit closed, catching in the elastic at the same time. I also zigzag stitched the other end, even though it didn't have a hole in the lining, so that it would match the first side.
finished
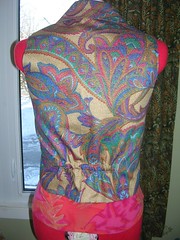
There you go - finished vest on the dummy, showing the gathering.

Thursday, March 01, 2007

Still life with dummy

So I'm back home again and I'd like to thank all those who made comments on my last entry - I'll get there soon! In the meantime, I wanted to get my dummy set up. She still hasn't spoken to me with her name. I keep thinking it "should" be an alliteration with Dummy but maybe she should be a variation of Julia - I'm Jule to the family. On the other hand, I really liked the name Sarah when I was little. It'll happen.

I cranked open those dials and then dressed her in this underwire bra that I bought for something dressy. I hate underwires - they don't lie on my ribcage at all comfortably. Maybe I have a weird shaped chest, I don't know (and don't care) but I don't like them. So I thought it would be good for my dummy - she can't complain. It was not filled out, shall we say, so I stuffed the bra with some small facecloths I have and it works.
D with bra
Then I put on a shirt I made last summer and sure enough, it didn't fit the dummy either. I have to lose 5 pounds (or more) or give this shirt away - never been worn!
D with too tight shirt
So next, I put a tank on her that I'd made. It fits very closely but that's because it's made of this rayon stuff that accordions up when you wash it. It's perfect for an undergarment because of the way it fits and how it shows where the armholes can't be lower than (ooh, is that bad grammar or what?).
D with tank
Plus of course, it matches the dummy nicely. Next I put the grey jacket on her - it needs a final press but it'll look good when I finally wear it to class.
grey jacket
Now for the real reason I wanted to get the dummy. Inspired by A Dress A Day, I have these two patterns that have never been used.
dress patterns
I wanted to make sure that I was closer than usual with the fitting, before I lashed out and actually sewed one of these dresses.
pattern pinned
The pinning isn't very accurate but I'm familiar enough with patterns to see that I shouldn't have to do much altering if I make the bodice in a 12 and the skirt (waist and hips) in a 14, especially if I wait until I have the main pieces sewed together before I see how deep to make the dart in the bodice back.
pattern pinned
I wanted to make view D (sleeveless) of the sun dress in New Look 6587 for the little holiday we have planned for the end of March. I have some unattractive cotton that I will make this pattern in first, using the dummy, and then some nicer rayon that will be the more finished model. And then for the "Duro"!
Mum is now making real progress, with her feeding tube removed, eating some real food and they're going to fix the tracheostomy so she can finally talk. I think her progress now will feel exponential compared to the past 5 weeks and I'm really looking forward to it.