Friday, June 30, 2006
10,000
Well that was a thrill. I checked my blog counter and I passed the 10,000 page loads mark today. That's since I put the counter on back in January. I am so pleased the blog is this popular! Now I have set my sights on passing 10,000 on the "unique visitor" marker. I'm almost at 6,000. What IS it about round numbers anyway?
Some Shorts
Peter has these pants that he lives in. He bought them at the MEC and they have zip-off legs. Mostly he wears them as his only pair of shorts. They are also made of lightweight nylon and dry fast if he gets caught in the rain. One day not very long ago, he decided to spruce them up a little by ironing them. He did this without telling me or having done much ironing, as well as with the typical man's mentality that if 1 on the iron is good, 5 must be better. He melted a hole in them. Oh the crying that day. He went back to the MEC but they didn't sell them like that any more. I took pity on him and put a patch over the hole and so while they wore well, they didn't look very good.
Finally, I decided to brave making him a pair. I had this men's pattern (size large) that I bought years ago for the windbreaker type jacket (which I never made) and it also had some typical elastic waist pants in it.
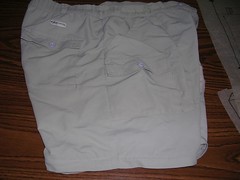
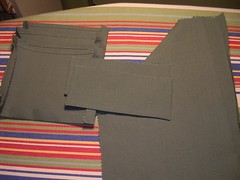
Here are the shorts he still wears. They have lots of pockets and he actually uses the small flapped pocket on the front for his cell phone. The pattern only gives the option of pockets on the side seams and I didn't want to make those.
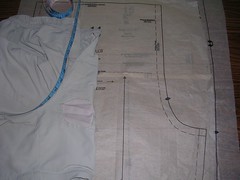
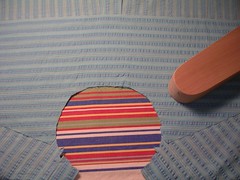
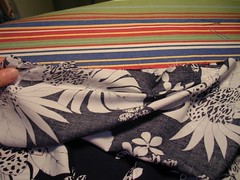
I laid the shorts next to the pattern piece and measured the length of the crotch. That indicated to me that I should take up the pattern the full inch in this area. You can also see the patch where the giant hole was, right on the front. I couldn't find any scraps to match exactly.
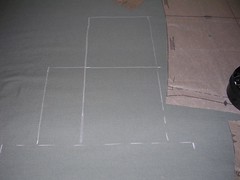
I measured all the pockets on the beloved shorts and then cut out rectangles with half inch seam allowances. I used my pinking shears too so I could just fold over the edges and sew them right on. As this pair of shorts was the prototype, I didn't want to spend too much time fussing over details if it turned out that he hated them and would never wear them.
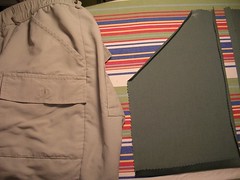
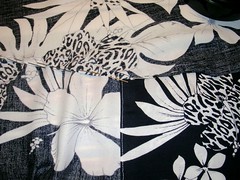
I compared them each step of the way, at least with regard to the pockets. I was also not sure when I went to buy the fabric, what I would get because I really didn't want nylon. Imagine my surprise when I re-discovered good old cotton-polyester blend!
I ended up making two patch pockets on the back without flaps (because he never used the pockets on the back of the beloved shorts) and two large pockets on the front with smaller butoned-flap pockets on top of them. I didn't give them gussets or pleats in this incarnation, again because I didn't want to put that much effort into something that might be rejected. And I didn't even put interfacing in the pocket flaps!
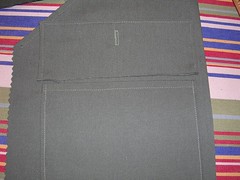
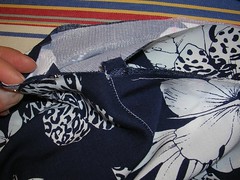
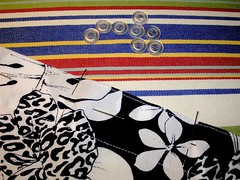
Here I am eyeballing where the flap should go. I made the buttonhole in advance of attaching the flap because it is easier. I found some old green buttons in my stash which worked well.
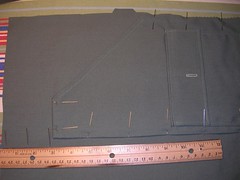
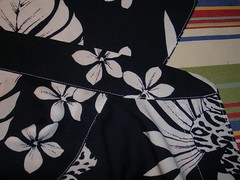
Now I'm measuring how far down to put the pockets, given that I have to fold the top of the shorts over to create the waistline casing.

As usual, I bought too much fabric and was able to cut out for myself a pair of shorts. I was so inspired by the cool applied pockets I made up for his shorts that I made some for myself as well.
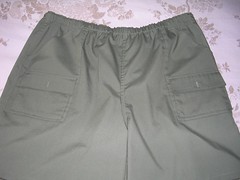
I did all my usual flat fell seam finishing and put the elastic in the waist casing. I fear they are too large so I am waiting for him to try them on and give a verdict before I finish closing in the casing. Even if there is a little too much fabric all over, if they fit in the waist, maybe he can wear them for gardening or something and I can make a smaller pair. In any event, I will have a pair myself that I know I am going to get a lot of use out of.
Finally, I decided to brave making him a pair. I had this men's pattern (size large) that I bought years ago for the windbreaker type jacket (which I never made) and it also had some typical elastic waist pants in it.
Here are the shorts he still wears. They have lots of pockets and he actually uses the small flapped pocket on the front for his cell phone. The pattern only gives the option of pockets on the side seams and I didn't want to make those.
I laid the shorts next to the pattern piece and measured the length of the crotch. That indicated to me that I should take up the pattern the full inch in this area. You can also see the patch where the giant hole was, right on the front. I couldn't find any scraps to match exactly.
I measured all the pockets on the beloved shorts and then cut out rectangles with half inch seam allowances. I used my pinking shears too so I could just fold over the edges and sew them right on. As this pair of shorts was the prototype, I didn't want to spend too much time fussing over details if it turned out that he hated them and would never wear them.
I compared them each step of the way, at least with regard to the pockets. I was also not sure when I went to buy the fabric, what I would get because I really didn't want nylon. Imagine my surprise when I re-discovered good old cotton-polyester blend!
I ended up making two patch pockets on the back without flaps (because he never used the pockets on the back of the beloved shorts) and two large pockets on the front with smaller butoned-flap pockets on top of them. I didn't give them gussets or pleats in this incarnation, again because I didn't want to put that much effort into something that might be rejected. And I didn't even put interfacing in the pocket flaps!
Here I am eyeballing where the flap should go. I made the buttonhole in advance of attaching the flap because it is easier. I found some old green buttons in my stash which worked well.
Now I'm measuring how far down to put the pockets, given that I have to fold the top of the shorts over to create the waistline casing.
As usual, I bought too much fabric and was able to cut out for myself a pair of shorts. I was so inspired by the cool applied pockets I made up for his shorts that I made some for myself as well.
I did all my usual flat fell seam finishing and put the elastic in the waist casing. I fear they are too large so I am waiting for him to try them on and give a verdict before I finish closing in the casing. Even if there is a little too much fabric all over, if they fit in the waist, maybe he can wear them for gardening or something and I can make a smaller pair. In any event, I will have a pair myself that I know I am going to get a lot of use out of.
Thursday, June 29, 2006
Another Seersucker Bike Shirt
As I made Peter's Hawaiian shirt, I thought about the second length of seersucker I had hidden in the closet, waiting to be made into another (surprise) biking shirt for him. I had made him one seersucker shirt already but I used the close-fitting shirt pattern and it is a little snug, until he can lose some weight. I know he can use the loose shirts now, especially in the heat and humidity, so I got out the blue-green seersucker and started cutting. I even got myself a little shirt out of it in the bargain.
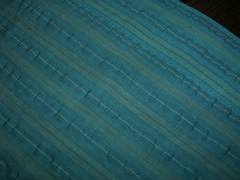
All the other photos wash out the nice turquoise colour so I put this pic in to show the true colour of the fabric.

I was trying to get his shirt made in a hurry, without him knowing and I made as much as an assembly line as I could, pinning all the pieces and then sewing them all in one swoop.
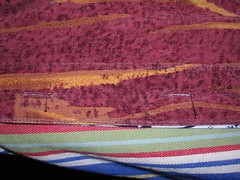
I decided that since I had just made one of these shirts, I would only blog in detail about one thing - this time, the back yoke on his shirt. You cut out two identical pieces for the yoke and sew the both to the back of the shirt. Then you sew the shirt fronts to the front edges of the yoke on the outside. Once you have the pieces sewn together, you turn the shirt inside out and make sure the inside yoke piece lines up perfectly with the outside yoke piece. I iron the pieces together to be extra sure. Then you can turn under the raw edge of the seam allowance on the inside yoke piece so that it barely overlaps the stitching line where you sewed the outside yoke piece to the fronts.
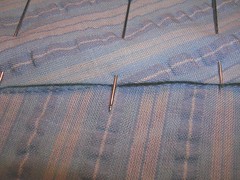
I took a picture of the pinned down overlap and angled the camera so I could look under the overlap a bit. You can see the stitching line.
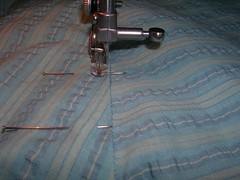
Here I am sewing down the overlap from the inside or wrong side of the shirt. On the Hawaiian shirt, I sewed from the outside because I was conscious the stitching would really show. On this shirt I just threw caution to the wind and stitched from the wrong side.
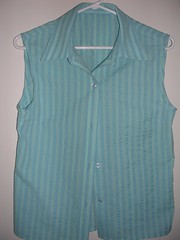
I was sewing on his buttons as he got home last night and managed to have it for him to wear when he got out of the shower. I am posting a photo of my little "bonus" shirt because his is all wrinkled now.
Next up - I am going to try shorts for Peter. I have a very basic, elastic waist shorts pattern that I am going to modify based on his favourite pair of purchased shorts. I am also inspired by this posting of similar shorts just made.
All the other photos wash out the nice turquoise colour so I put this pic in to show the true colour of the fabric.
I was trying to get his shirt made in a hurry, without him knowing and I made as much as an assembly line as I could, pinning all the pieces and then sewing them all in one swoop.
I decided that since I had just made one of these shirts, I would only blog in detail about one thing - this time, the back yoke on his shirt. You cut out two identical pieces for the yoke and sew the both to the back of the shirt. Then you sew the shirt fronts to the front edges of the yoke on the outside. Once you have the pieces sewn together, you turn the shirt inside out and make sure the inside yoke piece lines up perfectly with the outside yoke piece. I iron the pieces together to be extra sure. Then you can turn under the raw edge of the seam allowance on the inside yoke piece so that it barely overlaps the stitching line where you sewed the outside yoke piece to the fronts.
I took a picture of the pinned down overlap and angled the camera so I could look under the overlap a bit. You can see the stitching line.
Here I am sewing down the overlap from the inside or wrong side of the shirt. On the Hawaiian shirt, I sewed from the outside because I was conscious the stitching would really show. On this shirt I just threw caution to the wind and stitched from the wrong side.
I was sewing on his buttons as he got home last night and managed to have it for him to wear when he got out of the shower. I am posting a photo of my little "bonus" shirt because his is all wrinkled now.
Next up - I am going to try shorts for Peter. I have a very basic, elastic waist shorts pattern that I am going to modify based on his favourite pair of purchased shorts. I am also inspired by this posting of similar shorts just made.
Friday, June 23, 2006
Peter's Hawaiian Shirt

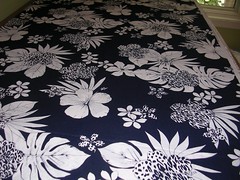
I've used this pattern (McCall's 8409) quite a few times before and it makes for a loose fitting shirt that Peter really likes. He has taken to wearing them while cycling too and sometimes puts a t-shirt underneath for an extra layer. When he expressed the desire for yet another one of these shirts in rayon (a breathable fabric that doesn't absorb sweat like cotton), he also asked if I could find some Hawaiian shirt print fabric. Alas, FabricLand was out of rayon except for one lonely table and only had one print on it that I thought was suitable. But it was really nice.
With the dark navy and white, I had to decide whether to use white or navy thread. The last time I had one of these contrasting prints, I went with the dark thread and wasn't very happy with the contrast. Of course, I know I am also going to get contrast with white thread against the navy but I thought that it wouldn't be as negative as the dark thread. I think I was right.
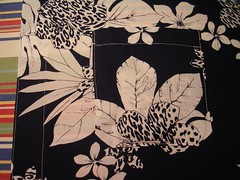
Here is the pocket, stitched to the front with white thread. I also used white thread for the topstitching down the front plackets. Unfortunately, my backstitching to anchor the ends is a little wobbly and shows up if you click on the photo and make it bigger.
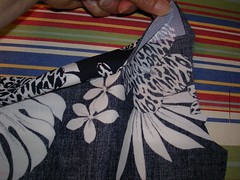
Speaking of the plackets or front bands, I did something different for this shirt. The pattern calls for a separate band to be sewn to the left front - the side that will have the buttonholes. That band is interfaced. It also calls for the right side to be folded over twice with no interfacing. This time, I didn't cut out a front band for the left front and instead, I interfaced both front edges and folded them over twice. With the topstitching, they both look like bands and it was simpler than cutting out the band and sewing it on. Here, I am showing the folded over band with a strip of interfacing ironed onto the inside or wrong side.
Since this shirt pattern is so loose, the sleeves are almost straight at the shoulder (they are not set in) and I can easily use my technique of sewing the sleeve to the shirt body at the armscye first and doing the flat fell, before sewing up the underarm seam. Here I am pinning the sleeve to the shirt body. You can see how little I need to ease the little bit of excess sleeve fabric into the body.
I have sewn on the sleeve and am folding over the seam allowance that belonged to the sleeve part for the flat fell finish. You can see a bit of the right side of the fabric - that is the yoke on the back. It is two layers of fabric so the inside of the shirt has a layer where the right side of the fabric shows.
This picture looks a bit of a mess. I have started to pin the collar band to the shirt. I haven't yet clipped the edge of the shirt neck opening and so it is stretched out to the right side of the photo. I am showing here the fact that I am sewing the collar band to the inside or wrong side of the neck first. Once it is sewn on, I will trim the seam allowances, iron them up toward the collar and then fold over the long edge of the collar band facing and sew it by machine to the outside of the neck edge.
Here is the result of machine sewing the collar band facing to the outside of the neck edge. It is a more professional look, compared with hand sewing the collar band facing to the inside. I also managed to keep the stitching straight, unlike the pocket!
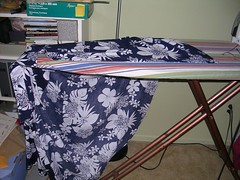
All the rest of this blog entry is about buttons and button holes. I have draped the shirt on the ironing board so I can deal with the front edges or plackets. On a man's shirt, the button holes go on the left front which is the side I have placed on the board first. Once I have finished making the buttonholes, I can pull the right side of the shirt front up and place it under the left front to mark where the buttons will go. It's like I'm doing the shirt up around the board.
I usually use an existing shirt to mark where the buttonholes will go. Here, I have overlaid the Hawaiian shirt with another rayon shirt I made from the same pattern. I am putting pins in at one end of the vertical buttonholes. I choose the end that faces the bottom of the shirt because when I have the placket in the automatic buttonholer, the bulk of the shirt is to my left and the buttonholer starts at the far end and works toward me as I'm sitting at the machine.
I've marked all the buttonholes with one pin down the length of it and one pin across the far (or bottom) end.

Here I am showing two of the buttonholes I made. Once I had marked their locations, I realized that it would look better if I made some buttonholes with navy top thread. Unfortunately, you can't see the navy-on-navy in the photo but I like the custom look to it. The white buttonhole is obviously the one on the right side of the photo and the navy is on the left side.

Once the buttonholes are cut open, I drape the shirt on the ironing board and overlap the hole side over the side where the buttons will be sewn. I use pins to hold down the shirt tails so they meet each other precisely and pins to hold down the collar edges too. Then I stick pins through the buttonholes in the middle, to mark where I will sew the buttons. Depending on the shirt, I may also use a ruler to measure to make sure the buttons are going in the middle of the placket on the right side of the shirt.
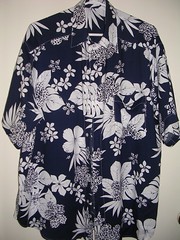
Ta Da! One Hawaiian shirt, ready for a bike ride.

Tuesday, June 20, 2006
Coat Finished

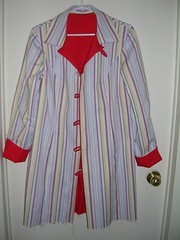
I am so pleased with the way this coat turned out, especially because I had not made the pattern before AND I made it reversible which was not called for in the instructions. It is cute and comfortable. The only thing I might change later is the placement of the buttons, but more on that in a minute.
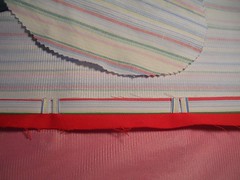
First of all, I hemmed the sleeves. The two sleeves nested inside each other and I just wanted to turn up about a half an inch to tuck in the raw edges.
I decided to literally do just that - tuck in the raw edges. I folded up the striped side and then the red side and put pins all around.
With red thread in the top and white thread in the bobbin, I sewed around the bottom edge of the sleeve with the zipper foot like topstitching. Whenever I wear the coat, I will fold up the cuffs, exposing the contrasting side.
For the hem at the bottom of the garment, I simply ironed up a narrow hem (folding it over twice) and sewed all the way around, switching the threads to red or white, depending on where I was sewing. I folded out the seam allowances at the front edges to reduce the bulk a little there and make it easier to sew.
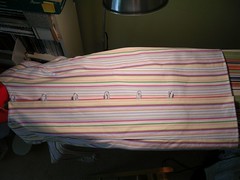
For button placement, I laid the left side of the coat on the ironing board and then wrapped the coat around and overlapped the loop (right) side onto the left side. Then I put pins in at the ends of the loops. On the striped side, I just followed the same stripe all the way down. For the red side, in addition to putting pins in for the location running up and down the front, I also measured from the front edge to make sure the buttons were all the same distance from the front edge.
I tried the coat on at this point, to see how the overlap would work. In this photo, I have the camera under my chin, pointing downwards. I realized that the buttons needed to be much farther away from the front edge than they are with regular button holes but I may have second-guessed myself a little and put them too close to the fronts. It may turn out that after wearing the coat in real life, I will move the buttons a little farther away front the front edge, to provide more overlap. Time will tell.
I ended up sewing the button just to the side it matched. I didn't sew right through to the other side. I was concerned that in wearing the coat, the fabric on the one side would get pulled by the button and that it might also not be strong enough, so I considered sewing right through to the contrasting side. If I had done this however, it would have meant seeing the sewing on the contrasting side. For a while, I considered sewing a small button on the opposite side as an anchor as well as to hide the stitching. I decided against that because it would have looked odd and busy, to have a line of six small buttons (or I also considered beads) running down the right-hand side of the coat. If it turns out that the buttons pull or even become loose with the way I have initially sewn them on, I can always go to the anchor button later.

In the end, I also ran a line of topstitching down the front edges, to ensure they would stay nice and flat as I like. I am not anxious for the weather to turn cool enough for me to wear this cute and totally fun coat, but it's ready for the first day the temperature hits single digits!
Saturday, June 17, 2006
Coat loops finished
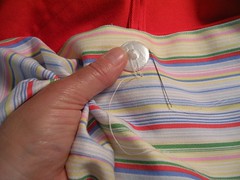
I hung the coat up and pinned a white button to the front and put the loop around it. I am a little trepidacious about how the buttons are going to feel on the inside but what the heck.
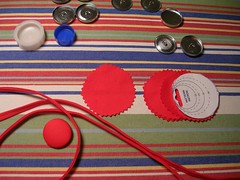
I could NOT find red buttons to suit me so I decided to go with self-covered buttons. Of course, when I went to get the forms, all they had was the "size 45" which is considerably larger than the white buttons I got for the striped side. Oh well. Then I made the red buttons and I really liked the way they looked and so I started second-guessing the white buttons I had already bought. Which started making me crazy because the loops I had made on the striped side were too small for the larger red buttons and therefore wouldn't fit the forms if I bought them for the striped side. I have therefore decided NOT to think about this any more and just go with what I have. I am sure when I am wearing the striped side out, the white buttons will look fine.
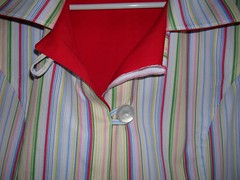
So now I have both sets of loops sewn on the coat and therefore, the fronts sewn up. I am really liking this! Yes, the red loops are bigger than the striped loops but when the coat is done up, you will only see one at the neck so I don't think it will matter.
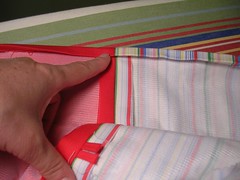
This photo also shows how I am planning to finish the sleeves. I made them as long as the pattern piece and they are a good 2 or 3 inches too long. I usually take sleeve pattern pieces up but I thought I would not do that for the first time I made this pattern. Now I am glad I didn't because I have decided to hem the sleeves extra long like this and fold the cuff up to show the contrasting side. You only see the opposite side of the coat at the neck so I think showing it at the cuffs will look cute too.
Thursday, June 15, 2006
Back to the Reversible Coat
Now that I have let the puzzle of how to close the coat percolate in my brain for a while, I am ready to give it a whirl. I decided to use loops made out of the same coat fabric instead of buttonholes or some other means of closing. I made a test loop using the easy striped fabric (just cut down the lines!).
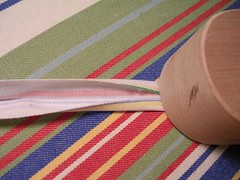
I folded over each side and then folded the strip in half and sewed one line down the edge with the folds.
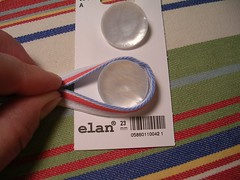
Next, I held the loop around the button I had purchased for the striped side and decided it had to be at least 9 cm long.
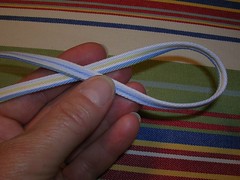
There are six loops required so I made a strip of loop over 60 cm in length, choosing the pale blue stripe to be on the outside so it wouldn't be too contrasty.
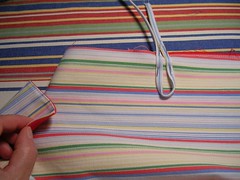
I am always extra careful to make sure I have the correct side for doing something like making buttonholes and I try on a garment obsessively until I am really sure I have the correct panel or side or whatever. In this case, I am even more paranoid because I am doing something that I am making up as I go along. I want the striped loops to be on the right-hand side of the coat when the striped side is OUTside. They will hide on the inside of the coat when the red side is on the outside. I also know the loop is going to be sewn into the seam when I sew the red and striped sides together at the fronts - sewing the front edges together. Here, I have pinned a loop to the striped front and then I tried the coat on and imagined I had sewn that front seam. I am holding the collar point to illustrate that this will indeed be the right-hand side of the coat with the striped side OUT.
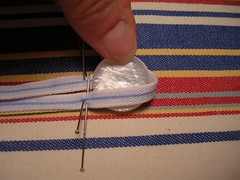
Now I am obsessing about the length of the loop. I put it around the buttons again so that the button would just fit, and I marked the smallest length with pins. It turned out to be 6 cm. So I cut lengths of loop that were 9 cm long in total length, knowing that 1.5 cm would be sewn IN the seam allowance on each end of the loop.
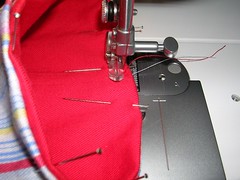
I pinned each 9 cm piece of loop to the front edge. I made sure that each loop was facing up the same way and had the seam side facing out for uniformity. I placed the loops at 11 cm intervals as suggested by the pattern's buttonhole placement guide.
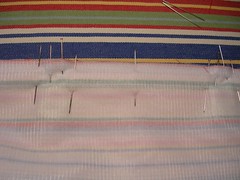
Next I pinned the striped front to the red front, right sides together, all the way down the front. I had left off sewing the two sides of the coat together at the neck and so I just needed to carry on where the stitching stopped. I put the striped side UP when I sewed, so I could follow a stripe all the way and get a straight-looking line.
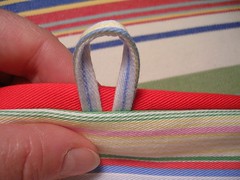
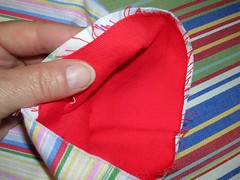
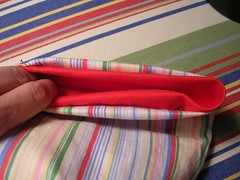
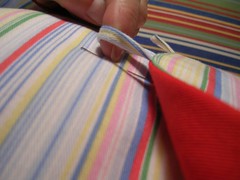
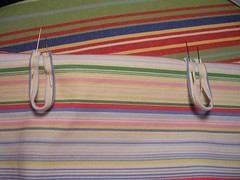
This is how the loop looked when I turned the coat right side out. I am so relieved!
Here I have turned the coat wrong side out again and am ironing the seam open to get the nice flat edge I like. Next - the red loops!
I folded over each side and then folded the strip in half and sewed one line down the edge with the folds.
Next, I held the loop around the button I had purchased for the striped side and decided it had to be at least 9 cm long.
There are six loops required so I made a strip of loop over 60 cm in length, choosing the pale blue stripe to be on the outside so it wouldn't be too contrasty.
I am always extra careful to make sure I have the correct side for doing something like making buttonholes and I try on a garment obsessively until I am really sure I have the correct panel or side or whatever. In this case, I am even more paranoid because I am doing something that I am making up as I go along. I want the striped loops to be on the right-hand side of the coat when the striped side is OUTside. They will hide on the inside of the coat when the red side is on the outside. I also know the loop is going to be sewn into the seam when I sew the red and striped sides together at the fronts - sewing the front edges together. Here, I have pinned a loop to the striped front and then I tried the coat on and imagined I had sewn that front seam. I am holding the collar point to illustrate that this will indeed be the right-hand side of the coat with the striped side OUT.
Now I am obsessing about the length of the loop. I put it around the buttons again so that the button would just fit, and I marked the smallest length with pins. It turned out to be 6 cm. So I cut lengths of loop that were 9 cm long in total length, knowing that 1.5 cm would be sewn IN the seam allowance on each end of the loop.
I pinned each 9 cm piece of loop to the front edge. I made sure that each loop was facing up the same way and had the seam side facing out for uniformity. I placed the loops at 11 cm intervals as suggested by the pattern's buttonhole placement guide.
Next I pinned the striped front to the red front, right sides together, all the way down the front. I had left off sewing the two sides of the coat together at the neck and so I just needed to carry on where the stitching stopped. I put the striped side UP when I sewed, so I could follow a stripe all the way and get a straight-looking line.
This is how the loop looked when I turned the coat right side out. I am so relieved!
Here I have turned the coat wrong side out again and am ironing the seam open to get the nice flat edge I like. Next - the red loops!
Subscribe to:
Posts (Atom)