Saturday, April 30, 2011

An embarrassment of riches

Now that I've finished the red linen outfit, I am on to new things. I have been thinking about this double-sided (two layered) fabric I bought some years ago after I won a gift certificate to spend at Fabricland.
DSCN2385
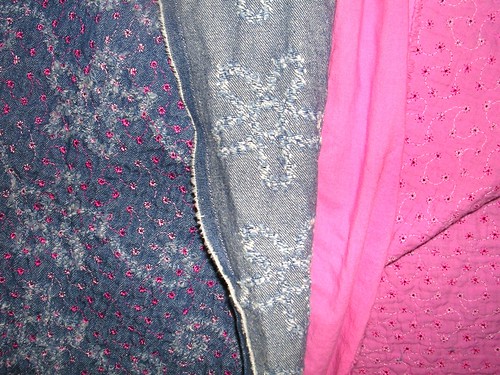
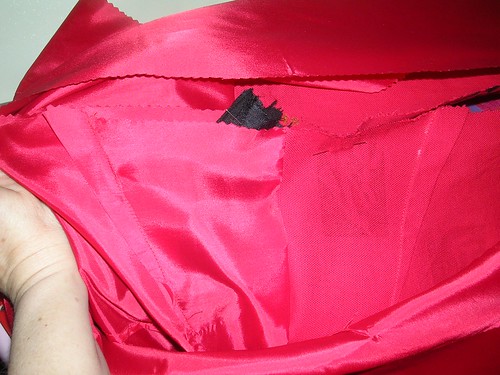
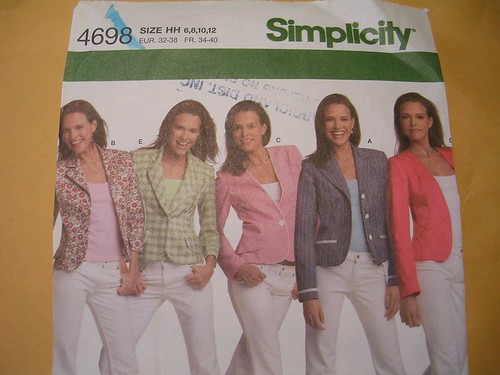
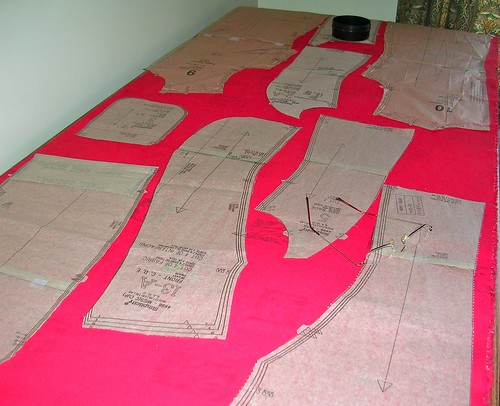
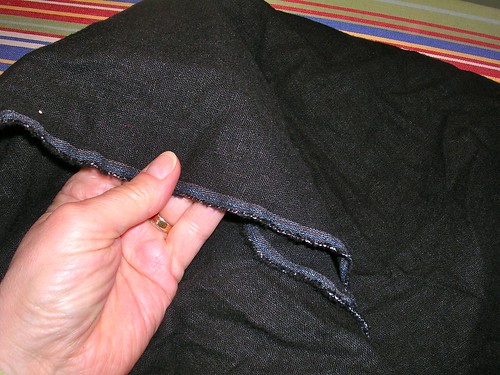
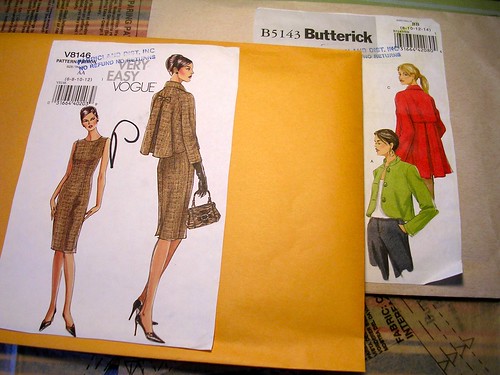
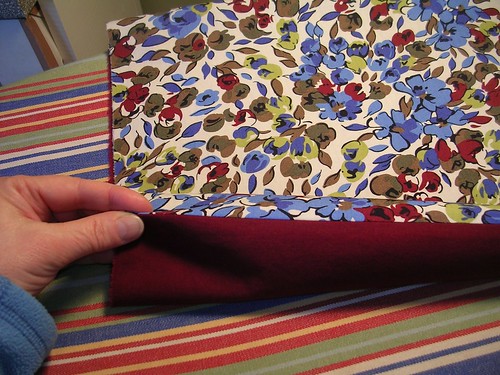
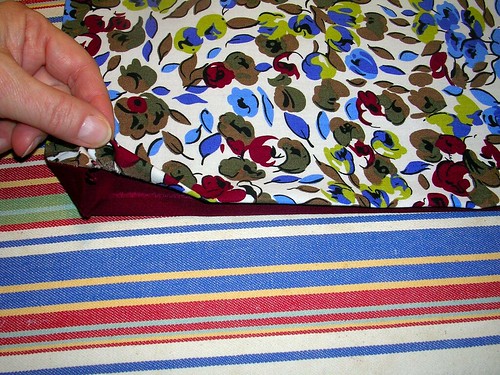
It's a thin layer of denim embroidered to a thin layer of bright pink cotton. In addition, there are frayed flower shapes on the denim, which actually make it less sturdy. My plan is to make a reversible jacket, even though I will probably wear the denim side out most of the time. But making it reversible will allow me to have a bright pink jacket for the times that I want one. Now that I'm doing a fair bit of breast cancer awareness work, I suppose the pink will come in handy, although I bought it years before I even got diagnosed. I'm planning to use the Butterick 4741 pattern I used for the bright yellow twill jacket I wore to France in 2008, but adapt it with plain sleeves (no cuffs or placket) and a one piece front so the jacket can be truly reversible.

While I was hauling the denim out of the stash, I re-discovered all these other fabrics too! Hence the title of this post.
DSCN2387
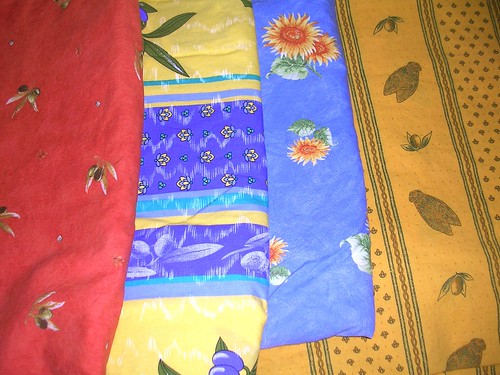
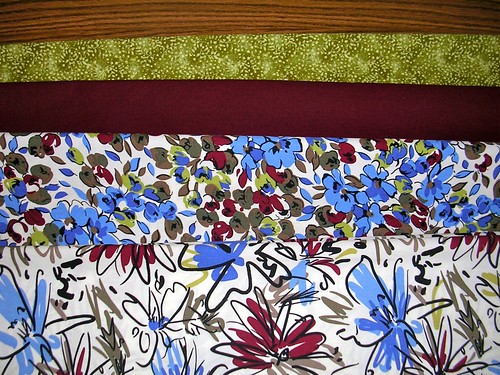
Speaking of France 2008, here are four of the Provencal cottons I got on that trip. I think I will make either shirts or skirts out of them. They are not heavy weight fabric and will probably wear forever as shirts. Delicious looking!
DSCN2388
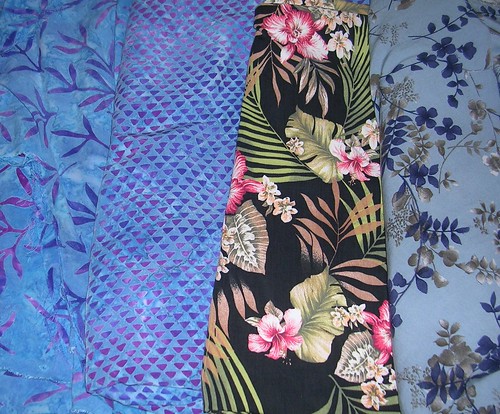
Then there are these lengths of rayon of the soft, challis variety. I bought the two complementary blue ones on the left side and have made a dress out of the larger print already, with accents in the small, geometric print. So now I have to make something with the geometric print. This fabric is actually stiffer than the other rayons and seems to have more dye in it or something. It has a batik look to it. I am thinking I should make dresses out of this fabric, as it is lightweight and drapes well. My only "issue" is that I don't really have much need for dresses - I can get more wear out of shirts. On the other hand, if you build it, they will come. Maybe if I make dresses, I will find places I can wear them!

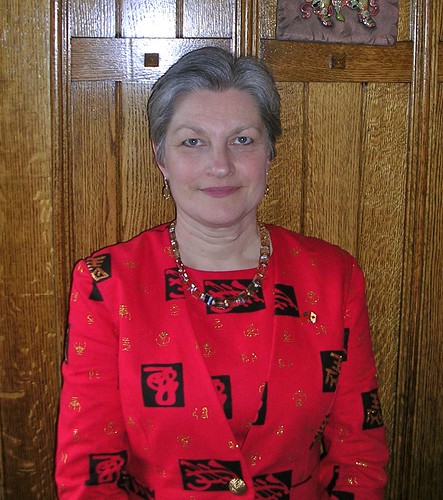
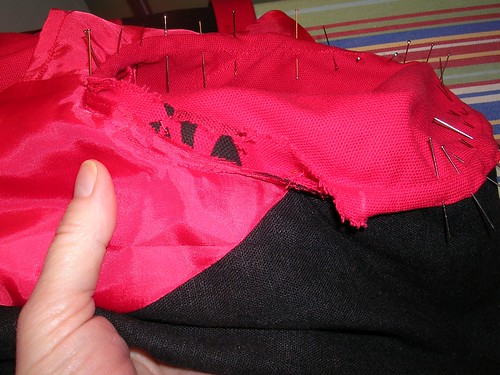
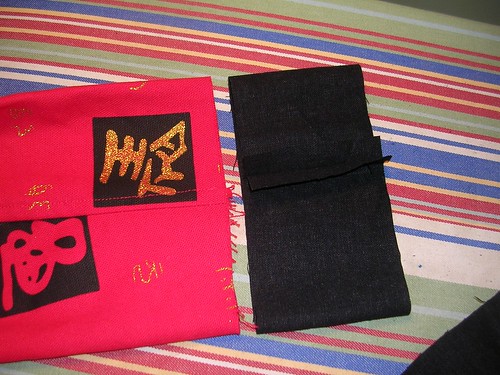
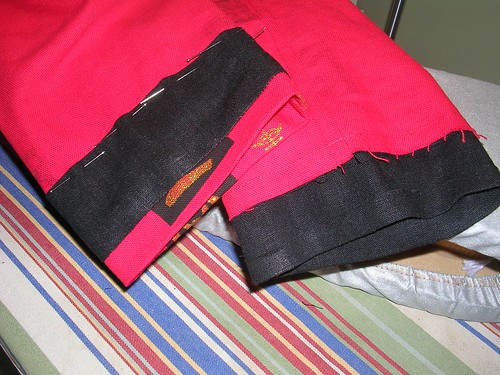
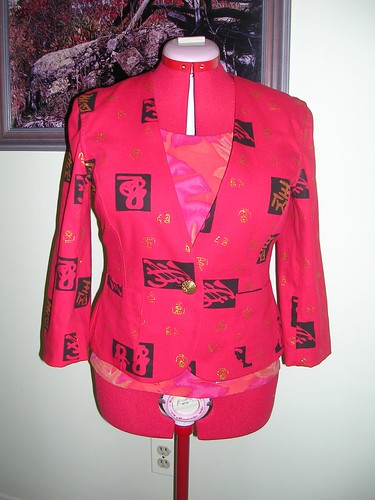
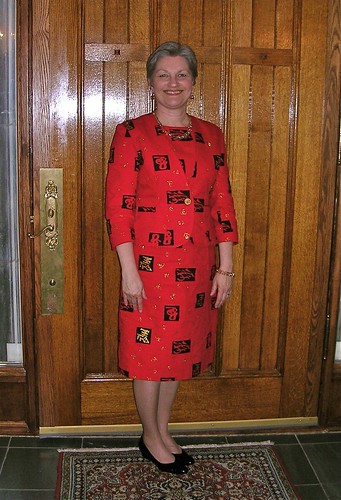
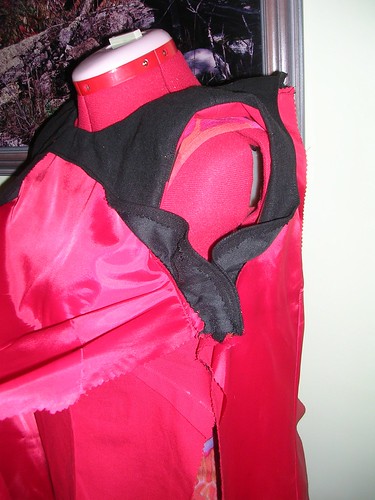
Anyway, all this to say that I am still sewing up my stash - no new fabric for me! And I write this to help myself resist going and getting this green polka-dot fabric I saw when I was getting the lining for the red outfit. It reminded me of this cute shirt dress I had when I first went to law school, that I wore with a pink jacket. That was 1981 folks. Good times.

Friday, April 29, 2011

Red dress success!

DSCN2378
I was really pleased with the outfit (and it was comfortable!) and got lots of compliments on it. The Taiwanese folks at the residence were kind enough to tell me that the large gold character probably was "horse" and it was right side up, even if they thought it might be a mirror image. The jewelry I am wearing was created by Karen McClintock and worked perfectly with the outfit. Each earring is one of the square Swarovski crystals that make up the necklace and the bracelet. I couldn't afford all the pieces and frankly, I hardly ever wear necklaces and bracelets. However, I did buy the earrings and I do wear earrings all the time. They were over $100 with tax.
DSCN2375 copy
Here is a bit of a close-up. This photo was taken using my little camera by a local photographer who does charity events like this, Frank Scheme. He has posted his pix over at his website.
DSCN2366
Let me just back track a little. Here, I am flat felling the armscye which can get tricky when the fabric frays or is too stiff. I was lucky that the linen, while substantial, was not that thick. I have done this with denim, so it isn't too horrible. [I went to dictionary dot com and discovered I have been mispronouncing "armscye"! Horrors. I have been saying arm-ski, when it should be arm-sigh.]
DSCN2368
I decided instead of just turning up the sleeve hems, I would do a sort of couture hem, even though no one but me would ever know it is there. I used a strip of the black linen...
DSCN2369
... which I machine sewed to the raw edge of the bottom of the sleeve. Then I ironed it up and hand sewed the folded edge of the black linen to the sleeve.
DSCN2371
I remembered I had a single large brass/gold button leftover in my collection and it even had a sort of Oriental look to it. It works well.
DSCN2373
I look a little glassy in the flash! But I'm really not. And I see I will eventually have to do something with that dark front tooth. I fell off my bicycle when I was 8, scraping my face down the pavement. The tooth bled into the enamel and made it darker than the others. On the other hand, I am aging all over and getting a bit of a chicken neck and age spots, so I have to ask myself if I care about the tooth.
DSCN2382
DSCN2380
Here are a couple of more pix from the event. It is graciously held at the residence of the Taipei Economic and Cultural Ambassador, Dr. David and Mrs. Lin Chih Lee. They even feed us while we are there. We have a silent auction too. Mostly, I like it as a social event that raises awareness but also provides an excuse for survivors getting together. All in all, a success.

Tuesday, April 26, 2011

Red linen dress and jacket

Into the home stretch! I have to wear it in two days, so I'd better be getting finished. On the Friday, some of us going to the charity event went to choose jewelry for our outfits. A jewelry designer (Karen McClintock) is showcasing her work at the charity event and some of us at BCA get to wear pieces as models. Our Executive Director found the perfect piece of clear gold Swarovski crystals necklace with matching earrings and bracelet for my outfit. I can wear the bracelet to good effect because the sleeves on the jacket are three-quarter length. I'll try to get photos on Thursday, of the whole ensemble.
DSCN2349
Here's the dress, with the lining and the facing, ready to sew together. I wanted the lining to end up with the wrong side of it touching the wrong side of the dress and the black facings on the inside of the dress where they belong. I was successful!
DSCN2351
Here, I've sewn them all together and I'm reaching under the facing to pull the individual dress back pieces out through the facings. Looks like a weird glove, but it's not. Also, I didn't realize how hairy my arms are! I should take a loofa to them.
DSCN2352
Once I had turned the dress right-side-out, I put it on the dummy to ascertain how I should fasten the side seams together. It all worked out as I had imagined.
DSCN2353
I pinned the dress (linen) side seams together and continued pinning down the sides of the lining, catching the black facings in with the lining. Then I sewed all down the sides of the dress and the lining in one go.
DSCN2354
Rather than top stitching around the facings, I under-stitched them so they would lie flat and not creep out from under the dress. There's more under-stitching in a minute.
DSCN2356
Once I got all the pieces of the dress sorted out, I put the zipper down the back, leaving the facings and lining free. Once the zipper was in, I sewed the bottom of the back centre seam on the lining and hand sewed the edges of the lining to the zipper tape, enclosing the raw inside of the dress in the lining. I've also hand sewed the hem but still have to tack the lining to the dress at the one side seam split I left for freer walking.
DSCN2359
I decided I would go ahead and make unlined pockets for the jacket. I had a couple of small pieces left over - scraps really - and just enough for pockets.
DSCN2360
Ironing those rounded corners can get very tricky without burning your fingers so I hold down the fabric with pins, do an initial press and then take the pins out and press the pockets and pound them with a clapper.
DSCN2363
After the pockets were sewn onto the jacket, I sewed on the black facings. The jacket is considered to be unlined, but it does have a little bit of lining at the front and a bit around the back of the neck.
DSCN2362
Here, I am under-stitching the jacket facing. I am using black thread top and bottom so it doesn't show any red on the black linen facing. I switched to red thread for the part around the back of the neck. The spot shown here is where those seams meet at the shoulder.
DSCN2364
Now, I have basted the lining and facing bits to the jacket at the armholes, in preparation for inserting the sleeves. I have also flat felled all the seams that will show on the inside of the jacket, including the sleeves, even though I wouldn't roll the sleeves up or anything. I just like to know that when I take off the jacket, if someone sees the inside, it will be as nicely finished as the outside. The hard part left is finishing the armscye seams with the flat fell. I've done it before - that's why I know it's difficult.

Sunday, April 17, 2011

Red linen dress

I have been cutting and cutting and marking and pinning. Now I am sewing.
DSCN2345
I am doing my usual "assembly line" procedure, sewing all the preliminary bits like darts first. I also have to switch back and forth between red and black thread, because of the facings.
DSCN2346
Right now, I am taking a break to imagine how I will attach the lining into the dress. The pattern does not call for lining the dress. And it calls for this one piece facing where you have to pull the two back pieces out through the shoulders, in order to turn it right side out. I think I will attach the lining to the dress, right sides together, at the shoulder, and sew the shoulders together with all four layers sandwiched together. Then I will attach the facing as instructed and pull everything out through the shoulders, following the plan. Once I have that accomplished, all the long seams (sides and back) will be free and I can sew the lining seams, right sides together, and the dress seams, right sides together, and then when they are done, the dress should be all lined nicely. It's a theory! I'll let you know how it works.

Saturday, April 16, 2011

Figuring out Chinese characters

Yesterday, I took a photo of the gold character on the fabric and ran over to my friend May's house and asked her to tell me what it was, or at least, which way was up.
DSCN2343
The gold one seemed to me to be the most legible of the three large characters, so I thought I'd make sure it at least, was right side up. I had already pinned the dress pattern pieces on the fabric and had made the assumption that the three strokes with the vertical line were at the bottom of the character. May looked at it and said she wasn't sure what it was exactly, but she was pretty sure that the three lines would be at the top of the character, not the bottom.

Later, May came over with a book of Chinese characters and I spent some time poring over them. It is possible that the gold character is "biao" or "manifest" (show), although I don't know why that would be on fabric. I think that fabric is more likely to have zodiac characters, or words like "love" or "soup". [This is a reference to one of my favourite shows "Big Bang Theory" and the episode in which Sheldon asks Penny why she has a tattoo of "soup" on her hip. She says it is "courage", not "soup". It is discussed more here and someone has even posted a GIF of the two characters here.]
DSCN2340
I couldn't manage to get the pattern pieces for the jacket with the pleat in the back to fit on the fabric, after I had pinned the dress on, even when I eliminated the pleat. So I went with a tried and true pattern, Simplicity 4698, which has lots of smaller pattern pieces that I can juggle around.
DSCN2339
I managed to squeeze them all on there. At least, I got the main pieces on.
DSCN2341
I knew I wasn't going to be able to get them all on, so I bought some black linen for all the facings. I am making the jacket with no collar but it has large front facings. Also, the dress has facings all around the top edges. I toyed with the idea of red linen facings but thought the black would make a nice contrast and then I wouldn't have to match the red. I also bought plain red lining as I have decided it will be best to line the entire dress. It kind of negates the point of linen being worn when it's hot but this is pretty substantial linen and I think the dress will hang much better lined.

Finally, instead of a back vent, I am going to make a side slit at the bottom of the dress. I made a back vent the first time I made this dress (last January, also in linen) and I wasn't happy with how it rode up when I bent over. I know I can just avoid bending over, but with the Chinese fabric and everything, I thought a side vent or slit would work.

Thursday, April 14, 2011

The red Chinese linen

I have decided to whip up a dress and hopefully some kind of jacket combo in the red linen.
DSCN2337
My big problem to start with, is that I don't know which way is "up"!
DSCN2338
I remember the student who gave me this as a present, told me that one of the characters was "horse". I think it's that block at the bottom, which means that it is right side up. But I can't identify the other two big block characters - the other red one and the gold one. Does any reader here know? All the little gold characters go both ways, so it doesn't matter for them.
DSCN2335
My other problem is getting a jacket out of the fabric. It is nice and wide and I am not worrying about matching characters and I am sure I can get a short sleeve (if not a 3/4 sleeve) out of it. But it's going to be tight. (Don't worry - I will make sure the pattern pieces are all the same way up, not like they are in the photo!)
DSCN2336
I'm going to make this Vogue dress again. I made it last year in linen and wore it to a fundraiser as it was a hot day. I want to wear the red linen to the same fundraiser this year but I have no idea what the weather will be. It's at the end of April which shouldn't be that hot and it's freezing right now. I have another unlined jacket pattern that is much closer fitting (uses less fabric) so I'll see after I sort things out, which one it will be.
DSCN2334
Finally, I made some pot holders for the wedding gifts and now I just have to decide how to wrap them. If I can't find the right sized box, I think I will go with the tried-and-true gift bag.

Sunday, April 10, 2011

Placemats and stuff

I do like making some things for other people, especially when I'm working with nice fabric. I started by tearing all the placemat sides into the same size for the print and the other side.
DSCN2321
Then I sewed them right sides together along the long sides, using different coloured threads for the different sides.
DSCN2322
I like to work like an assembly line, so after I sewed all the long seams, I pressed them all open. This made the seam flat for when I turned the mats right side out.
DSCN2323
Once they were right side out, I pressed the long seams flat.
DSCN2324
Then I pressed the raw edges of the short sides of the mats under so that they lined up for top stitching.
DSCN2325
Doing it this way meant that I didn't have to line up ALL the edges and I could get a cleaner line along all four edges for the top stitching. I then top stitched all the edges very close to the seam or the opening (as the case may be). I also stitched in 5/8 of an inch from the outer edge, to give the mats more substance. I decided to go with a flat placemat and not a quilted one. It's a choice. All of my own mats are quilted but I think the flat ones are more elegant.
DSCN2327
Here they are. I made all the napkins and used up every inch of that fabric (they are large napkins). Then I made the reversible placemats in the two colours for the two different recipients.
DSCN2328
My cousin had asked for a tea cozy so I pulled out one I made but don't really use (I nuke my tea when it gets cold). I thought it would look nicer with a rounded top so I drafted a template for that.
DSCN2329
I only needed a little bit of seam binding so I cut a strip of fabric in several diagonal pieces using my self-healing mat and rotary cutter and stitching them together.
DSCN2330
This recipient wanted a burgundy colour scheme, so I machine quilted the two fabrics together with the burgundy on what was going to be the outside. It's always surprising how long that takes!
DSCN2331
I put a little loop for a pull on the top and stitched the seam binding on one side by machine.
DSCN2332
I stitched the second side of the seam binding by hand, so the machine stitched line would be hidden. I think it looks pretty good myself.

I think I'll still make some potholders because I have some scraps left over but I'm already wondering what project to do next.

Wednesday, April 06, 2011

The blue suit

I said I was going to wear it and I did. I asked Peter to take a picture of me just before I left for class:
DSCN2320
I look like I'm holding my breath. But I think I am just standing up straight after all the yoga I have been doing. I see the one sleeve looks like it needs some more pressing, alas. But I have to say, it fit well and the fabric is very light so it was very comfortable to wear and teach in (which involves a lot of arm waving for me). And because it is wool, it was warm and yet breathable. I wasn't actually sure if I was going to like it after I made it but now that I have worn it, I think it will get fairly frequent rotation.

Sunday, April 03, 2011

Wedding presents

I have two weddings to attend this summer for people who don't know each other and will never meet, so I am making the same thing for each of them. One asked for placemats and the other already has everything but you can always use some new table linens, so I got fabric enough for two sets and will make them up in one batch.
DSCN2311
The younger couple asked for a burgundy colour scheme. Did I ever have trouble finding that colour in the quilting cottons! I was surprised at how little there was of it. After some searching, I found two complimentary prints in a really nice, smooth cotton. It was so nice in fact, I wonder if I should go back and get some of that fabric for myself. I am going to use the larger, abstract "flower" print for the napkins and the smaller print for one side of the placement. I know the main colour is blue but there IS burgundy in the print. I will use the dark, solid burgundy for the other side of the placemats.

For the other couple, I chose green for the opposite side of the placemat but everything else will be the same.
DSCN2312
I've already pressed all the napkins, ready for sewing the edges. I'm going to miter the corners. I press over each edge twice, to enfold the raw edge. Then I find the creased corner and stick a pin in it.
DSCN2313
Then I open out the pressed edges and fold the corner over on the diagonal, twice, to encase the raw edge.
DSCN2314
Then I fold the long edges back in and secure them for now with a pin.
DSCN2315
Here's the mitered corner, ready for sewing. I'll use a zipper foot and stitch right along the folded edge on the "wrong" side of the napkin, using off white thread on both upper and bobbin threads. I like doing stuff like this in assembly line style, where I complete all the same steps and then move on to the next thing. After I finish sewing the napkins, I'll rip the other fabrics up into the placemat pieces and get to work on them.