Monday, May 21, 2007

Up to the cuffs

I now know to turn off the strong incandescent light over my ironing board, before I take a photo. Then the flash on the camera goes off and I get the right colour reproduction. So now my pix are really GREEN.
jacket details
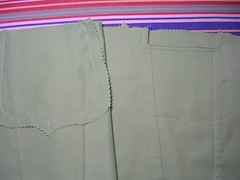
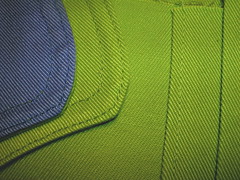
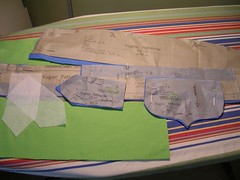
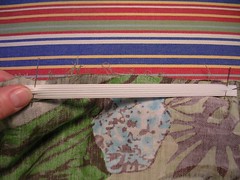
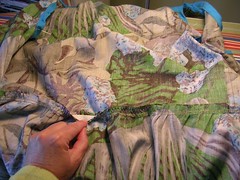
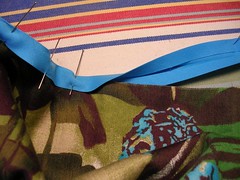
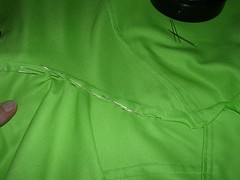
Here, I have started to pin down the flat fell for the shoulder seam finish. I really can't iron down the flat fell around the shoulder, so I pin it, sew it and then give it a final press. Of course, I did first press the seam allowance as flat as I could toward the body of the jacket.
jacket details
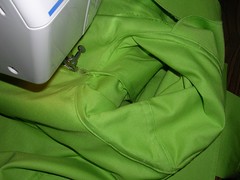
I usually do a modified flat fell on the underarm seam but since I made the tiny baby clothes recently and flat felled everything there in miniature, I thought I would do a proper, trim-only-one-side flat fell and it worked well. I also did it that way to save thread, because I would only have to sew down the one side, but I think I am going to end up with lots of thread left, I have been so parsimonious.
jacket details
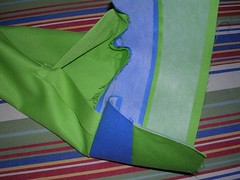
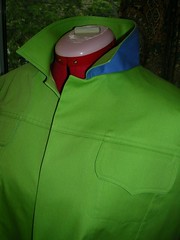
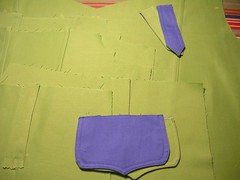
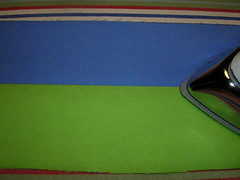
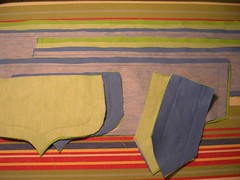
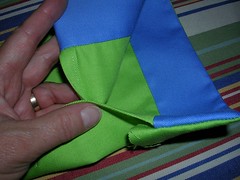
Now it was time for the contrasting cuffs. I first sewed the blue band to the INside of the sleeve. I used green thread for the top (I think) and blue for the bottom. In any event, I did have the two colours of thread on the machine at the same time.
jacket details
Then I sewed the ends of the cuffs together, making sure to fold precisely along the seam between the green and blue bands. At this point, I realized it was better to sew with the blue side up, so I could see where to start and end the seam and I didn't change the threads around. As I suspected, it didn't show when I was done anyway, so it didn't matter.
jacket details
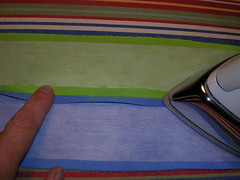
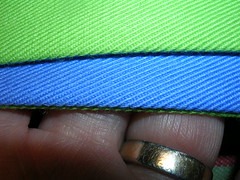
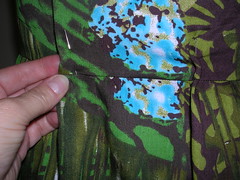
I trimmed the seam allowances fairly closely and turned the cuff to the right side out. Then I pressed along the seam between the blue and green bands, trying to make sure the blue was every so slightly angled toward the inside of the cuff. I wasn't entirely successful along the ends of the cuffs and a tiny line of blue does show there, now that I've finished the topstitching. But really, I don't think it's a big deal.
jacket details
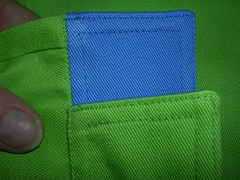
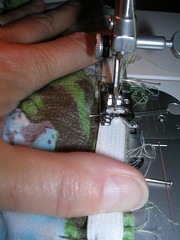
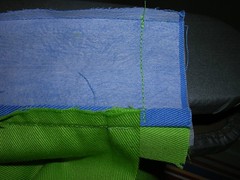
Finally, I did the topstitching. The way these cuffs are constructed, you fold the seam allowance under and sew the folded edge of the band over the seam line on the OUTside of the sleeve. In this case, it was the green side of the band that got stitched to the outside of the sleeve. Since I have done this manoeuver many times before, I know that in the first, outermost line of topstitching, the line that actually stitches the cuff closed and to the sleeve, the INside line of stitching (the bobbin thread line) actually ends up more on the sleeve part than on the cuff part. Therefore, I used green thread for the top AND bobbin for that line of stitching. You might have to go to the extreme close-up in Flickr to see it, but you can see that on the INside, there is green thread in that one spot. Then I switched to blue bobbin thread and stitched all around the cuff in the two rows required for the top stitching. I'll be doing the same for the bottom band.

Thursday, May 17, 2007

Jacket about half done

Just a little update, as I won't get back to this until tomorrow. I am forging ahead with the regular sewing of pieces together and thought I would show the pockets. I can't believe how bad the colour reproduction turned out on this one. Yuck.
jacket
In this photo, you can see how I stitched around the pocket "bag" before attaching it to the jacket front. I do that so I can get the proper shape on the top stitching.
jacket
This photo shows the true colours and how the jacket is about half done. Unless I turn the collar up this way, you won't see the blue but I will know it is there and that makes me smile. Next step is to put the sleeves on.

Tuesday, May 15, 2007

Starting to sew the Jacket

This morning, I sewed all the main vertical seams on the fronts and back, trimmed the seams, ironed them and then topstitched them in a flat fell. Probably more ironing than sewing but still, a fair bit of both.
jacket sewing
The light in this photo makes the green look unfortunate and not at all like the bright, cheerful colour it is, but that shows up later. You can see the back, two fronts and the bottoms of the two sleeves, plus tabs and pocket flaps. I can see (close up) that I have used slightly different shades of green for the main seam stitching but I did make an effort to use the matching green thread for the top stitching. Then I filled a bobbin with the blue and did the top stitching of the contrast pieces.
jacket sewing
First however, I pressed the heck out of the seams on the contrast pieces. I pressed the seam open on the wrong side.
jacket sewing
Then I made sure it was really flat on the right side. Then I pressed the edge together so that the blue was on one side and the green on the other. If I hadn't done all that initial pressing, I might have had bits of the fabric rolling into the seam ditch and it could have been a mess. This way, it's neater and frankly, easier even if it does seem to take extra long in the pressing department.
jacket sewing
This is an extreme close-up of the edge of the collar. You can see that on the underside (the blue side), you can just see a bit of the green. However, on the up side (the green side), you can't see the blue. I won't be wearing my collar turned up like they did in the 80s (or was that the 70s?) so I made sure the blue wouldn't be seen at the edge of the collar when it was lying flat. I suppose it doesn't matter but I had to decide one way or the other and this is the way I went.
jacket sewing
Here is a close-up of the topstitching. I used blue for the bobbin thread and green for the top. In this photo, you can also see the difference between the right and wrong sides of the fabric itself as shown on the sleeve to the right of the pocket flaps.

Sunday, May 13, 2007

Continuing the jacket prep work

I was wrong - my mother noticed the weave. It was a pleasure to have my parents here for the Mother's Day weekend, especially after all the health problems Mum had in the winter. Dad had something he had to do on Friday after they got here, so Mum came upstairs with me and sat in my sewing room, reading, while I cut the fabric out. She would find amusing passages from her book and read them aloud to me while I hunched over the cutting table. It was most companionable.
jacket prep
As I was cutting, I asked Mum about which side of the twill she thought was the "right" side and she thought the more visible weave with the diagonal markings was the right side and after we talked about it, I agreed.
jacket prep
After I had cut out all the green pieces, I sorted out which pieces I needed to cut the underside in blue and pinned them to the blue twill and cut them out, leaving a half inch seam allowance on the collar, cuffs and bottom bands. Then I cut out the corresponding pieces in interfacing and arranged them all so I could make sure I hadn't missed anything.
jacket prep
Finally, I sewed together the blue and green pieces, using an old leftover green thread for the bobbin and the blue thread for the top.

Wednesday, May 09, 2007

Another jean jacket and some other things

This is a jacket that I have had on my mind for quite some time now. I have also had the twill fabrics sitting in my stash boxes for a while. In fact, it has been so long that I thought the green twill was much more like a Kelly green than the brighter, more acid green that emerged when I went digging. I am glad it's not as Kelly green as I had imagined. I like the brighter green with a touch more yellow than blue in it. But it does go nicely with the mid blue twill I got at a separate time.
jean jacket prep
In this photo, I have also dug out of my boxes some rayon that I bought in three complimentary prints. I have already made a matching pants and big shirt in the large print and a dress with the medium print (using a little of the small print for contrast). I realized that it goes well with the plain blue twill so I unearthed it in anticipation for later.
jean jacket prep
In further anticipation of what is to come, I went to get matching thread (no photo - really!) and to see if there was some twill in a blue print. I found some! As far as the thread is concerned, I discovered only today that Fabricland is phasing OUT Mettler thread which was the only one that really matched the green. AND they only had one small spool of it. Argh. So I am going to have to be clever in my use of green thread. I say this because normally, a fully-flat-felled jean jacket uses up two 100m spools of thread. Anyway.
jean jacket prep
Again with the Vogue 7610 pattern - I love this pattern and it SO works for me. But this time (drum roll please) I am going to make the undersides of the bands, pocket flaps, collar and tabs in a contrasting fabric. The green jacket will have little touches of the blue twill. And the blue jacket will have touches of the blue print twill. Oh hold me back, I'm so excited. :) Now, you'll hardly see them because they are just the undersides of things, but I'm telling you, it's pretty exciting.
jean jacket prep
These are the pattern pieces that I will use in the contrast. However, the bands and the collar are both normally folded over to make the two sides so I am going to be adding a seam allowance so I can get the contrasting sides this time. I'm going to go ahead and cut two collar pieces too, because it is just easier than fiddling around trying to get only one layer for that piece. And what could I do with the other bit anyway, except save it to use for crafts? So I'll stash it away and one year, I'll make yet another jean jacket that will use the green as contrast. Or something.
jean jacket prep
I have enough of the plain blue and the print blue twill to make summer skirts so I'm happy about that too. As far as which is the right and wrong side of twill, your guess is as good as mine. Of course, you can't tell from looking at this photo but I think the right side is on the right side of the photo. The "wrong" side looks very diagonal and the "right" side looks more like the weave is at right angles to itself. I am sure no one in the world but me will notice.

Saturday, May 05, 2007

The Dress is Done

dress measuring elastic
I measured between the dart locations and decided to use a piece of elastic 6 inches long and stretch it over 8 inches of waistline at the back.
dress fitting elastic
I pinned one end of the elastic to where the dart was supposed be on one side, and ran the elastic along the untrimmed seam allowance to the location of the other dart. Then I pinned the elastic along the seam allowance and went to sew it down.
dress sewing elastic
I sewed the elastic to the seam allowance using a long, wide zigzag stitch, stretching it as I went.
dress placing elastic
When I was done, the elastic was hidden behind the seam allowance, as it was pressed up toward the bodice.
dress finished
I took a photo of the dress on my dummy, who I have decided to call "Rose". I was lying awake a few nights ago, trying to get back to sleep. I decided to go slowly through the alphabet, looking for a name for the dummy that resonated with me. I often use the alphabet technique to go back to sleep, instead of counting sheep. Anyway, I got to the letter R and the name Rose just seemed to work. Plus she is a nice rosy colour so there you go. I was just going to put this up as the final photo for this dress but then it got just warm enough to put it on so I got Peter to take a picture (or two) of me wearing it outside.
the dress
the dress
I like the one with the jacket because the jacket covers a multitude of sins. And I made that jacket too and wear it all the time, along with the dozen other I made from the same pattern. Hey, when a pattern works, I take advantage of it. As you will see in the next entry or so.

Wednesday, May 02, 2007

Almost finished the dress

So my dress is nearly complete and I make my husband go to the sewing room to admire it on the dummy. He says, "are you really going to wear that in public?" And I say, "I thought you weren't going to complain any more about my fabric choices?" And he says, "I can't help it. That fabric makes me feel like Kramer when he heard Mary Hart's voice on television."
dress with bias tape
I tried the dress on again and was surprised to see that it really wasn't as low in the front as I had feared. So I have put aside the blue eyelet lace I bought and am only going to trim the neck and armholes with blue bias tape.
dress with trim
Here, I've pinned the dress back on the dummy to decide how many buttons to put, at least on the bodice. I refuse to have a top that gapes between buttons and so I put pins in every two inches, which is awfully close together but works for me.
dress buttons
I chose some plain, slightly turquoise buttons and am putting them two inches apart on the bodice and 2 and 1/2 inches apart down the front of the skirt. They only had 15 matching buttons so I bought them all and have used 14 on this dress.
dress back adjustment
After sewing the skirt back to the bodice and trying it on, I realized that it is a bit loose in the waist. However, instead of having that sewed-in look, I think I am going to put a bit of elastic on the seam allowance at the back and that will snug the waistline up without making it difficult to breathe.