Saturday, October 29, 2005

shoulders and collar

First, I had to sew the fronts to the back of the shirt. I am making little flat fells on the shoulders, just because I can. You put the pieces together right sides together, like normal and press the seam open. Then you trim one side (one seam allowance) to about half and fold the other one over it, effectively sealing in all the raw edges.
20 shoulder seam
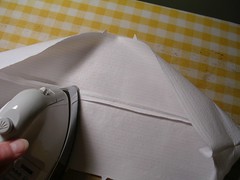
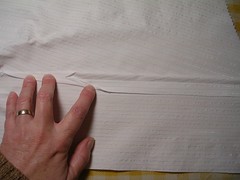
Pressing is everything. After you press the seam open and trim half of it, turn the thing over and press it form the right side. Then press the seam allowances to one side, with the untrimmed allowance on top. Turn the shirt back over to the wrong side and press again, so that the seam allowances are firmly to one side. Now tuck the untrimmed seam allowance over the trimmed one and press again.
21 shoulder seam
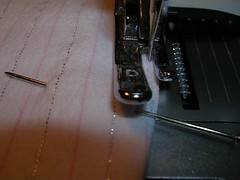
Now sew down the loose edge with a zipper foot.

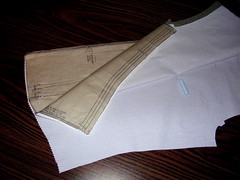
Next is the collar. This is a one piece collar but the same technique can be used on the standard two piece collar with a band. I learned this from some pattern instructions once up on a time and now I use it everywhere. And I find it easier and neater than sewing the collar facing by hand. It works best when you interface BOTH sides of the collar so the collar and the collar facing are identical. It can get confusing when they aren’t identical which we can deal with some other time.
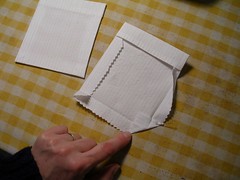
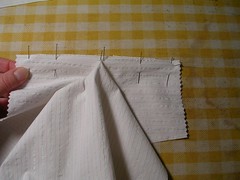
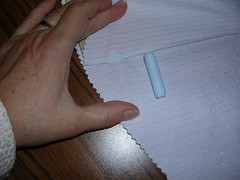
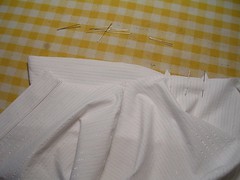
First you have to pin the collar to the neck edge of the shirt. the collar facing is the side that is folded up. This part is easy when you have a stretchy fabric like I am using. Lay the collar out on the ironing board with the facing side down. You put the collar down first because it is interfaced and therefore sturdy and not stretchy. Lay the shirt neck edge on top of the collar, with the WRONG side of the shirt touching the collar. Pin the centre notches together and stake them down to the ironing board cover with a pin.
22 collar
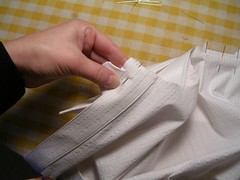
Now match up the edge of the band with the seam on the collar and pin them together.
23 collar
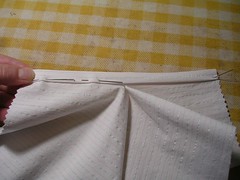
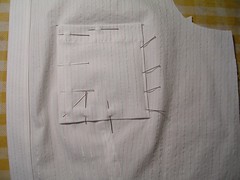
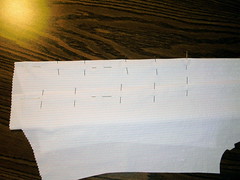
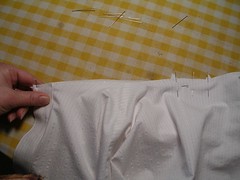
Stretch out the shirt between the band you just pinned and the centre notches and stick pins in carefully every half inch or so, making sure you don’t wrinkle the fabric up between the pins.
24 collar
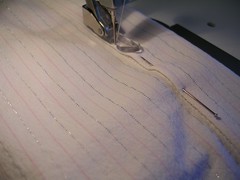
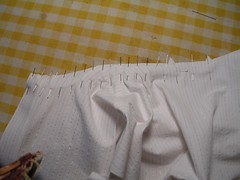
The more pins you use the better, so you don’t get any wrinkles. Do the same pinning with the other half of the collar. When you sew over all these pins, sew slowly so you don’t break a needle on them.
25 collar
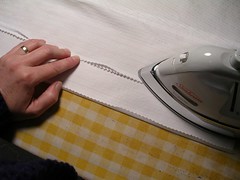
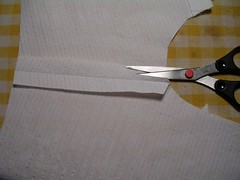
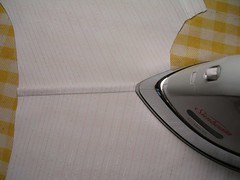
Now sew the collar to the shirt. When you are done, spread it out on the ironing board so that you can press the seam out flat. You should trim the seam allowances before you press. The seam allowances with be pressed toward the collar so they can be hidden when you sew the facing down.
26 collar
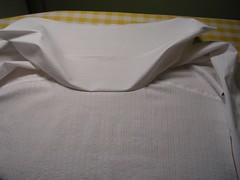
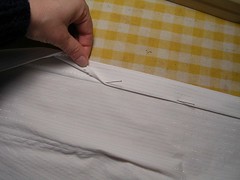
After pressing, turn the collar facing under and start to pin it over the sewing line where you stitched the collar to the shirt. This is similar to the placket and the band, where you cover a line of stitching with a fold of fabric. The ends are the most fussy points, as you have to fold in the raw edges and make a clean line.
27 collar
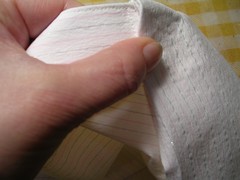
Once you have the collar facing folded over the stitching line - and this is on the RIGHT side of the shirt - make sure it is nice and flat and pin it in place. Now sew the facing to the shirt using a zipper foot.
28 collar
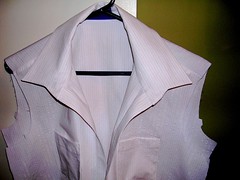
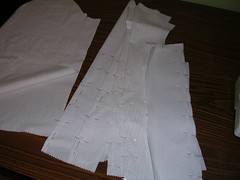
This procedure gives you a nice flat finished edge to where the collar is attached to the shirt. When I used to sew the facing down by hand, it never seemed to lie as flat as this. Finally, the shirt is starting to take shape!
29 shirt

Thursday, October 27, 2005

placket, front band and pockets

Okay, we start up where we left off, with the placket. Once the strip is sewed to the wrong side of the sleeve (with this fabric, the right and wrong sides are identical so you have to be careful you make the sleeves mirror images of each other and not make two left sleeves), you have to fold the raw edge over and then pin it down over the stitching line. In the photo, I have again anchored one end to the ironing board with a pin (which makes me notice that I really need a new ironing board cover). I make sure that the folded edge of the placket is just covering the stitching line and then I will use a zipper foot to sew it on the machine, because that will get me nice and close to the fold.
14sleeve placket folded
I have sewn the band to the front (like the placket, wrong side of front to right side of band) and now I have to press it so I can fold it over and stitch it down on the right side of the front piece. (I decided to trim the band with pinking shears so that I do not get a hard line of bulky fabric down the front. A pinked edge will be softer. I didn’t pink the collar edge because for some reason, there I don’t mind the line of fabric. Go figure.) Anyway, once the raw edge is folded over on the band and the edges are trimmed, I press the seam where the band meets the front OPEN, and then to one side, so the seam will be as flat as possible. I also use my clapper at every stage where flatness is desired - I don’t wait until the last stage to use the clapper.
15front band press
Then I fold the band over the stitching line, just like the placket and I will use a zipper foot on it too.
16front band folded
I went ahead and made pockets, even though I have yet to use pockets on this pattern. The front dart comes up and under where the pocket is placed, so you don’t get a flat surface on which to pin the pocket. Anyway, the next photo shows that I have sewed the top of the pocket and turned it right side out. I have finished one pocket and it is turned right side up. The other pocket is showing the wrong side to show the mitered corners, made by folding the raw edges in. I used to think I should bind up the inner raw edges on pockets until I examined an expensive man’s shirt and discovered the pockets were raw on the inside. And if you pink the raw edges, you don’t get raveling.
17pockets
With my zipper foot, I sewed the plackets and the front bands down, removing pins as I went, especially because I put the pins in lengthwise. And in using the pins in the first place, I made sure I put them in so the points would aim to the back as I sewed, so I could just pull them out as I went along. You can see that the head of the pin is facing me as I sit at the machine.
18placket closeup
Finally, since I had the zipper foot on, I attached the pockets. I am still undecided as to whether I will leave them on because of the way the fabric on the shirt fronts is behaving. I’ll wait until I try the shirt on when it is finished, buttons and all, before making a final decision. I am confident that I can pick out the stitching and not leave a mess if I decide to take one or both pockets off. The left one went on better than the right which is good because if you only have one pocket, it should be the left one (it’s a rule somewhere). And I don’t know why one goes on better than the other when they are supposed to be identical.
19pocket placement

Wednesday, October 26, 2005

sewing darts and other stuff


I like to get as many pieces ready for sewing as possible, then sew them all in one sitting. Then I go to the ironing board, remove pins if necessary and iron out the bits I sewed. It’s a bit more like an assembly line, or so I tell myself and seems to make the process go more quickly. I also don’t have to leave the iron on in between sewing only one thing and then another, or have to heat up the iron more than necessary.

In the first picture, I have ready to sew all four darts, the two collar halves together and the two sleeves where the placket will be placed. (There’s nothing more I can sew without doing these first or turning the iron on - for the pockets as we’ll see in a moment.) You have to sew a line of stitching around where you will slash the sleeve to allow the placket. When I am done sewing these things, I press open the darts on the front pieces, press the darts to one side on the back and press open the collar seam.
08collar seam
The collar is made out of two pieces which are the same. You sew them right sides together and then turn it right side out to make the collar. In order to make the finished collar seam nice and flat, I press it open in the inside after I have trimmed it. Then when you turn it right side out and press the halves together, the seam doesn’t buckle or fold into the inside of the collar.

When I make the darts, I start at the wide end and sew toward the point, backstitching about 4 to 6 stitches at the point, backing along the line of stitching I just made. In the picture, you can see the blue chalk I used to mark the point.
09dart point
When I press the front dart open (it is different from the back darts which only take up a little bit of fabric and are not slashed along their length), I flatten the point with my fingers and then just apply the iron and I don’t worry if the point goes to one side or the other. The main thing for me is to get the slashed part of the dart open so that I can then fold the seam allowance under, hiding the raw edge. In this way, I make a modified flat fell finish.
10dart pressed
In the next photo, you can see where I have turned the seam allowance under, on the top side of the dart (not where my fingers are).
11dart flat fell
Once I have pressed the fold flat, I sew it down to bind the raw edges inside the flat fell. I start at the wide end and when I get near the point, I estimate where the seam is and leaving the needle down in the fabric, turn the dart around 180 degrees and sew down the other side, ending at the wide end.
12sewing down dart
Finally, I sew on the placket. I have sewed around where I slash the sleeve fabric and then I cut the fabric. Next, I lay the placket (in this case it is a simple strip of fabric) down on the ironing board and place the sleeve on top of it. I have anchored the right end by placing a pin through the placket and sleeve and into the ironing board cover and this allows me to make sure the sleeve is flat along the placket.
13sleeve placket

Tuesday, October 25, 2005

cutting, marking, interfacing

The next step was to pin down the pattern pieces so they could be cut out. I used to try to get away with fewer pins but now I just put them in every corner and bend and every 3 or 4 inches down long sides. Once securely attached to the fabric, I cut out the pieces. I have also started to use pinking shears on the edges of the pieces where I will make a double fold, like the hem, or where a raw edge will be hidden but not bound, like inside the pocket. I don’t usually make pockets on this shirt pattern but I had the fabric so I cut some out in case I feel like adding them later.
04wrong sides together
Once everything is cut out, I mark the pieces with the dots and darts. I try to remember to fold the fabric wrong sides together before I lay it out to be cut (in this case, the fabric is the same on each side so that was easy). When the wrong side is facing itself and you open up the fabric to where a pin is marking a dot, you can use chalk to mark both sides, the mirror images, of the fabric at the same time. I find it cuts the marking time in less than half because you don’t have to realign the pattern piece and remark the dots.
05marking dart dots
Once everything is marked, I usually pin the darts into sewing position right then, in case the chalk rubs off and I can’t find the marks later. I like to start at the wide end of the dart and finish with a little back stitching at the point. I know some books say to tie a knot because backstitching can make a lumpy point but I don’t usually find this a problem, especially if I am really careful once I get to the point. This shirt has four long vertical darts and nothing has to be sewn before they get made so I put those pieces aside.
06darts ready for sewing
Next I get out the interfacing and cut out the pieces that require it - the collar, front bands and cuffs. I am using iron-on interfacing even though it sometimes bubbles a little because I have to iron this shirt every time I wash it anyway and I can smooth out the bubbles then. Then I spend the time ironing on the interfacing. It’s a bit tedious but you can listen to the radio while you do it.

Sunday, October 23, 2005

a shirt

I decided to make a shirt. I’ve used this pattern several times now and I know it works. It didn’t even need any adjustments after the first time I used it. Usually, I have to take the sleeves up a little bit (short arms) and often the body is too long (all my height, such as it is at 5’2”, is in my legs). But this shirt worked right away.
shirt pattern
It is very close-fitting with the darts and all but I have a whole bunch of loose-fitting shirts and wanted the next bunch to be different. Plus, I can leave the tail out of whatever pants or skirt I am wearing and that is an acceptable look these days. I have to say, I am glad of this “tail out” look because it hides a multitude of sins.

The pattern offers options for Western looking shirts but, as I have no desire for them, I just make it plain. And it takes very little material to make one of these skinny little shirts.

I got the fabric at Fabricland, on sale. I confess I already have the same shirt in the same fabric only with blue stripes instead of pink. It is a nice rich cotton with Lycra in it. This is a bonus because even though the shirt fits closely, it stretches and so doesn’t bind me in the arms. After the success of the blue striped shirt with Lycra, I went back to Fabricland, knowing they had had the pink stripe but not knowing if they still had any left. I figured it was fate when I found some of it on the left-over table at only $2 per metre! In fact, I bought what they had left which was about 3 metres, about 1.5 more than I needed. I will eventually make another shirt using a different pattern and probably short sleeves. Or maybe I could make one for my niece if I had a pattern in her size. We’ll see.
pink stripe unironed
As usual, I washed the fabric and put it ruthlessly in the dryer. This wrinkles it all up so then I have to iron the whole piece so it will lie flat on the table for cutting. I have noticed with the blue stripe that it wrinkles every time it is washed but it irons out nicely so I’m okay with that.
pattern laid out
Since I have made several shirts with this pattern, the pieces are well used and familiar to me. I rarely even look at the suggested layout of pattern pieces as shown in the instructions and just go with whatever works for me. Even though the stripe is even, I still almost always cut all the pieces out with the top of the pattern pieces all facing the same way (“up”). This is a good habit to get into because most fabrics have some kind of direction and it is better to err on the side of all pieces going “up” than to get one piece upside down. (The sleeve piece on the right is just sitting there, actually at a 90 degree angle from how it will get pinned, and none of the pieces are actually pinned yet - for the observant among you.)

Thursday, October 20, 2005

First post (the Rule)

I have a strict rule that I made up, I impose on myself and I enforce rigorously. It is: I cannot start a new project until I have completely finished the project I am currently working on. Before I made this rule, I would start several projects and have them all hanging about with different spools of threads out of the box and pieces of fabric and patterns all jumbled up in a big mess. I discovered that I prefer to think about a new thing to make and to start making it than to continue and finish it. Too tedious. Well, it isn’t really that tedious but it can get to be plain work after a while. And it is more fun to think of the various fabrics and what garment I could make with them, or what craft object I could make, than to actually pin those pieces together and iron them and rip out stuff if need be. So I wanted to start this sewing blog some time ago but I have been trying to finish this blouse first, so I could start the blog with a new project. Since I have had Rocky (see http://puppywalking.blogspot.com/) for the last 6 weeks or so, I have had my free time somewhat curtailed and so the blouse has languished and I have not been allowed to start something new for the blog.

Today, I determined I would get that thing finished... and I did! I even managed to put the snaps on this other shirt I’d made months ago and for which I’d sort of violated my rule because I hadn’t quite finished it (although it was just the fasteners, please!). I’ll tell the snaps story some other time, maybe. So stay tuned for the introduction of the fabric and pattern for the next thing I’m making, which will either be some jeans or a shirt. Unless it’s something else.