I like to get as many pieces ready for sewing as possible, then sew them all in one sitting. Then I go to the ironing board, remove pins if necessary and iron out the bits I sewed. It’s a bit more like an assembly line, or so I tell myself and seems to make the process go more quickly. I also don’t have to leave the iron on in between sewing only one thing and then another, or have to heat up the iron more than necessary.
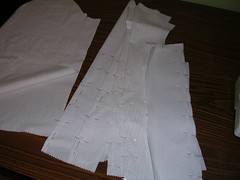
In the first picture, I have ready to sew all four darts, the two collar halves together and the two sleeves where the placket will be placed. (There’s nothing more I can sew without doing these first or turning the iron on - for the pockets as we’ll see in a moment.) You have to sew a line of stitching around where you will slash the sleeve to allow the placket. When I am done sewing these things, I press open the darts on the front pieces, press the darts to one side on the back and press open the collar seam.
The collar is made out of two pieces which are the same. You sew them right sides together and then turn it right side out to make the collar. In order to make the finished collar seam nice and flat, I press it open in the inside after I have trimmed it. Then when you turn it right side out and press the halves together, the seam doesn’t buckle or fold into the inside of the collar.
When I make the darts, I start at the wide end and sew toward the point, backstitching about 4 to 6 stitches at the point, backing along the line of stitching I just made. In the picture, you can see the blue chalk I used to mark the point.
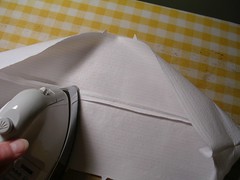
When I press the front dart open (it is different from the back darts which only take up a little bit of fabric and are not slashed along their length), I flatten the point with my fingers and then just apply the iron and I don’t worry if the point goes to one side or the other. The main thing for me is to get the slashed part of the dart open so that I can then fold the seam allowance under, hiding the raw edge. In this way, I make a modified flat fell finish.

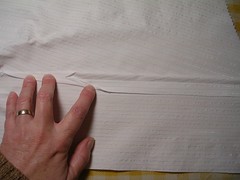
In the next photo, you can see where I have turned the seam allowance under, on the top side of the dart (not where my fingers are).
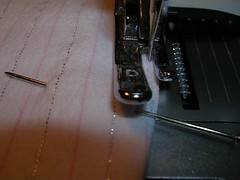
Once I have pressed the fold flat, I sew it down to bind the raw edges inside the flat fell. I start at the wide end and when I get near the point, I estimate where the seam is and leaving the needle down in the fabric, turn the dart around 180 degrees and sew down the other side, ending at the wide end.

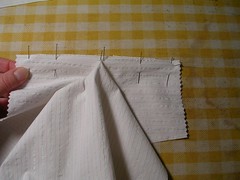
Finally, I sew on the placket. I have sewed around where I slash the sleeve fabric and then I cut the fabric. Next, I lay the placket (in this case it is a simple strip of fabric) down on the ironing board and place the sleeve on top of it. I have anchored the right end by placing a pin through the placket and sleeve and into the ironing board cover and this allows me to make sure the sleeve is flat along the placket.
No comments:
Post a Comment