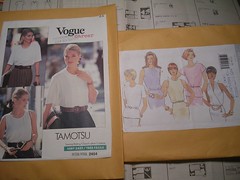
Here are the two patterns I wanted to compare. I have used the tank pattern on the Vogue Tamotsu #2454 many times. It is simple and fits. There are no facings (you cut some bias strips of fabric instead) and I can get it over my head so I don't even put the button opening at the back. I have only used the B view (the mauve tank with the neck gathers) in the Butterick pattern (#4056) once and it was fine. However, I have decided as the years go by that once one reaches a "certain age", slightly covered up is better than bare. So I wanted to see how the D view (the pink one) in the Butterick would work.
It has a round neck which is not very low and cap sleeves which cover a little but don't bind like set-in sleeves. I rummaged around and found some polyester (I don't know why I ever buy it) but in a pretty pale green colour. It also has these raised flowers printed on it which act like plastic when you iron it. Man! Polyester is annoying enough to iron but when you add sticky plastic flowers, it's a good thing I was treating this as a muslin.

I laid the Vogue tank pattern piece over the cap sleeve piece and saw that it should fit nicely. I cut two inches off the bottom of the Butterick pattern piece because I don't want to have to tuck in the blouse when I wear it.
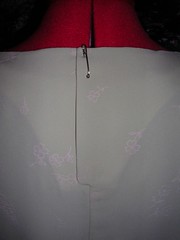
I had a feeling that I would be able to pull this blouse on over my head but I made the back placket anyway. I was right and so I won't make the placket next time. This also means that I can cut the back out on the fold too and only have underarm and shoulder seams - so simple! I think I will just sew some buttons right to the placket and not even bother to make buttonholes for this green muslin top.

Here it is, almost finished. I sewed it up in just a couple of hours, including all the comparing and cutting out parts. I still have to machine sew the bottom hem, press the sleeve hems, sew on the buttons and re-press the neckline but that won't take long. I may even try to make bias strips instead of the facings that the pattern calls for and which I did make for the green top. Even though it is a muslin, I think I will try wearing it under a suit jacket to work at least once. Polyester and my body chemistry do not mix well so it may turn out that I will have "pit issues" wearing it. If that happens, I will wash it and put it in the give-away bag for the Sally Ann. But at least I know the pattern works.
3 comments:
Julia, I really like the line of this top....Am looking forward to seeing how it fits you and how it "wears".
Julia;
I've been reading your blog every weekday for most of 2007, and I just wanted to thank you for it. Your explanations and the pictures make perfect sense, and I've gotten a little braver about sewing and wearing what I sew since I started reading.
Thanks,
Frances
Carmen, I am so pleased with how dead easy it is, especially now that I have made one without facings, that I want to scurry upstairs and make another dozen of them from other remnants!
Frances, that is one of the nicest comments I have received, thank you so much. Stay tuned for more of the same in 2008!
Post a Comment