
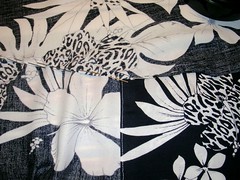
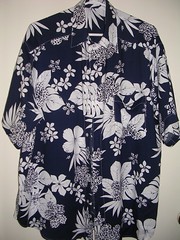
I've used this pattern (McCall's 8409) quite a few times before and it makes for a loose fitting shirt that Peter really likes. He has taken to wearing them while cycling too and sometimes puts a t-shirt underneath for an extra layer. When he expressed the desire for yet another one of these shirts in rayon (a breathable fabric that doesn't absorb sweat like cotton), he also asked if I could find some Hawaiian shirt print fabric. Alas, FabricLand was out of rayon except for one lonely table and only had one print on it that I thought was suitable. But it was really nice.
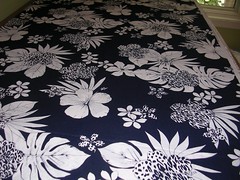
With the dark navy and white, I had to decide whether to use white or navy thread. The last time I had one of these contrasting prints, I went with the dark thread and wasn't very happy with the contrast. Of course, I know I am also going to get contrast with white thread against the navy but I thought that it wouldn't be as negative as the dark thread. I think I was right.
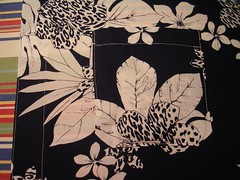
Here is the pocket, stitched to the front with white thread. I also used white thread for the topstitching down the front plackets. Unfortunately, my backstitching to anchor the ends is a little wobbly and shows up if you click on the photo and make it bigger.
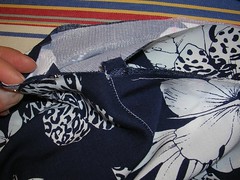
Speaking of the plackets or front bands, I did something different for this shirt. The pattern calls for a separate band to be sewn to the left front - the side that will have the buttonholes. That band is interfaced. It also calls for the right side to be folded over twice with no interfacing. This time, I didn't cut out a front band for the left front and instead, I interfaced both front edges and folded them over twice. With the topstitching, they both look like bands and it was simpler than cutting out the band and sewing it on. Here, I am showing the folded over band with a strip of interfacing ironed onto the inside or wrong side.
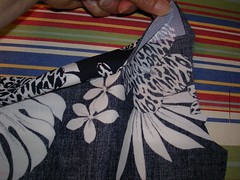
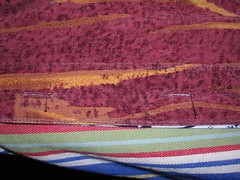
Since this shirt pattern is so loose, the sleeves are almost straight at the shoulder (they are not set in) and I can easily use my technique of sewing the sleeve to the shirt body at the armscye first and doing the flat fell, before sewing up the underarm seam. Here I am pinning the sleeve to the shirt body. You can see how little I need to ease the little bit of excess sleeve fabric into the body.
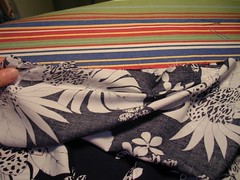
I have sewn on the sleeve and am folding over the seam allowance that belonged to the sleeve part for the flat fell finish. You can see a bit of the right side of the fabric - that is the yoke on the back. It is two layers of fabric so the inside of the shirt has a layer where the right side of the fabric shows.
This picture looks a bit of a mess. I have started to pin the collar band to the shirt. I haven't yet clipped the edge of the shirt neck opening and so it is stretched out to the right side of the photo. I am showing here the fact that I am sewing the collar band to the inside or wrong side of the neck first. Once it is sewn on, I will trim the seam allowances, iron them up toward the collar and then fold over the long edge of the collar band facing and sew it by machine to the outside of the neck edge.
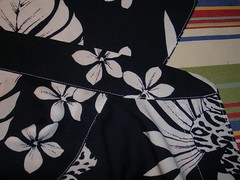
Here is the result of machine sewing the collar band facing to the outside of the neck edge. It is a more professional look, compared with hand sewing the collar band facing to the inside. I also managed to keep the stitching straight, unlike the pocket!
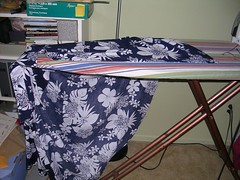
All the rest of this blog entry is about buttons and button holes. I have draped the shirt on the ironing board so I can deal with the front edges or plackets. On a man's shirt, the button holes go on the left front which is the side I have placed on the board first. Once I have finished making the buttonholes, I can pull the right side of the shirt front up and place it under the left front to mark where the buttons will go. It's like I'm doing the shirt up around the board.
I usually use an existing shirt to mark where the buttonholes will go. Here, I have overlaid the Hawaiian shirt with another rayon shirt I made from the same pattern. I am putting pins in at one end of the vertical buttonholes. I choose the end that faces the bottom of the shirt because when I have the placket in the automatic buttonholer, the bulk of the shirt is to my left and the buttonholer starts at the far end and works toward me as I'm sitting at the machine.
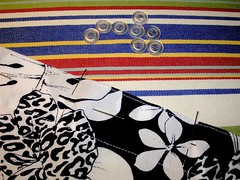
I've marked all the buttonholes with one pin down the length of it and one pin across the far (or bottom) end.

Here I am showing two of the buttonholes I made. Once I had marked their locations, I realized that it would look better if I made some buttonholes with navy top thread. Unfortunately, you can't see the navy-on-navy in the photo but I like the custom look to it. The white buttonhole is obviously the one on the right side of the photo and the navy is on the left side.

Once the buttonholes are cut open, I drape the shirt on the ironing board and overlap the hole side over the side where the buttons will be sewn. I use pins to hold down the shirt tails so they meet each other precisely and pins to hold down the collar edges too. Then I stick pins through the buttonholes in the middle, to mark where I will sew the buttons. Depending on the shirt, I may also use a ruler to measure to make sure the buttons are going in the middle of the placket on the right side of the shirt.
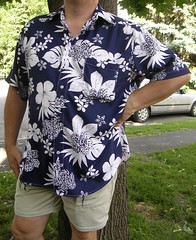
Ta Da! One Hawaiian shirt, ready for a bike ride.
7 comments:
Great looking shirt! I really like the fabric. Looks like a Tommy Bahamma shirt to me. I am sure the cost of making it was priceless!
Linda, I can't believe the bargains I sometimes get. It is 100% rayon but a really nice weight and drape. It was regularly $10/metre and I got it for 50% off so it effectively cost about $10 in materials! He has been wearing it today and I am still impressed with how good it looks.
You did a great job! My husband has been liking to wear Hawaiian shirts a lot lately! Must be comfortable.
Yes Cindi, mine says they are very comfy. The rayon comes from cellulose which seems to wick moisture away from the skin. Cotton just absorbs sweat. And if the rayon is nice, it will wash and wear with only a little touch-up ironing.
Thanks Sharon and Nuha Azam! I wish I could have found more of this fabric. I'll keep looking, because Peter really likes these shirts.
fabulous fabric, great job! i'm sure he's the best dressed bike rider in canada!
Thanks Miriam. Plus he knows when he compliments me and I hear other people compliment him on his shirt, he gets MORE shirts!
Post a Comment