Wednesday, May 09, 2007

Another jean jacket and some other things

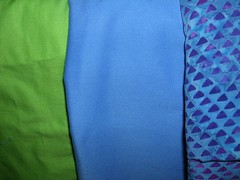
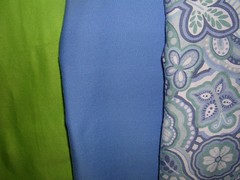
This is a jacket that I have had on my mind for quite some time now. I have also had the twill fabrics sitting in my stash boxes for a while. In fact, it has been so long that I thought the green twill was much more like a Kelly green than the brighter, more acid green that emerged when I went digging. I am glad it's not as Kelly green as I had imagined. I like the brighter green with a touch more yellow than blue in it. But it does go nicely with the mid blue twill I got at a separate time.
jean jacket prep
In this photo, I have also dug out of my boxes some rayon that I bought in three complimentary prints. I have already made a matching pants and big shirt in the large print and a dress with the medium print (using a little of the small print for contrast). I realized that it goes well with the plain blue twill so I unearthed it in anticipation for later.
jean jacket prep
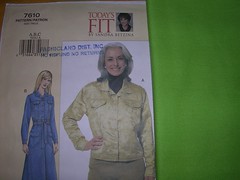
In further anticipation of what is to come, I went to get matching thread (no photo - really!) and to see if there was some twill in a blue print. I found some! As far as the thread is concerned, I discovered only today that Fabricland is phasing OUT Mettler thread which was the only one that really matched the green. AND they only had one small spool of it. Argh. So I am going to have to be clever in my use of green thread. I say this because normally, a fully-flat-felled jean jacket uses up two 100m spools of thread. Anyway.
jean jacket prep
Again with the Vogue 7610 pattern - I love this pattern and it SO works for me. But this time (drum roll please) I am going to make the undersides of the bands, pocket flaps, collar and tabs in a contrasting fabric. The green jacket will have little touches of the blue twill. And the blue jacket will have touches of the blue print twill. Oh hold me back, I'm so excited. :) Now, you'll hardly see them because they are just the undersides of things, but I'm telling you, it's pretty exciting.
jean jacket prep
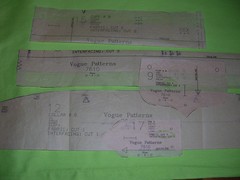
These are the pattern pieces that I will use in the contrast. However, the bands and the collar are both normally folded over to make the two sides so I am going to be adding a seam allowance so I can get the contrasting sides this time. I'm going to go ahead and cut two collar pieces too, because it is just easier than fiddling around trying to get only one layer for that piece. And what could I do with the other bit anyway, except save it to use for crafts? So I'll stash it away and one year, I'll make yet another jean jacket that will use the green as contrast. Or something.
jean jacket prep
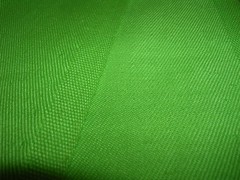
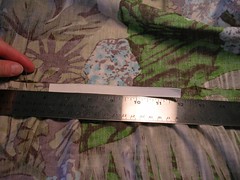
I have enough of the plain blue and the print blue twill to make summer skirts so I'm happy about that too. As far as which is the right and wrong side of twill, your guess is as good as mine. Of course, you can't tell from looking at this photo but I think the right side is on the right side of the photo. The "wrong" side looks very diagonal and the "right" side looks more like the weave is at right angles to itself. I am sure no one in the world but me will notice.

Saturday, May 05, 2007

The Dress is Done

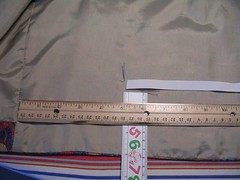
dress measuring elastic
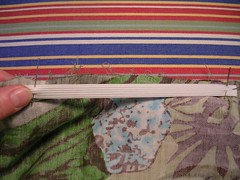
I measured between the dart locations and decided to use a piece of elastic 6 inches long and stretch it over 8 inches of waistline at the back.
dress fitting elastic
I pinned one end of the elastic to where the dart was supposed be on one side, and ran the elastic along the untrimmed seam allowance to the location of the other dart. Then I pinned the elastic along the seam allowance and went to sew it down.
dress sewing elastic
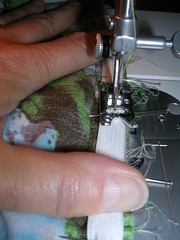
I sewed the elastic to the seam allowance using a long, wide zigzag stitch, stretching it as I went.
dress placing elastic
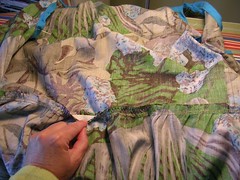
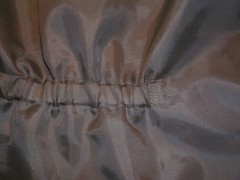
When I was done, the elastic was hidden behind the seam allowance, as it was pressed up toward the bodice.
dress finished
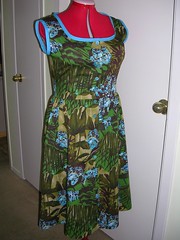
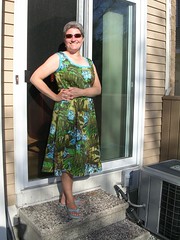
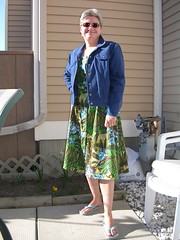
I took a photo of the dress on my dummy, who I have decided to call "Rose". I was lying awake a few nights ago, trying to get back to sleep. I decided to go slowly through the alphabet, looking for a name for the dummy that resonated with me. I often use the alphabet technique to go back to sleep, instead of counting sheep. Anyway, I got to the letter R and the name Rose just seemed to work. Plus she is a nice rosy colour so there you go. I was just going to put this up as the final photo for this dress but then it got just warm enough to put it on so I got Peter to take a picture (or two) of me wearing it outside.
the dress
the dress
I like the one with the jacket because the jacket covers a multitude of sins. And I made that jacket too and wear it all the time, along with the dozen other I made from the same pattern. Hey, when a pattern works, I take advantage of it. As you will see in the next entry or so.

Wednesday, May 02, 2007

Almost finished the dress

So my dress is nearly complete and I make my husband go to the sewing room to admire it on the dummy. He says, "are you really going to wear that in public?" And I say, "I thought you weren't going to complain any more about my fabric choices?" And he says, "I can't help it. That fabric makes me feel like Kramer when he heard Mary Hart's voice on television."
dress with bias tape
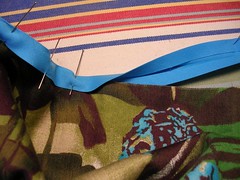
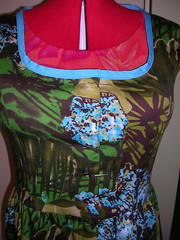
I tried the dress on again and was surprised to see that it really wasn't as low in the front as I had feared. So I have put aside the blue eyelet lace I bought and am only going to trim the neck and armholes with blue bias tape.
dress with trim
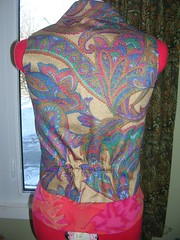
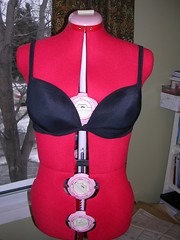
Here, I've pinned the dress back on the dummy to decide how many buttons to put, at least on the bodice. I refuse to have a top that gapes between buttons and so I put pins in every two inches, which is awfully close together but works for me.
dress buttons
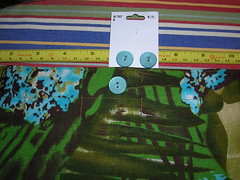
I chose some plain, slightly turquoise buttons and am putting them two inches apart on the bodice and 2 and 1/2 inches apart down the front of the skirt. They only had 15 matching buttons so I bought them all and have used 14 on this dress.
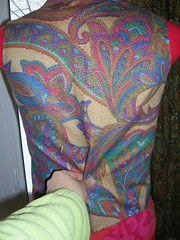
dress back adjustment
After sewing the skirt back to the bodice and trying it on, I realized that it is a bit loose in the waist. However, instead of having that sewed-in look, I think I am going to put a bit of elastic on the seam allowance at the back and that will snug the waistline up without making it difficult to breathe.

Saturday, April 28, 2007

Summer Dress Continued...

Sometimes I out-smart myself and then, when I fix the problem, I figure it's good that I am smart enough to fix the problem but I wish I hadn't created it in the first place. Also, I should just accept the fact that I should cut the garment out in the 14 and give up on thinking I am a 12 in most places. sigh. But I really DO want to lose 10 pounds! wail.

What happened when I took up the bodice pattern pieces was that I raised the neckline a little but not enough and in the process, I made the armholes quite tight. I can fix the armholes but my bigger problem was that I cut out the pattern in the size 12 and the bodice barely fit around the bust on the dummy.
bodice on dummy
So I was glad I hadn't sewn in the darts in the back but I wasn't sure what to do about the fact that the front edges hardly met.
dart?
I may in fact end up taking a small tuck in the back of the bodice where the darts are because my waist is okay for the size 12. But it's not small enough for two full darts.
front band seam allowance
In the meanwhile, I pondered what to do about the front. I had to sew on an interfaced front band on each side of the front and I decided to take only a 3/8 seam instead of the usual 5/8 seam allowance. That might give me an extra whole inch to play with and I need every bit I can get. I also sewed the skirt to the bodice only at the front so I could play with the gathering and darts in the back later.
dress on dummy
It worked like a charm and when I put the dress on the dummy, I could get the front bands to properly overlap! Now I can adjust the back gathers and that part will be done.
dress back
Next, I want to go to the store to see what they have in the way of a flat ruffle that I could sew into the neckline (I might barely have enough fabric to make one but I thought I'd look through the notions first). I was thinking if they had something in the blue or the kelly green, I could sew it onto the neckline instead of just the seam binding the pattern calls for and therefore get some more coverage for the old cleavage. Plus, I will get some seam binding for the armholes and buttons and I'll be done.

Friday, April 27, 2007

Sleeveless Summer Dress

My new project is a summer dress. Inspired by A Dress A Day, I got some new dress patterns recently and have been wanting the try them out. Now that Summer is sort of near (today is rainy and NOT warm at only 10C or 50F), it seemed like a good time and I also have my new dummy (who I haven't named yet) so I can fit the patterns better.
summer dress
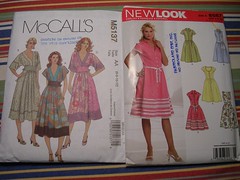
I wanted to try this New Look pattern 6587 in the sleeveless View D. It looked cute and would be nice and cool when it finally gets hot enough. Plus, View D showed a print fabric which reminded me of Dress A Day so I figured it would be a good match. Not wanting to waste however, I went through my stash and chose a fairly ... ugly, shall we say, cotton print for the "muslin" that I never make.

I thought I had already blogged about this print but I went back several entries and didn't see anything so pardon me if you've heard it before. Anyway, the fabric is a nice 100% cotton sateen ("sateen" now reminds me of Nicole Kidman in Moulin Rouge) but the print on it is weird, man. It sort of looks like tropical foliage but it's oddly abstract. And then there are the unexplainable blue blobs that remind me of the Horta on that episode of Star Trek. So why did I buy it? Yep, it was on sale! I really have to stop doing that.

The pattern calls for optional pockets but they way they are set up, I fear they would make the dress look like an old fashioned pinafore so I have decided against them.
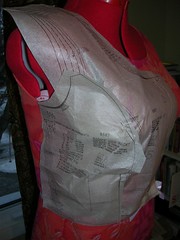
summer dress
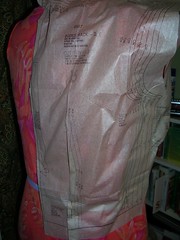
Now that I have the dummy, I actually pinned the paper pattern to the dummy to see how it might look. I thought that the armholes and the front neckline would be too low (showing bra under the arms and too much cleavage in the front) so I decided to take up the bodice pieces one half inch on the front and the back. I had considered waiting until I had the fabric cut out and then taking the bodice up at the shoulder seam but then everything else would be hauled upwards and so out of proper alignment. This is why I got the dummy in the first place so I got brave with the pattern adjustments. I haven't seen how it worked out, so I am keeping my fingers crossed that I made the right decision. I'll know soon...

There are also two vertical darts on the back of the bodice and I am leaving them unsewn until I can fit the bodice onto the dummy.
summer dress
Here is the bodice sewn together except for the shoulder seams. I am about to flat fell the vertical seams and it's easier to do when I can lay the piece out flat.

Wednesday, April 25, 2007

I'm back with baby clothes! Not for me (thank goodness)

All's well that ends well. It has taken me forever to get back to sewing and blogging but here I am again. Mum made a complete recovery which amazed us all but left us forever grateful for her strength of will and character, as well as the medical care she got while in hospital. Then, a friend decided to have a baby (or will, in May) so I got to go to the baby shower and so I made some of the cutest clothes imaginable - baby clothes.
Baby clothes pattern
Over many years, I have used this McCall's pattern 9331 to make the newborn sized clothes whenever friends of mine have babies. I think the first time I used it was for my nephew who is now 22 years old! I love the way the feet on the pants stick up and the hat is just the cutest. I figure the parents can put a t-shirt on the baby and then dress it in the little jacket that is called a kimono on the pattern.

I went shopping for the fabric with my mother after she had got out of hospital and she suggested we go for the pink (a little peachy actually) and blue flannelettes and mix them up, since we didn't know if the baby was going to be a boy or a girl. I figure a baby doesn't know what colour it is wearing so it would only be the parents who might object and these parents are pretty relaxed about that sort of gender-biased colour thing. And if they did mind the colours, they could give away the outfit that was mostly the "wrong" colour. I had also, in the past, made yards and yards of flannelette seam binding in white and I decided to use some of that up on this project.
Baby clothes feet
Since the pieces are so small, I had lots of options in cutting. I decided to make the bottoms of the pants feet in the opposite colours and to find matching bears for each. I chose the sleeping bears for the blue feet and the awake bears for the pink. You might have to click on the photo to see the large for detail.
Baby clothes pants
In this view of the inside of the pants, you can see I decided to flat fell all the seams for a nice smooth finish. I also used the white flannelette seam binding to encase the elastic around the ankles. The top of the pants will be elasticized also. Pretty cute already.
Baby flat fell
I wasn't sure if I was going to be able to physically manage flat felling the seam that made a tube out of the pants leg (and the jacket arm) as they were going to be so small. But I did! It was tight going but I managed to sew into the leg and turn around at the bottom and sew my way out again.
Baby clothes jacket
Here's a view of the jacket. I made the sleeves out of the contrasting fabric colour. All the seams are enclosed in modified flat fells. The jacket closes by using a tie on the inside and then a tie on the outside, after the front flap is folded shut.
Baby clothes
Here is a view of both pairs of pants, both jackets and the hat, after completion. You can see the feet - so cute! And the hat is two layers - one pink and one blue - so it is reversible depending on the sex of the baby.
Baby clothes
Finally, one last view of both outfits and the hat. Adorable.

Tuesday, March 06, 2007

Hems and fitting a vest

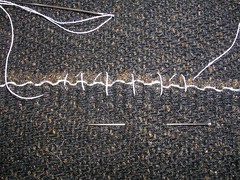
A few odds and ends today. Someone asked in the comments, when I was making the purple coat, about what stitch I used on the hem. I tend to use any old stitch that works. The purple coat had really loosely woven fabric so I used a giant loose stitch. I decided to demonstrate on that dark brown stuff with contrasting white thread.
hem 1
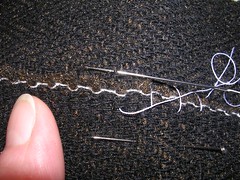
First, I turned up the selvage of the left over piece of fabric, so you could see the difference between the "hem" and the background. The selvage has a white thread running through it so if I had thought more, I would have used pink thread or something for the fake hem stitches. After anchoring the thread in the hem (the turned-up part), I take a stitch in the skirt or body fabric. The needle is still in the taking-of-the-stitch position.
hem 2
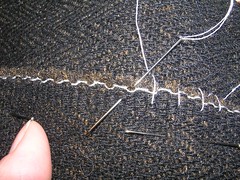
Next, I put the needle under the edge of the hem and bring it out far enough below the raw edge (in this case, the selvage edge) so the thread won't end up pulling out of the raw edge. I didn't have to worry about the hem stitch pulling away from the loose threads on the purple coat because I had previously stitched lining pieces to each coat piece and so I had in effect, a line of stay stitching running all along the hem.
hem 3
When I pull the thread out and get set to make the next stitch, this is what it looks like. Effectively, what you see from the inside of the garment on the hem are small vertical stitches. The stitches are at an angle behind the hem. On the right side of the garment, you shouldn't see stitches at all, because you should only have taken a very small bit of the fabric in each stitch. I think the next time I hem something by hand, I'll do a blurb on it so it should look better than this!
vest
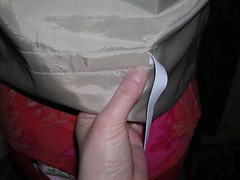
The next thing I decided to do with my dummy is retro-fit some vests with a back elastic. I really like wearing vests but I have wished for some of them to fit a little more closely. Now that I can work on a dummy, I can get the better fit.
measuring
By putting the vest on the dummy, I was able to gauge where I wanted the elastic to sit on the vest. Then I measured each side and up from the bottom so the elastic casing would be even across the back. I stitched a rectangular casing where I had marked it on the vest.
cutting
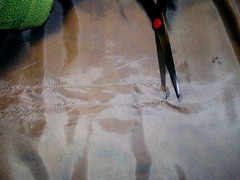
With the casing stitched, I cut a slit in the lining so I could insert the elastic.
elastic insert
Because the elastic was a half inch wide, it was stiff enough so that I could just slide it into the casing and work it along by itself, without using a bodkin or anything to pull it. This way, I only needed to make the one slit in the lining.
sizing
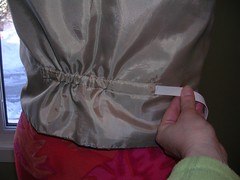
Once I had worked the elastic to the other end of the casing, I stuck two pins in it to anchor it (you can just see them in the photo). I put the vest on the dummy inside-out and pulled the elastic until the vest fit the waist more closely.
sizing 2
Then I cut off the excess elastic and zigzag stitched the slit closed, catching in the elastic at the same time. I also zigzag stitched the other end, even though it didn't have a hole in the lining, so that it would match the first side.
finished
There you go - finished vest on the dummy, showing the gathering.

Thursday, March 01, 2007

Still life with dummy

So I'm back home again and I'd like to thank all those who made comments on my last entry - I'll get there soon! In the meantime, I wanted to get my dummy set up. She still hasn't spoken to me with her name. I keep thinking it "should" be an alliteration with Dummy but maybe she should be a variation of Julia - I'm Jule to the family. On the other hand, I really liked the name Sarah when I was little. It'll happen.

I cranked open those dials and then dressed her in this underwire bra that I bought for something dressy. I hate underwires - they don't lie on my ribcage at all comfortably. Maybe I have a weird shaped chest, I don't know (and don't care) but I don't like them. So I thought it would be good for my dummy - she can't complain. It was not filled out, shall we say, so I stuffed the bra with some small facecloths I have and it works.
D with bra
Then I put on a shirt I made last summer and sure enough, it didn't fit the dummy either. I have to lose 5 pounds (or more) or give this shirt away - never been worn!
D with too tight shirt
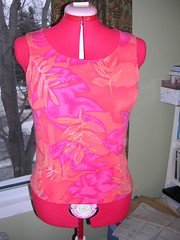
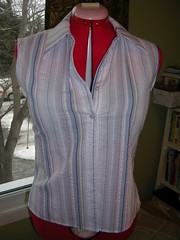
So next, I put a tank on her that I'd made. It fits very closely but that's because it's made of this rayon stuff that accordions up when you wash it. It's perfect for an undergarment because of the way it fits and how it shows where the armholes can't be lower than (ooh, is that bad grammar or what?).
D with tank
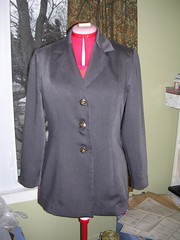
Plus of course, it matches the dummy nicely. Next I put the grey jacket on her - it needs a final press but it'll look good when I finally wear it to class.
grey jacket
Now for the real reason I wanted to get the dummy. Inspired by A Dress A Day, I have these two patterns that have never been used.
dress patterns
I wanted to make sure that I was closer than usual with the fitting, before I lashed out and actually sewed one of these dresses.
pattern pinned
The pinning isn't very accurate but I'm familiar enough with patterns to see that I shouldn't have to do much altering if I make the bodice in a 12 and the skirt (waist and hips) in a 14, especially if I wait until I have the main pieces sewed together before I see how deep to make the dart in the bodice back.
pattern pinned
I wanted to make view D (sleeveless) of the sun dress in New Look 6587 for the little holiday we have planned for the end of March. I have some unattractive cotton that I will make this pattern in first, using the dummy, and then some nicer rayon that will be the more finished model. And then for the "Duro"!
Mum is now making real progress, with her feeding tube removed, eating some real food and they're going to fix the tracheostomy so she can finally talk. I think her progress now will feel exponential compared to the past 5 weeks and I'm really looking forward to it.

Saturday, February 24, 2007

Doppelganger

[I wrote this yesterday...] Da da, it's my birthday! Da dum, it's my birthday! And my Mum is getting BETter! It's been a tough 6 weeks but things look like they are finally moving in the right direction.
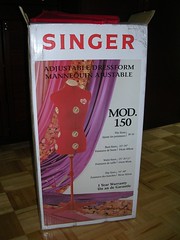
So about my birthday - I've only been thinking about getting a dressmaker's dummy for about 30 years and today I got one.
my new dummy
My Dad is here for the day and since he has a car, we drove to the Fabricland where I wondered if I'd have to order a dummy. But no! Not only did they have lots in stock, they were 40% off just until tomorrow for members only. Woot!
my new dummy
It's not fancy but I am really looking forward to finally using a dummy for more than just fitting. I might even, eventually, sign up for that pattern making class at the college where I teach. It's part of a larger program but they might let me take just the one course.
my new dummy
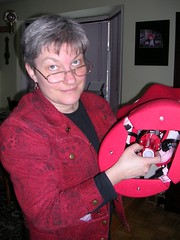
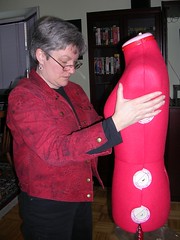
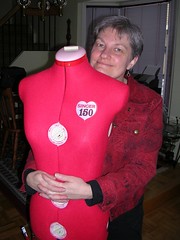
She's a nice pink colour and she's as small as this size gets - unfortunately, when I get upstairs to the sanctity of my sewing room, I'm going to have to crank open those dials almost all the way for this size. However, I have been going to the gym - it's one of the main things that has helped during Mum's problem - and I have actually lost an entire pound. Yes, I did say "one pound". When I was 20 I weighed 25 pounds less than what I weigh today at age 49. Not horrible and I call it my "survivor fat" - if I fell off a boat tomorrow, I'd be able to live for a while on it - but I'd still like to be a little lankier than I am now. Never mind. Que sera, sera and all that.
my new dummy