Saturday, December 23, 2006

Coat sleeves are on

From a dusting of snow in the previous entry to Ottawa socked in by fog:
newhillcam23dec06
Last night we had freezing rain and the power went out at 3:30am but it was back on in about an hour. We lay awake, listening to the ice sliding off the roof. It was supposed to get up to 4C by the morning and 7C by the afternoon but by 1pm today, it was still only 3C. However, all the freezing rain has melted to it is mostly just wet out.
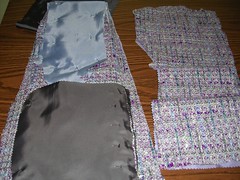
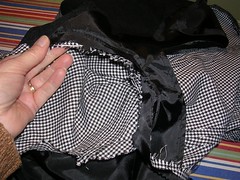
coat partly sewn
A day or two ago, I had got to the point where the coat was starting to look like a coat.
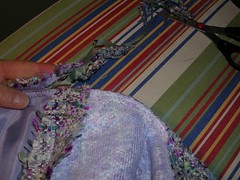
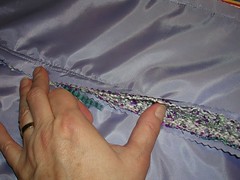
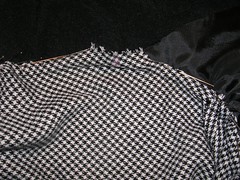
trimming shoulder seam
Then I put the sleeves on both the lining and the coat. I zigzag stitched around the shoulder seam and tried not to trim the coat seam too closely for fear of excessive ravelling. Only time will tell on that count, I suppose.
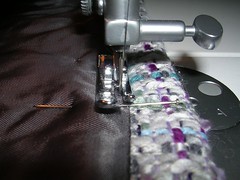
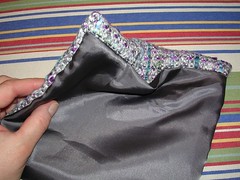
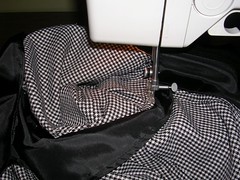
finishing pocket
I decided to machine sew the pocket lining to the pocket where I had turned the pocket right side out. I also sewed all the way around the pocket to make sure the lining stayed tucked behind the pocket face. They are patch pockets and now that I have the body of the coat sewn up, I can sew them in place. That'll come in the next entry.
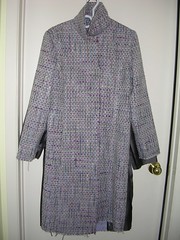
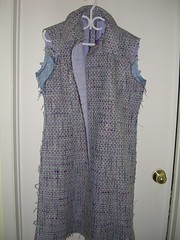
coat with sleeves
Finally, I took a picture of the coat complete with sleeves because it is so fun when it gets to that stage. Behind the coat is the separate lining, also with sleeves sewn on. Now (after the pockets) I just have to sew the lining to the coat and presto! we're almost done!

Tuesday, December 19, 2006

Starting to sew the coat together

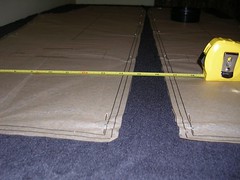
pieces lined up (no pun intended)
Here are some pieces lined up, ready to sew. The square dark object is one of the pockets.
pocket before pressing
This is the lined pocket, turned right side out and ready for pressing. I turned it through the small gap in the sewing shown in the photo. I could sew that gap shut by hand but I think I will sew it shut with topstitching. Topstitching will also help to secure those ravelly fabric threads.
centre back seam
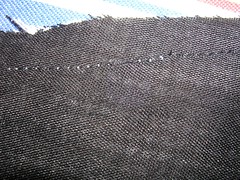
Here, I've sewed the centre back seam and am showing it before I pressed it open and flat. I pinked all the edges of the lining so it wouldn't fray, knowing that I would be trimming too many seams. You can see that the coat fabric is already fraying big time so it's a good thing I sewed the lining to each piece at about 3/8 inch and then again, it is sewn along the 5/8 seam line, so hopefully, by the time the whole coat unravels along the seams, it will also be worn out in other ways.
a dusting of snow
And this morning when I glanced out the front window, this is what I saw. Half an hour later however, the snow had melted from all the pavement and some of the grass where the sun hit it. We may not have a white Christmas this year.

Sunday, December 17, 2006

Winter coat interlining

My sewing machine is back! I finally called on Friday after it had been gone more than a week and was told it was "next in the line". Sure enough, they called on Saturday to say it was fixed and I prevailed upon a different friend to drive me over there to get it. In fact, the weather was so mild, I could have gone on my bike with the trailer but since he was willing to drive me, I took him up on it.
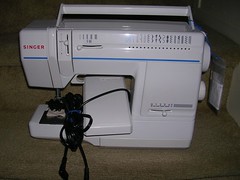
she's back!
Here's my baby on the stairs to go up. It turned out that the bobbin case was the culprit - it needed an adjustment because every so often (every six inches of sewing), the needle would strike a part of the bobbin case when it went down into the bobbin area and so break the thread that way. I have now sewed for a while and there have been no broken threads! I am so relieved. It was really getting to me, I can tell you.
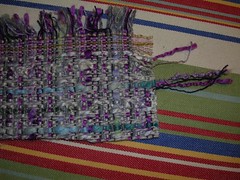
frayed fabric
Here's a close up of the fabric and you can see how loosely woven and ravelly it is. (My spell check didn't recognize "ravelly" so I looked it up and it is a word - just not very well known.) This is why I am backing each piece with lining - or interlining we shall call it. Someone suggested in the comments that I consider lining it with flannel to make it warmer and that is certainly an option. However, flannel would also make the coat heavier and more bulky and I thought I would go for a lighter weight option. I can always add a sweater underneath on a colder day for warmth. And I planned this coat to be worm only to about minus 10C.
tailor's tacks
When I started cutting out the pieces, I thought that I would have a hard time making notches and that chalk marking wouldn't show up for the dots. So I made some (elaborate for me) tailor's tacks for both notches and dots. Then, when I cut out the interlining pieces, I realized that I could easily cut notches and make chalk marks on that fabric so all the tacks were for naught.
interfaced pieces
Here are all the pieces with fused interfacing - the front, front facing and both collar sections. I think the main seams I will have to trim will be the shoulder seams and I will use a zigzag on those and hope the threads won't eventually pull away.
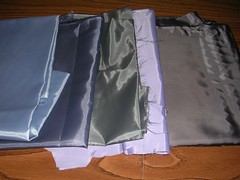
linings
I went through my stash of linings and found several pieces in the same colourways as the coat. The grey piece on the far right is what I am using to line the coat itself.
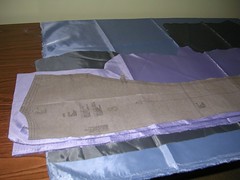
interlining
For the interlining (which will not be seen) I ended up getting the two back pieces out of the mauve, the side fronts and side backs out of the blue and the sleeves out of a pale green. I have almost finished sewing all those pieces together and it is a pain. The loosely woven wooly stuff moves all over the place and seems to grow as I move down one edge of it. I have to keep stuffing the excess under the needle so the fabric piece doesn't end up a foot longer than the interlining piece. But it is almost done so I can say I've been successful.

Once I have finished attaching the interlining to the two backs, two sleeves and four sides, then I can start putting the coat itself together.

Wednesday, December 13, 2006

Winter coat prep work

Tomorrow I monitor the last exam for the semester and after I post the marks, I'll be done working (for money anyway) until January, when I'll be teaching two more courses at the college. If it weren't for the total lack of money, I'd feel quite like the woman of leisure.

My friend took me and my machine over to the Sewing Machine Hospital where I explained the problem with the breaking thread. The first thing the guy did was look at the needle because needles with burrs on them do break threads. I gritted my teeth and explained that I replaced the needle ALL the time and it wasn't that. Anyway. He still hasn't called and it has been 6 days (today is the 7th day) and I am starting to miss my machine. However, I decided I would cut out the coat next while I am waiting and so here I am again. Hello!
coat pattern
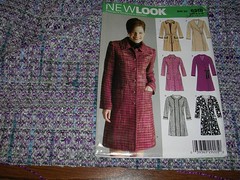
This is a very similar pattern to the reversible red coat I made but that one fit a little snugly so I decided to make this in the 14 so I could fit sweaters underneath. I have a longer, warmer coat for the minus 20C weather but I wanted this wooly one for the weather when it's cold but not cold enough to bring out the fake fur. Interestingly, when I bought the purple "wool", right next to it on the table was the exact same red "wool" they used to make the coat in the photo on the pattern envelope! I liked the purple better.

I am making the view shown in the photo, because I wanted a coat that buttoned up to the neck. When it's cold and windy out, you don't want an open shawl collar, thank you very much. In fact, I have an open shawl collar on my minus 20C coat and I tie it closed with a scarf around the neck and I have never liked doing that. I am probably going to retrofit that coat with a loop for a button at the neck but I'll blog about that when it happens.

This fabric also frays easily and profusely so I am anticipating potential difficulties. First of all, since I want it to be warm, I am going to cut out pieces of lining for each of the coat pieces in the body and sleeves, and sew the lining pieces right to the coat pieces, before they get sewn together. In this way, the coat will be more windproof and the pieces may retain their shape better.
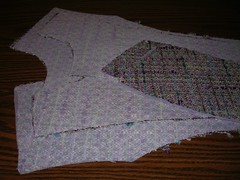
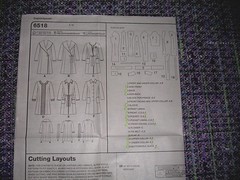
pattern pieces
I'll be "double lining" the sleeves, the side front and side back and the back. For the front, the pattern pieces are the front and the front facing. I have decided to iron on interfacing on both of those pieces, not just on the front facing. I have been thinking that when I sew the front and front facing together to make the front edge, that the seam may ravel and ruin especially if I clip it to reduce bulk. I thought about putting some kind of applied trim around all the finished edges but then I thought, if I iron on interfacing, that may glue the fibres together enough that they won't ravel. If they do ravel later, I can always put the trim on later.

I'll also be doing this with the interfacing on both of the collar pieces (top and bottom) so they won't ravel either. (Don't you find it interesting that "ravel" means both to disentangle as well and to tangle up? And "unravel" means that same things? Cool - but confusing.] And there are the buttonholes to consider, if I do buttonholes. In any event, with the entire front interfaced and "glued" together, the buttonholes or whatever fastening I end up using will be less of a problem. Now I just have to discover if I have enough lining odds and ends to do the "interlining". I have a nice piece of quite thick polyester for the "real" lining.

Friday, December 01, 2006

Still working on the jacket

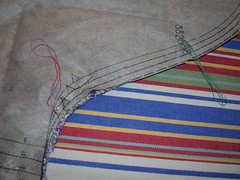
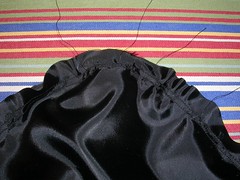
Thanks everyone for the great and kind suggestions about my machine. I also got an offer from a knitting friend to drive me and my machine over to "The Sewing Machine Hospital" where she says another friend of hers got good service for her machine. I have decided to take her up on it and now we just have to get together some time. I took this photo of the armscye of the lining to show all the threads sticking out from where they broke every few inches while sewing. It's entirely random, the thread breaking, and so it's always a shock when it happens and makes me crazy. There are only 4 threads showing in this part of the picture but the top thread broke at least 6 times while sewing around the armscye the one time (I sew around it twice and then trim the fabric close to the inner line of stitching)
broken threads
In the meanwhile, I got a flyer today from Sears and they have their most basic Kenmore machine on sale this week for $149 ($30 off). That is about the same machine I started sewing with, over 30 years ago. And I only stopped using it after I just couldn't control the bobbin thread tension any more and I also thought I deserved something bigger and better. The interesting thing about my old Kenmore was that something went "snap" in the bobbin area in the first year I had it and it never really was the same afterwards. I have no idea why I never took it in for repair. Well, the first few years, I had zero money for stuff like that and it did work pretty well - you just couldn't ever topstitch on it and expect good results. Later I guess I just thought no one could do much with it. Silly, I know. Anyway, it was a good workhorse and so I am thinking about getting it again for back up for times like this, when I have to get the Singer serviced. I won't be able to sew anything fancy with it and won't do buttonholes, but it would work for the seams and all the other stuff I do. I'll think on it some more.

In the other meantime, I think I have been in a funk about several things for several reasons and I haven't been sewing or writing or anything. Today, we are having a freezing rain winter storm and after I got home from teaching this morning, I curled up on the sofa and watched the last episode of "October 1970" which I had taped the night before. I think I might be the only person watching it, because I haven't heard that anyone else is. And while it was reviewed in the paper when the first episode was due to air, nothing has been said about in the paper since. I found it very well done and if you want to know more, just type in FLQ at Wikipedia and you'll get a lot of info. It was 8 hours produced by the CBC (and maybe others) and while I would say it had that distinct Canadian tv stamp on it, it wasn't at all unwatchable. (Talk about being damned with faint praise.) I was in grade 7 and living on a military base just north of Quebec City in 1970 so I remember it pretty well.

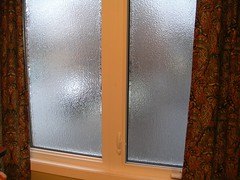
After the show ended, I felt like it was freezing in the house but when I checked the temperature, it did say 18C (64.4F) so I thought to warm up, instead of turning up the heat, I would go up and at least iron something, if not sew. This is the "view" I discovered out my sewing room window:
freezing rain
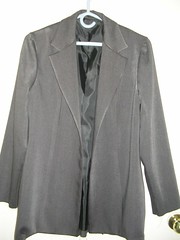
Nasty stuff, freezing rain. I noticed my poor, neglected grey jacket hanging on the door and took it down to see where I had left off. I had sewed the lining to the jacket all around the edges and now I just had to turn it right side out and iron it flat. So I did that and this is how it looks, prior to hemming everything.
grey jacket
It's actually looking pretty good! It has a bit of a sheen to the fabric and it's a nice weight so I think I will end up wearing it quite a bit. But I will definitely have to spice it up with brightly coloured shirts. Now all I have left to do is to sew up the hems of the jacket and lining and that is all done by hand so I won't miss my machine for now. I also have to hem the pants and then lose 5 pounds so they won't be quite so snug. Grr. 10 pounds would be better. Thank goodness my husband has decided to lose some weight too - it's always easier to do when we're in it together.

The last thing for the jacket will be the buttonholes and I could do them by hand but I'd rather use the machine. Instead, while I'm waiting for my SInger to be fixed, I may cut out the wooly winter coat fabric I got a while ago. By the time I am ready to sew it, the Singer will be back, and I won't be violating my Rule about not having more than one project on the go at once.

Wednesday, November 22, 2006

Frustration in Spades

I have been So frustrated that I haven't blogged or sewed much in the last 3 weeks. Where we left off was after I had ordered a new bobbin case, having decided that this was the cause of my thread breaking problems. I got the new case and was so happy about it. Then I looked at both cases together and they looked identical so I wasn't so happy any more about solving my problem so easily. Then it got worse. I put the new case in the machine and it turns out is was ever so slightly a tiny bit bigger than the existing case and didn't even let the thread under the thingies that held it in place. I played with it for ages, putting in the old one and watching how the threads moved and putting in the new one and watching how they got stuck.

I finally decided that I would eventually take the new case back as unfit for the purpose and started to sew again with the old case. Aaargh! Now the thread breaks even more often. I sewed two seams around an armscye today and the thread broke six times. So okay, I know something is wrong and I have to take the machine in for servicing.

My big problem is not having a car so I can't lug the machine easily to a repair person. And anyway, the last time I took the Singer in for servicing was some years ago when I had a thread tension problem but the Singer store doesn't exist any more so I don't even know where to go. I have actually contemplated taking a course on how to repair sewing machines so I can fix the wretched thing myself.

I am also thinking that I will buy an inexpensive but common brand of machine at a place like Sears so, when I Do need to take it in, I can get there easily enough, etc. I feel like I have been banging my head against the wall. And I think I feel that way because it is Just a thread breaking and I can't stand that I can't figure it out myself. Aargh again.

To add insult to injury, I am so un-enamoured with the boring grey flannel that I have been avoiding finishing it. I bought some fun purple and white stuff to make a tailored winter coat that will go to about -10C and I can't sew it because of my Rule (no new projects till the existing one is done). So blogging will be light until I make a decision about the old machine and possibly a new one.

Sunday, October 29, 2006

Grey "flannel" and the new bobbin case

Right after I ordered the bobbin case, I got a stupid cold on Monday. Then I gave midterms to 78 students on Tuesday and Wednesday and then I had to mark them all. So I just finished all that and the worst of the cold on Friday. Also on Friday, Peter picked up the bobbin case for me so I was pretty excited. However, I couldn't sew with it right away because while I was waiting for it so I could sew the buttonhole on the houndstooth jacket without mishap, I decided to lay out some more fabric for another outfit.
grey fabric
I had this huge piece of some grey flannel-looking stuff that was mocking me so I decided to finally use it. I am pretty sure I had bought it with pants in mind and since the weather is getting ever more Wintery, I decided pants would be the thing. Plus, all the dress pants I had been wearing a few years ago are all pleated wonders that make me look even shorter and dumpier. I have a pattern that I have used once before in a rayon and they fit pretty well. I also have been watching "What Not to Wear" and they recommend pants that fall straight down from the widest part of your leg (i.e. that fatty saddlebag bit) and this pattern does that. As a bonus, there is no waistband so I know at least they will be comfortable.
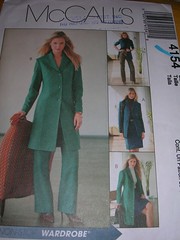
suit pattern
The pattern is a nice one - McCall's 4154 - and I have made the jacket too. I make the length that hits at mid-thigh. I have been thinking about making the longer jacket as a light weight coat but haven't got around to that yet.
bobbin cases
Then I finally got to compare the new bobbin case with the old one and to my surprise, the part that I thought had to be broken looks exactly like the same part on the new bobbin case. There is a tiny screw that looks different but that is the only thing I can see that looks any different - not the piece of plastic that I thought had been broken off. So I am mystified and a bit annoyed that when my long-suffering husband took the old case in to compare it with the new when he picked it up, the sales person said "oh yes I see where it is broken" and now neither one of us can see anything. Anyway, I am going to sew with the new case and see if my stupid thread continues to break. If it does, I know I have to find some other reason for the problem. Grr.

Monday, October 23, 2006

Finishing the jacket and some troubleshooting

And it's my blog anniversary! Last year on the 22nd of October, I put up my first entry. From some time in January when I installed a counter, I have had 25,000 page loads, with almost 16,000 unique visitors. Cool.

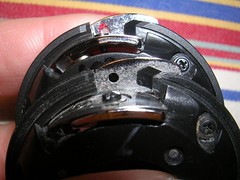
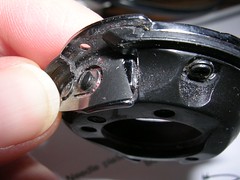
When my top thread broke today for the eleventh million time, I took the bobbin area apart yet again to see if I could spot the trouble. This time, I did. (Look at the black plastic bit by my thumb - it is snapped right off.)
bobbin case
I believe the bobbin case has been broken for years which is why I have had trouble for years. I don't know why I only spotted the problem today but I am glad I did. I immediately went to the internet and looked up local Singer dealers, found one, called it and for $39.95 have ordered the part. I am hoping that the new part will make my machine seem like new again!

In spite of this, I continued sewing the jacket. I've coped so far with the broken part, I may as well carry on. First, I put the sleeves in. No photos but this time, I sewed the sleeves up and flat felled the two seams on them. I also sewed up the body of the jacket, so I had to install the sleeves the old-fashioned and more difficult way, by setting them in as round objects. Not hard but more fiddly than sewing them in flat. I decided I would flat fell the armscye, as I had done the other seams and wanted consistency.
trimming the armscye
Here I am trimming away the seam allowance on the jacket side of the armscye seam. I am going to fold over and sew down the seam allowance that belongs to the sleeve part. You can see all the different parts too - the lining pieces and the facing made out of that faux suede.
flat felling the armscye
I have ironed the seam allowance flat, pressing it toward the body of the jacket. Now I am laboriously folding over the fraying seam allowance and pinning it down, with the pins heading away from the direction I will be sewing in, so I can pull them out one by one as I get to them. You can see a little of the pink chalk I used to mark one of the small dots for positioning.
sewing the flat fell
I've got the jacket on the sewing machine and am slowly going around the flat fell. You can't see it even in the large size photo, but the heads of the pins are pointing toward me the sewer (you the viewer) and I pull them out as I sew down the loosely folded seam allowance. And all the while, you have to keep feeling underneath where you are sewing to make sure you haven't caught up any of the jacket that isn't supposed to be sewed.
felled armscye finished
Maybe because I now know about it, the bobbin case didn't give me any trouble and I managed to make it around both shoulders without breaking a thread and having to start over. In this photo, the shoulder seam is on the right and the lapel is on the left. You can also see the seam joining the front with the side front.
jacket inside out
Now, the only machine sewing I have left is the buttonhole - all the rest is hand sewing. I haven't done a lot of hand sewing lately because I have decided machine sewing is good for almost everything. However, for this fabric, I am going to sew the hems (sleeve and bottom) by hand, as well as sew down the bits of lining along the side front panel. I'll do that while watching tv tonight.
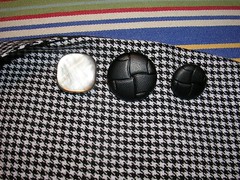
choice of buttons
Finally, I have to choose a button from my stash. Since there is only one button, I will probably go with the large fake-leather one in the photo. But I put up a couple of the also-rans in the photo.

Friday, October 20, 2006

The jacket continued

I'm really forging ahead on this jacket, especially with the encouraging words from Linda as a comment in the previous post. And I can't believe how nicely the contrasting fabric is working too.
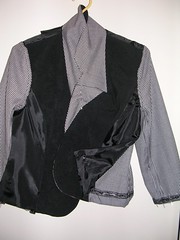
jacket half done
Here is what I have got so far - no sleeves and top stitching to do. But I really like that I chose black as the lining and contrast colour. I was going to go with white but I think the black is more effective. This jacket was going to be the secondary, throw-away item with the skirt being the main thing but I think it may turn out to be the opposite.
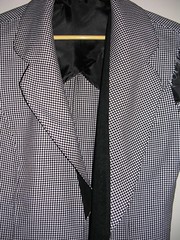
collar detail
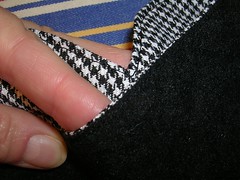
I decided to top stitch around the collar. I hadn't done that with the green cotton jacket but this isn't cotton and doesn't crease as tightly so I went with top stitching. I also rolled the houndstooth around the edge slightly, so I wouldn't get any of the contrast fabric creeping up from under the collar. That worked well.
seam binding
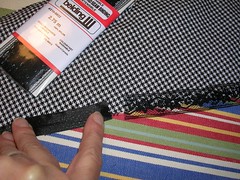
I have decided to use seam binding on the raw edge of the hem, instead of folding it under. It reduces bulk and make the jacket lie flatter. I am going to use the lace seam binding because it is not as harsh-looking as the satin. Also, I already have a package of it and don't have to go to the store on my bike in the rain to get more. :)
jean jacket ensemble
Finally, we went out last night and as I was standing there waiting for something, I realized I was wearing both a shirt and a jean jacket that I had made (some years ago now). I asked Peter to take a picture because I am always posting pix of things on hangers and not on me. The shirt is some lovely cotton with a touch of Lycra in it that I bought at Darrell Thomas a few years ago. Expensive and worth it. The jacket is a lightweight denim that I got for cheap at FabricLand. I wear it a LOT.

Wednesday, October 18, 2006

The little jacket to match

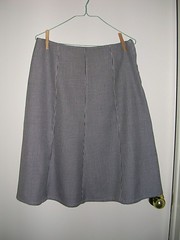
Here is the finished skirt:
8 gore skirt finished
I was asked in a comment about how the French seams affected the drape of the skirt and I don't think they do. I used to use them exclusively on all my shirts and never noticed a problem. On this skirt, the fabric isn't very thin or "drapey" but it isn't stiff either. Either way, I think French seams are not an issue. I wore the skirt today and with a slip over tights, it worked well. However, the thing that didn't work was how I finished the zipper at the top. I folded it over in such a way that a little hard bit of the zipper now pokes into my side. Stupid me. I will have to devise some sort of "zipper garage" to keep that plastic away from my skin. I thought about not bothering but then if I don't fix it, I won't wear the skirt much and this skirt could go a long way with other clothes so I think I will work on it.

The jacket is a little (that new, slightly shrunken look), 3/4 sleeve, unlined model I have made once before in a cotton. I have worn it too so I know it works. I am just not sure how odd it might look in a "wooly" fabric, as opposed to something summery. But I'm doing it anyway.
cotton jacket
Here is the cotton jacket - I am pulling it open so you can see the inside (don't forget, you can make the pictures larger for detail if you click on them and go to Flickr). It is only partly lined, with lining panels on the front, attached to the facings and on the back, at the shoulder level only.
facing fabric
When I cut the fabric, I didn't have enough for the whole jacket, even if I did go with 3/4 sleeves. So I had to find something in my stash that would work with this fabric that I could use as the under collar piece and the two front panels that serve as facings. I was going to go with the nubby cotton stuff I made into a jumper that was like a tent on me and so I never wore (seriously - I could have gone camping in it). But it was too thick and nubby. Then I found some really faux suede in black that I think will work. It has texture to it but it is very thin (hence the "really faux"). Black fabric is notoriously hard to photograph so you'll have to imagine what you are looking at.
contrasting thread
Finally, and as always, I am starting to have thread tension issues. I started sewing with the white bobbin and the black top thread but then I stitched the interfacing (not iron-on) to the front piece and saw that the white thread was showing a little. Going for consistency, I changed the bobbin to black and continued in the stitching on the right side of this photo. So all the seams will be finished in a modified flat fell (where I turn under both sides of the seam allowance) and stitched in black thread. I've already done a couple seams that way and it looks okay.

Wednesday, October 11, 2006

An 8 gore skirt

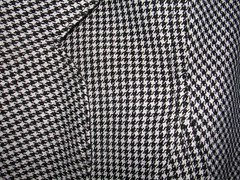
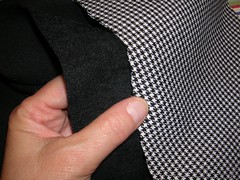
With Fall fast on its way (here, actually), I wanted another long but full skirt to wear as it got cooler. I have plenty of the longer, narrow skirts but I wanted some that flared out a little more - not so good on a high wind but slightly less restrictive than the narrow skirts. I found some tiny houndstooth fabric in black and white on the sale table and for the money, couldn't resist. It is some kind of acrylic or something and it washed and dried without a whimper or a wrinkle.
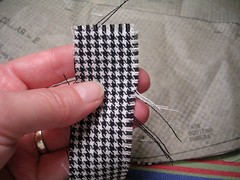
fabric
It does fray quite a bit so I had to be a little careful handling the pieces once I cut them, so it didn't fray down into where the seams would end up. I also ended up with way more than I needed for a skirt, even if I did plan to use the 8 gore pattern I'd used before (McCall's 3518). I laid out the skirt pattern pieces and then sized up what was left, to see what else I might get out of the fabric.
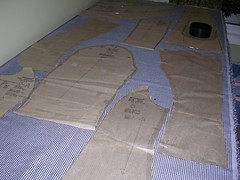
lay-out
There wasn't enough for a full-fledged jacket but I didn't think the fabric was right for something like a shirt. That's when I remembered the little unlined jacket pattern I had made before (Simplicity 4698).
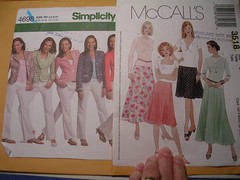
skirt and jacket patterns
If I went with the 3/4 sleeves, I might just have room for all the pieces. As it turned out, I didn't quite, but that's the next story. First, I wanted to get the skirt made so I could start wearing it, even if the (Canadian) Thanksgiving weekend (October 7-9) was delightfully sunny and in the 20s.
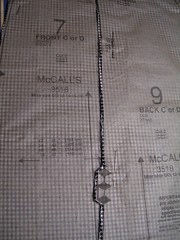
skirt pieces
My biggest problem with this 8 gore skirt pattern is keeping all 8 pieces organized, especially as in this case, when the fabric is identical on the right and wrong sides. I carefully unpinned the pattern pieces from the gores that go in the centre of the front and the back and then I pinned the pieces together so I wouldn't mix them up.

I also had decided this time that I would finish the seams as French seams and not use the flat fell. I thought it would be better for this fabric if I didn't have lines of stitching running down the right side all over the place. With a French seam (or at least my version of it), you first pin the pieces together with the WRONG sides together. Then you sew about a 1/4 inch seam, trim it, iron it and then fold the two pieces now with their RIGHT sides together and sew another 1/4 inch seam. thus enclosing the raw edge completely.
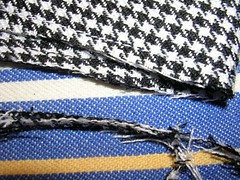
trimming french seam
Here is one seam, with the first line of stitching completed and the raw edge trimmed. You can also see here that I used white thread on the top and black thread on the bobbin, just to try to blend the thread in with the contrasty fabric.
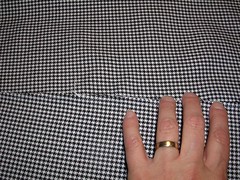
smoothing the raw edge
Once you have stitched the seam once, trimmed the raw edge (but not too closely because it will continue to fray), and ironed it flat, then you have to prepare for sewing the second line of stitching. Before you fold the pieces together, right sides together, along the first stitching line, you need to make sure the threads from the raw edge (which are unravelling already even though you just trimmed them) don't poke through the stitching line (less work trimming them later). I found that I could just smooth the fraying threads along with my hands and then fold the fabric over. On this photo, I am moving my hands from the right side to the left side of the picture, tucking in those loose threads.
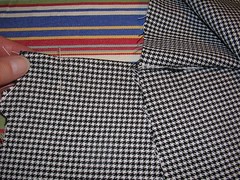
inside the seam
Once I had the fabric folded right sides together, I ironed along the fold and stuck a few pins in to make sure the fabric wouldn't shift as I sewed. This photo shows the pieces already stitched together once and pinned together for the second pass, and I am showing what it looks like inside the fold, with the raw edges of the fabric pieces.
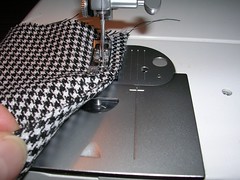
sewing the second line
Now I am sewing the second line of stitching which will encase the raw edges and give a finished look to the inside of the skirt. It will also prevent the seams from coming unravelled which would happen after a few wearings. You could serge the seams of course, if you had a serger which I don't.
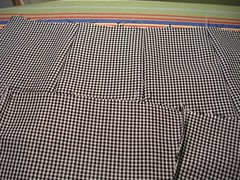
right and wrong sides
Here is what the panels look like sewn together. The right side (or outside) of the skirt is at the top and I have turned up the bottom of the skirt to show the finished, French seams on the wrong side of the skirt.
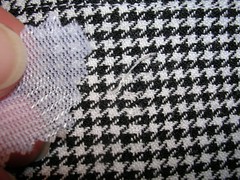
a flaw
I missed a small flaw in the fabric when I was cutting out the pieces and only saw it when I had put the gores together. A couple of threads in the weave had broken but you couldn't really see this on the outside of the skirt.
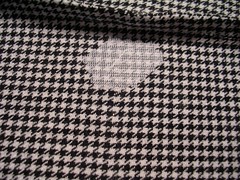
patching the flaw
I decided to use a small piece of iron-on interfacing over the flaw on the inside of the skirt. It will seal the loose threads in place and prevent further damage.

Tuesday, October 03, 2006

You CAN make your own clothes, and even wear them in public! (The title of my book, should I ever find a publisher.)

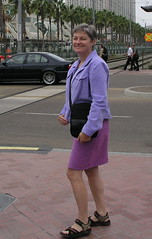
When I went to San Diego, I took clothes that I had made, because they fit and work well together. I took that purple corduroy jacket I just finished too because it was a baby wale (nice and light) and I was going with a blue and purple theme. But I didn't bring the skirt (lined and too warm). Instead I brought a cotton flowered skirt from the same pattern that I get a ton of wear out of. I also brought a short purple cotton skirt in a jean style (front zip and pockets) and the white corduroy jacket I made, also not that long ago (or was it?).
skirt/jacket proportions
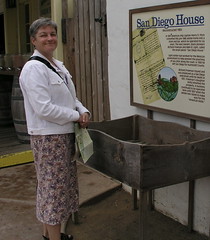
Here I am, squinting into the sun that is just starting to appear through the early haze, wearing the white jacket and the long flowered skirt. My feet are a little cut off, but you can see the proportions pretty well. Maybe it is just me, but even though I am only 5'2" I think this length of skirt works okay on me. Let me put it another way - it had better work because I have a closet full of this skirt!
skirt/jacket proportions 2
And here I am in the purple skirt and cord jacket. I know the knee length skirt works well and my legs are acceptable. But I really get a lot of wear with the longer skirt in every season but Summer. Be kind in your assessment. :)

Sunday, October 01, 2006

Back to Sewing

We're back from San Diego and we've been to the wedding, so now I can post the photos of that gift I made.
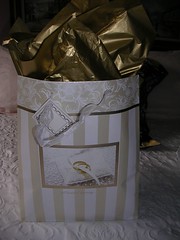
gift wrapped
Thanks to Hallmark, the gift wrap was pretty.
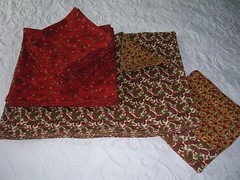
placemats & napkins
I made 8 reversible placemats with coordinating napkins, an additional 12 smaller cocktail napkins and two potholders from the leftovers.
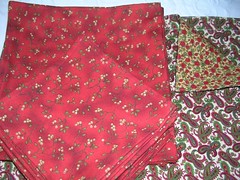
placemats closeup
I didn't quilt the placemats as I often do. Instead, I ironed over the edges and then lined up two fabrics and sewed them around the edges with two rows of topstitching. I had a time choosing the fabrics. I had it in my mind that I would look for blues and greens and large patterns when I got to the store but I couldn't find anything I liked that worked (in my mind). I finally settled on the small prints in the quilting cotton section, in coordinating reds and greens. These were actually in the Christmas section but I didn't choose fabrics with an obvious Christmas motif (holly or trees or stuff) so I am hoping this will work any time of the year. Although of course, it will also work at Christmas!

And the wedding was lovely. They had a Fall theme running throughout, right down to the meal which was beef tenderloin with Fall vegetables. It was so nice that we stayed later than I expected we would and we felt all lovey ourselves. Even after 24 years of marriage, a nice wedding lifts the spirits. Now I'm going to make a simple 8 gore skirt for wearing to school with layers in the cooler weather. I don't even think I'm going to line it. Sometimes I scare myself with my daring.