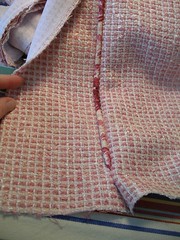
When I sewed (basted) the piping to the jacket, I used a slightly contrasty pink thread in the bobbin so that I might be able to see it and follow that line when I sewed the facing to the jacket. It worked here and there but blended in too much with the fabric to be really useful.
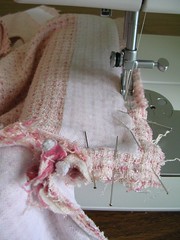
In the end, it didn't really matter because I could following the fat piping cord pretty well with the zipper foot except for one collar corner that I had to unstitch and re-sew. In this shot, I am sewing up the front toward the lapel corner. You might also notice that I have ironed on a but of interfacing to the jacket front (in addition to the facings which is normal). I am anticipating buttonhole issues.
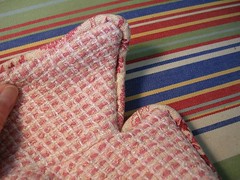
First of all, it looks like a jolly mess at the inside corners, where the lapels meet the collar.
And it IS a mess - you sort of have to feel your way like Yoda. You have to trim some of the excess fabric and piping cord but not TOO much, otherwise the ends will pull out. And don't sew too far into the corners because you could catch more fabric than you want. Better to sew less and then stitch it up by hand when it is turned right-side out.
Here's what the piping looks like down the front. It is turned into the seam allowance 1 and 1/2 inch above the bottom because that is where the hem will be.
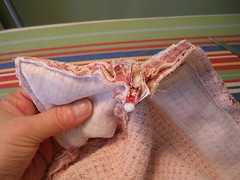
Here's one collar corner turned right side out but not yet pressed. Looks okay but...
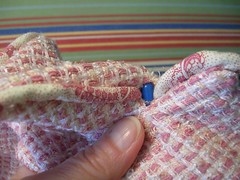
When you poke around in there, it is clear that there is a big gap where I didn't machine sew too closely into the inside corner. That's the blue handle on my seam ripper, showing through the gap.
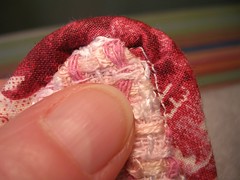
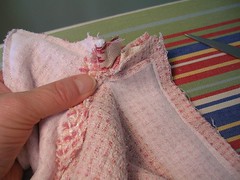
Also, at quite a few places along the piping, you can see some of the basting stitches because I didn't press closely enough to the piping cord as I sewed the true seam. I think I am going to sew by machine, a topstitching type of line down the piping to flatten the fabric and to compensate for missing some of these basting stitches.
6 comments:
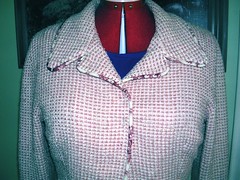
The piping is looking good - it really compliments the fabric.
WOW!! This is "real" sewing!! Your jacket, piping and all look great. You have a wonderful and informative blog.
Hi Julia,
I have been following your projects. Your jacket is comming along beautifully. As a person who's still learning, I appreciate all the detail information you have been providing.
Thanks,
Charlene (PR)
Thanks Vicki, my husband was just asking if maybe I shouldn't have made the piping a solid colour and I said, "no!"
Thanks Dee! It is true, I am no longer a beginner so I have that more advanced ("real"?) perspective. But I still make silly mistakes every now and then!
I'm glad the blog is useful Charlene. May I ask what the "(PR)" means?
I think the piping on your jacket is so beautiful!
Thanks Faye, and welcome to my blog! My husband isn't really convinced about the patterned piping but I think he will be once the pockets are on too. I may even use the piping fabric in working the buttonholes.
Post a Comment