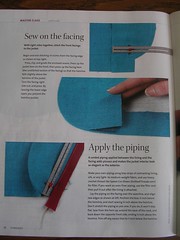
To put piping between the facing and the lining, I am using instructions from the March 2006 Number 123 issue of Threads Magazine (pages 77-80). You can go to www.threadsmagazine.com and look for specific issues but instead of giving you the article, they ask you to buy that issue. As it turns out, it's not too complicated but I had to make modifications and there was some confusion until I actually was turning the fabric in my hands. But I wouldn't have had the idea to do this if it weren't for Threads Magazine.
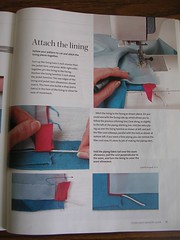
I'm putting these photos here so you can get the idea about how the magazine did the tutorial but you can't read what is written there so I don't think I'm violating copyright.
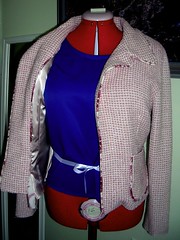
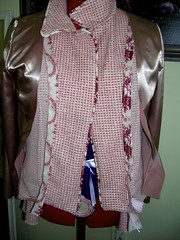
Here's what the jacket looks like at the moment. All the pieces are now together and I have even put the pockets on. I haven't quite finished the internal piping at the bottom but that's because I haven't sewed the hem which has to be done first.
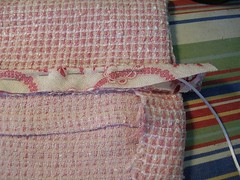
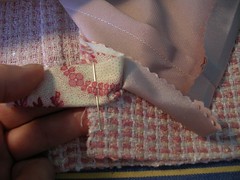
Back to the beginning. First I had to attach the piping to the raw edge of the facing. That was pretty straightforward and I left a fair bit (about 2 inches from near the top of the jacket hem) at the bottom in case I needed it. I am also using a thinner cord for the piping. It is about a third of the thickness of the exterior piping cord.
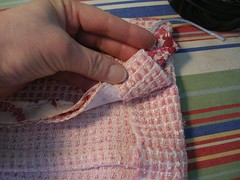
The article suggests leaving the facing free at the bottom by a couple of inches and I have done that. And don't forget that you are only going to sew the piping to the lining and so you will keep the hems free.
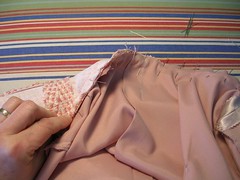
Once I had the piping sewn on to the facing, I draped the jacket over Rose and draped the lining over it too. The lining in the photo just confuses things, sorry. But what I find interesting was how different the piping is, depending on what diagonal I cut it on. In the photo, the right side is dark pink and the left side is totally pale. There is a bit of this unevenness of colour around the collar - one side is slightly darker than the other - but I am glad that this amount of contrast is now on the inside of the jacket. I think I planned it that way. :)
Once the piping was on, I pinned and then sewed the lining to the facing. I had already assembled the lining with the sleeves and everything so it was just a matter of sewing it to the facing which was pretty straightforward.
I didn't sew the lining all the way to the bottom of the hem. In a regular lining, you are supposed to leave the bottom 6 inches free and sew it down later by hand. This is where the modifications and some confusion came in. In the Threads model, there does not appear to be that extra fold of fabric in the lining at the bottom. Because I had not modified my pattern, I still had the fold of fabric (for ease) that most lined jackets have and now I had to figure out what to do with it.
I fiddled around with keeping the fold free and sewing down to where I would be hand stitching the lining to the jacket but then I caught the very bottom of the lining in the machine stitching and realized that it wouldn't work that way and had to rip it out.
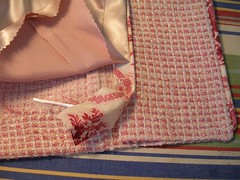
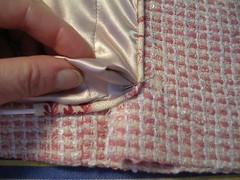
I left the lining sewed down to very near where the lining hem will be, but not to the very bottom. Then, I bent the piping off to the side, along the line of where I will be hand sewing and machine stitched it into place. I like the sturdiness of machine stitching, especially on loosely woven fabrics, and I wanted to also make sure the piping cord was well anchored by stitching.
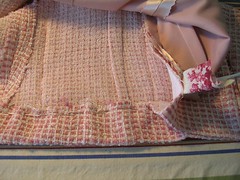
Here, I've pinned the lining to where I will be sewing it and you can see how the fold will work now (at least, I can). This is where I realized that I cannot finish it yet until I have sewing the jacket hem, which has to be done by hand.
So the bottom edge of the piping is on hold while I finish the jacket hem. And then I will also show what the Threads magazine suggested for the tiny raw edge of the hem. Assuming it all falls into place!
5 comments:
Geez...I was JUST hunting through my books today for piping tips, with decent pics!! Sheesh! lol
Hey M! Welcome to my blog. A few entries back I also posted about making the bias tape. In case that might be useful too. Good luck!
Oh my...lovely!
Thanks Sarah! I'm still working on it!
Very nice!!
Just so you know...you've been awarded the 'Excellent Blog' award! Thanks for all the detailed shots!
Post a Comment