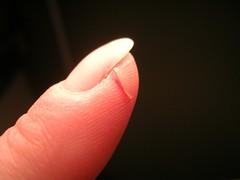
Plus I found myself slightly handicapped by a slice on my left index finger, managed whilst I was cutting a tomato one day. You don't realize how much you use that finger nor how many times thread has a way of wrapping itself around a finger until it keeps getting in the cut. Ouch! Anyway, it has healed over more since yesterday, when I took the picture so I am practically ignoring it now.
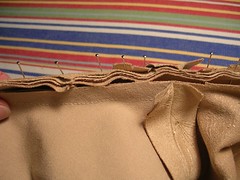
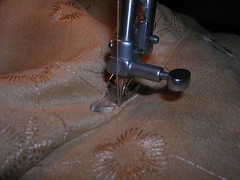
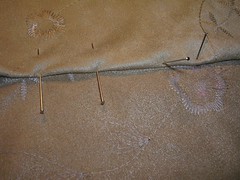
I left off work on the jacket just as I was about to put the collar on. With the collar, you also attach the front facing and yoke facing. Lots of layers! To stretch the neck edge to fit the collar, I made tiny cuts in the neck edge (and the facing edge, as it mirrors the jacket edge). Here, you are looking at the facing (wrong side) just before I clipped its edge so I could attach it to the jacket and collar which I already had pinned together. I do it all at once, rather than basting the jacket to the collar and then sewing the yoke to the rest of it.
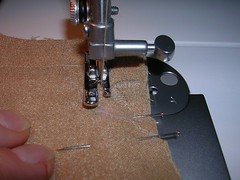
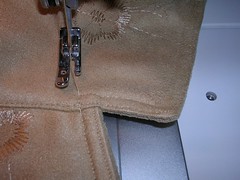
I took a photo of the corner here even though you can't see what I am about to refer to. When I get to a corner, I change the stitch length on my machine to small stitches and sew about 1/2 inch on either side of the exact corner turn with extra small stitches. In this way, when I trim the corner tightly to the stitching to reduce bulk, there is less chance of the fabric fraying loose.
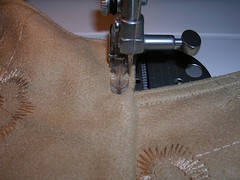
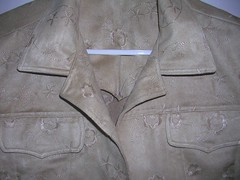
Here I am, already on the outside, topstitching the corner. When I was done sewing the collar on, I trimmed the seams and then spent quite a while turning the garment right side out. I had to press both the inside and outside of the yoke and then pound all those layers with my clapper. This is the first line of topstitching, close to the folded edge. I have turned the corner and am coming up on where the collar joins the jacket.
To make the junction of where the collar meets the jacket as flat as possible, I continued with my first line of topstitching along the neck edge. All the while I am sewing (and it is a very slow process), I am feeling underneath for the yoke facing, to make sure it is stretched away from the stitching line. On the top where I can see, I sew about two inches at a time before resting the needle in the fabric and gently pulling the fabric taut away from the stitching line. In this photo, you can see where I have just stitched, behind the needle. In front of the needle, the fabric has not been pulled flat yet.
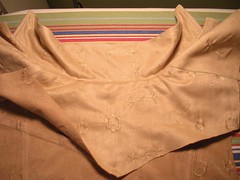
Here I have just finished the second line of topstitching up the left front, making the corner at the collar and backstitching for an anchor. I won't make two lines of topstitching around the neck edge.
I hung the jacket up at this point so I could admire how it was looking so far. You can see that I have not yet sewed down the yoke facing on the inside.
To get the yoke facing so it lies nice and flat, you have to lay the jacket out flat on the ironing board and smooth everything down.
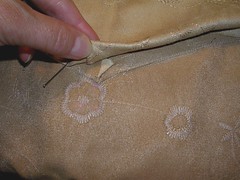
Then I start folding under the seam allowance and gradually pinning it over the stitching line. All that pink chalk in the photo at the point is because I marked the wrong dot and had to mark it twice. It'll disappear with a damp cloth.
On the outside yoke point, when I sewed it to the jacket back, I folded the point one way. On the inside, I am folding the point the other way to balance the bulk. I have never noticed any lumps in all the jackets I have made so I am not trimming any of this seam allowance away.
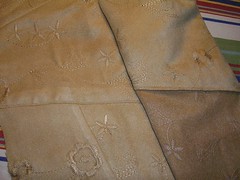
In this photo, I have finished the first line of topstitching, as well as I have sewed the yoke to the jacket around the shoulders. I have folded the right hand side of the yoke so you can see the inside and the outside. I stitched close to the seam line on the outside but on the inside, the stitching line is farther away from the folded edge. I don't want to make the mistake of not catching in any of the yoke because I am sewing from the outside, so I extend the fold a little far over the stitching line just to be on the safe side. It is on the inside of the jacket after all and hardly anyone will have the chance to see it. And even if they do, I'm betting no one notices. After I sewed the first line, I sewed a second line of topstitching parallel to the first along the bottom edge of the yoke.
Now for the sleeves.
10 comments:
Nasty cut. I have felt your pain.
Jacket is really looking good.
Linda, what I hated was how the thread felt when it slid right into the open wound! Eew.
eeeek! on the finger, it looks pretty nasty. the jacket looks great despite your handicap.
Wow, I love the fabric, it looks great so far!
Wow, that is looking great! I have a sewing blog too, I have never thought about posting pictures of the process, I just post pictures when they are done.
Great jacket - but that you made it with a cut finger is SO TOUGH! Not only do you have a professional finish - but you didn't bleed on it.
Jen, Amie and Kate! Three new visitors to my blog - welcome. And Miriam, I just thought the close up of the cut looked gross enough to post for a little sympathy. It has healed fast - I injure easily but heal fast, so it's a good trade-off. I am a bit delayed on the jacket now for other reasons but will get back to it shortly.
What kind of camera do you have that takes such wonderful close-up shots?
Cut finger, how is it that little skin tab is always getting caught on the fabric and thread???? and it hurts all over again!
Linda T.
Linda, you're right about that stupid tab of skin getting caught! Fortunately, I am all healed now.
My camera is a little Nikon Coolpix and for all its tiny size, packs a lot in it. It has a close-up setting on it and I use that for all my sewing shots. Peter bought it for himself, for his birthday, a couple of years ago but as soon as I discovered how easy and wonderful it was, I took it for myself. If anyone asks me what digital camera to buy, I recommend the Coolpix because you can't get anything better for the money. AND it uses double A batteries so you can get them anywhere if you run out. Bonus!
Sharon, I have stabbed myself with pins too many times to remember - and bled on my fabric! I blot the blood with water and a facecloth right away and it usually comes out.
Lapin, I am sure my French isn't as good as your English! Bienvenue a ma blog. Il y'a beaucoup d'information ici.
Post a Comment