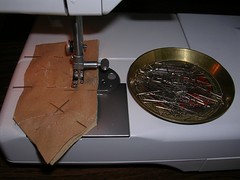
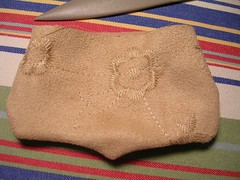
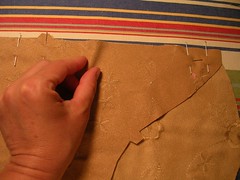
Here I am, sewing one of the tabs that go on the bottom band. I decided to sew the two tab sides together, right sides together, with the interfacing also pinned on to the wrong side of one tab piece, rather than sewing the interfacing first and then sewing the tab sides together. It saves one tiny step. This was at the end of sewing all the interfacing on all the other pieces and in the brass dish are all the pins I pulled out as I sewed.
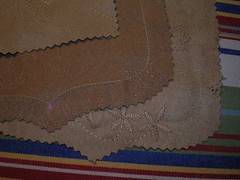
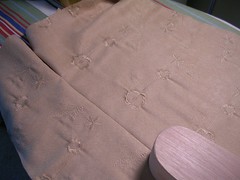
I usually zigzag stitch around the "pocket bag" (that's what they call it on the pattern instructions) to keep it from fraying. However, I noticed that this fabric doesn't want to fray much. Plus I had pinked the raw edges so I decided to leave it alone. Instead, I sewed a line around where I am going to sew the bag to the jacket, so I will be able to make the nice curving shape better than by guessing, as I usually do.
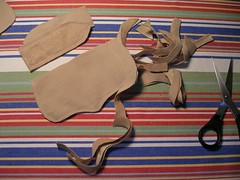
I sewed the interfacing to the pocket flaps in the same way as I did the tabs, all in one go. Now I am trimming the seam allowances off in preparation for turning them right side out.
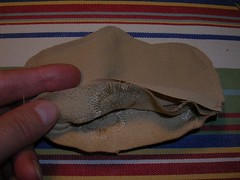
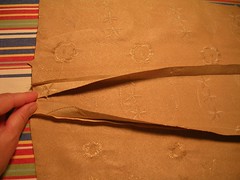
Here I am showing what the pocket flap looks like, peeking inside through the top opening. You can see the two suede layers plus the sewed-in interfacing.
This is the pocket flap turned right side out but before I pressed it.
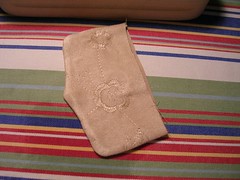
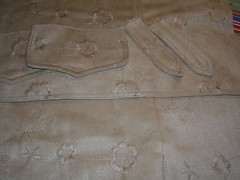
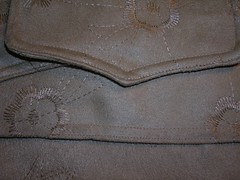
And here it is pressed and pounded with my clapper. This fabric doesn't want to crease so I have to use the clapper with more vigour but I also have to be careful because there is a nap and I want to press down the nap.
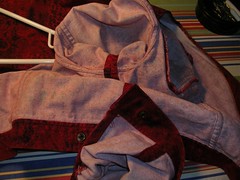
This is the first sleeve seam and I am pressing from the top to the bottom so I go with the nap.
I find it kind of aggravating that the colour changes so much from one shot to the next but seem unable to do anything about it. Oh well. Here I have decided to hold down the flat fell fold with pins, so I can get the iron in there and follow with the clapper and get that seam allowance pressed really tight and flat. If you don't have a third hand, pins work pretty well.
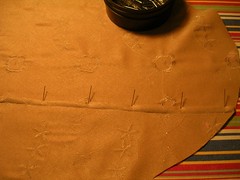
Before I got to the point where I was pressing that sleeve, I had to make the seam first. Here I am showing the ease in the one piece of the two-piece sleeve. I just stick a pin in one end of the seam and gently stretch and use more pins than usual, rather than basting. As I got ready to sew this sleeve seam however, I suddenly realized that I might want to sew the other sleeve seam first.
So I got out another of my jackets from this pattern and looked at how I had done the underarm seam. I want to sew the sleeve around the armscye first so it is an easier flat fell and I didn't want to sew up the wrong sleeve seam. I found out that the underarm seam is the one that doesn't have the vent in it so I was good to go.
I sewed some of the vertical body seams and here is the front, made out of three pieces. I am going to fold the seams away from the small centre piece and I have trimmed the seam allowances accordingly.
Because I had switched to my zipper foot to do the flat felling, I also did all the top stitching that was available - collar, tabs and flaps.
I always feel more efficient when I do similar steps all together, rather than in the order that the pattern instructions tell you. But I think you can only do this (with confidence) after you have had some experience sewing.
4 comments:
Julie, do you have any problems with the material under your presser foot? Does it slide or is the thickness causing you to do anything different? I noticed you said you used your zipper foot, was this to compensate for the thickness?
Cindi, one of the several things I really like about the Singer I got a few years ago is that it handles fabric thickness like nobody's business. I watched the guy do a demo sewing on a piece of leather folded I think four times over and was so impressed! I haven't sewed anything that thick but I have sewed through at least six layers of fairly heavy denim without a skip or a problem. Part of the trick to sewing thick layers is the pressure exerted by the presser foot. If you can adjust yours and are having problems, I would experiment with that before I went to a thread tension adjustment.
I use the zipper foot to get really close to the folded edge for topstitching or that flat fell finish I love so much. If I use the zipper foot for regular sewing, I find it doesn't feed the fabric as well as the regular straight or zigzag feet, because it presses down only on one side on the feed dogs. I had a Kenmore I used for 20 years and it never was as finely tuned as this one for noticing what fabric was under its presser foot. But I also think presser foot pressure is key.
This fabric is pretty good to sew with - not like some synthetics that slide and bunch and drive you crazy. I notice that when the sueded side or the right side is facing down, it feels like it is dragging a little more than the smoother or wrong side but it doesn't hinder the sewing.
Hope this helps!
Julia,
The jacket is looking fabulous! I love all the detail pics.
Thanks Debbie! I wanted to blog in detail about this jacket, as I was making it for someone else. Then, if my niece is iinterested, she can see how I made it for her and how long it took. I am hoping her friends will compliment her on it without knowing first that I made it and then she can tell them it is a one-of-a-kind, made-just-for-her jacket!
Post a Comment