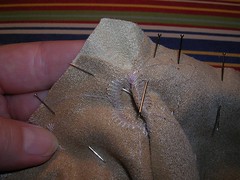
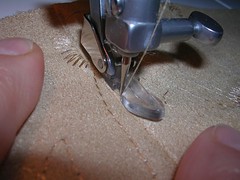
if you really look closely (i.e., pump the photo up on Flickr), you can see the pink chalk mark on the jacket centre back, where the point of the yoke on the seam allowance meets the clipped edge of the centre back. This is how you sew a v-shaped piece (the yoke) to its corresponding v-shaped mate. At the very centre point, you put the needle down through the fabric, lift the presser foot and turn the piece 90 degrees. Then put the presser foot down and sew along the second side.
On to the front chest pockets. This pattern calls for facing the edge of the pocket. I suppose you could roll the edge in some way and facing does create more bulk but I do it the way they suggest.
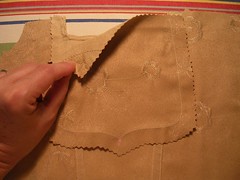
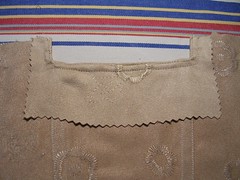
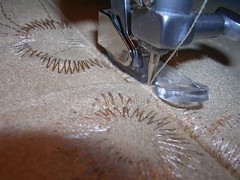
Once the pocket edge is finished, you apply the pocket bag to the wrong side of the front. This is where my stitching around the edge is going to pay off.
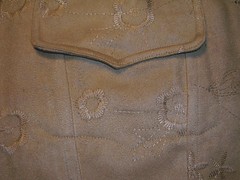
Now I have also attached the pocket flap and you can see how the shaped line of stitching around the pocket bag matches the shape of the flap on the outside.
Next come the top parts of the front pieces, above the pocket line. I have attached those pieces and am topstitching. Here I am using the zipper foot and stretching the fabric away to either side so I can get a nice tight line of stitching close to the fold.
As my needle plunged down through the edge of the pocket flap, I paused and counted that I was sewing through about eleven layers of fabric at that point! The pocket flap itself is six layers - two fabric and one interfacing, doubled because of the seam. Then there is the upper part, the lower part, the pocket bag and maybe two layers of the pocket facing.
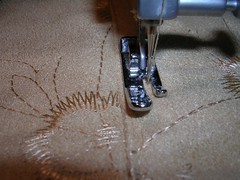
I switched presser feet to do the second row of topstitching because I could then use the width of my straight-stitching foot to gauge the width between rows of stitching.
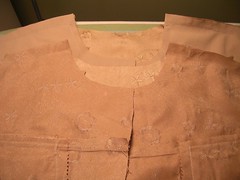
I have sewn the jacket fronts and back together at the shoulders, along with the facing fronts and pack. These seams I will merely press open, as they are going to be hidden inside the facing. Plus, if I made flat fells, it would just add bulk where I don't need bulk. Next - the collar. I seem to have, even after all these years, a mental block about attaching collars. I think I had a terrible time with some of my first-ever collars and I always think of them as the "hard part", even though I now know better.
4 comments:
You are providing great information. This jacket is really shaping up. Looking good.
Thanks for the encouragement Linda! I know people are reading the blog but it's nice to get a comment. :)
Wow, I can't believe you were sewing through 11 layers. You make it look so easy! Thanks for the great pictures.
Cindi, it's my machine that makes it easy! Thanks. :)
Post a Comment