
First, I have to choose buttons from my stash. Since this was fabric on sale and I'm not being fussy, I decided to use up 6 of the regular shirt buttons that I got that were slightly different from the other shirt buttons I often use. That left me one short for the loop at the neck, so I looked at the leftovers in my button box. I ended up choosing the red one with a shank, because there IS red in the shirt and the shank suits the loop best.
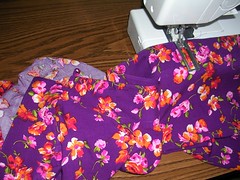
Then I marked where I wanted the buttonholes to go with pins and snapped the automatic buttonholer on the presser foot thingy.
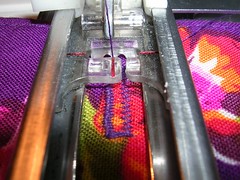
Here's a close-up of one of the buttonholes. You can see that the right-hand side is much less tightly stitched than the left. There IS an adjustment lever on the machine that is supposed to correct that but I have never been able to make it work. Well -- maybe I haven't tried very hard. Okay, okay, I'll work on it.
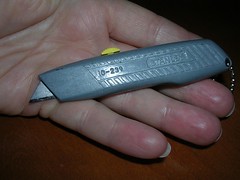
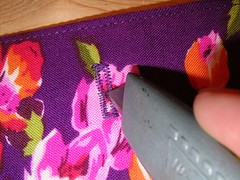
Here's where the tools I referred to earlier come in. I use this tiny utility knife to cut open the fabric, inside the encircling buttonhole stitching. I forget what I used to use before Peter gave me this - I think I just stuck scissors in through the fabric fibres and hoped for the best.
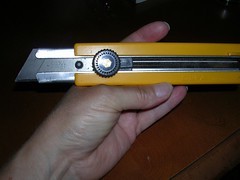
"Now that's a knife!" This is a pro-quality utility knife and not only is it too big for sewing, it is total overkill. But it's great for renovations!
Using a bit of softwood (like pine) to cut into, I stick the point of the knife between the rows of stitching and make a small cut. Sometimes, I let the rows of stitching get too close to each other and then I end up cutting the stitching which is very annoying and then I have to fix it.
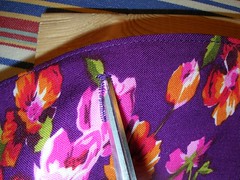
You can cut the whole hole with the knife but I prefer the control I have using small and very sharp scissors. Cut up to the ends of the hole so the button will fit through.
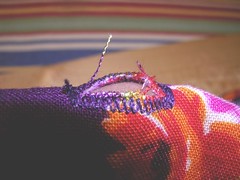
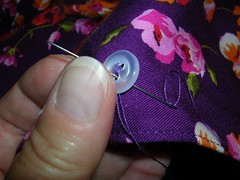
I then poke my finger into the hole to bend it open and expose loose threads that will get caught on the button or pulled. I trim those off. (This photo is the wrong side of the buttonhole, on the facing.)
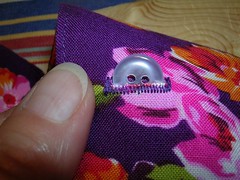
And the button fits!
Next, place the shirt on the ironing board and put the buttonhole side over where the buttons will go and mark the button placement with pins.
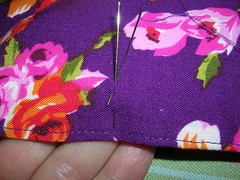
After I cut thread to sew the buttons on, I measured it and realized that I use a whole metre of thread, doubled, so it is 18 inches long with a knot in it. Put the needle in where the pin marks the spot for the button.
Put the needle-pulling-thread (sing with me now!) through the holes in the button and then back through the fabric where the first stitch was made.
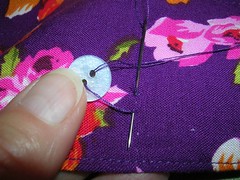
Now the button is snug on the fabric. Stick the needle through the first hole and by bending the fabric and tilting the button, you can get the needle through the fabric under the button and out where the second hole is.
Now you can put the needle up through that second hole in the button and then down through the first hole, again tilting the fabric as before. In this way, you get consistent stitches on the wrong side (the facing side). I used to stab up and down blindly through the holes in the buttons and my stitches on the wrong side were all over the place. This way is neater.
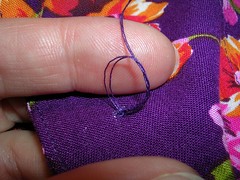
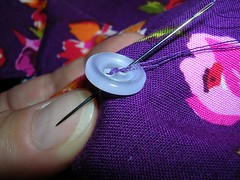
After about 4 or 5 of these stitches, pull the thread out on the facing side and take a stitch through the stitches you already made, making a loop. Thread the needle through that loop twice and pull tight, making a good knot. I also then take a small stitch in the fabric to bury the tail of the thread before cutting it off flat against the fabric.

Finished neck detail.
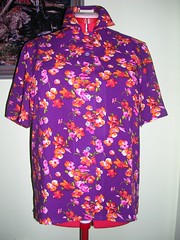
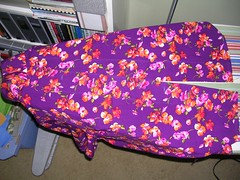
Finished shirt on Rose.
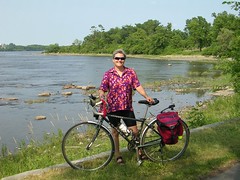
Shirt in action! I rode out to meet my husband coming home from work yesterday and wore the shirt for the first time. It was hot and humid and the reason the hem is all crooked is because the back of the shirt is wet with sweat and hanging lower than the front, plus I have pulled the collar away from the back of my neck for air.
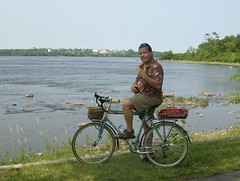
Peter is saying, "shh. There are ducklings down here!"
He is also wearing one of my shirts. :)
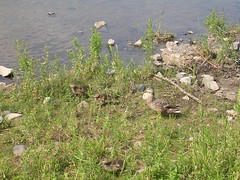
And there are the ducks! Mom and three medium sized babies. Sweet.
6 comments:
Hi:
I followed your link from Granny J's blog and to my surprise, I see you are a sewer. So am I! It's great to find a fellow seamstress. Love your pics of work in progress.
Welcome quilteddogs! I have seen your name on some of GrannyJ's comments. Not only do we have sewing in common, I had a dog blog of my own when I was raising Rockwell for Guide Dogs for the Blind. But the really scary part is that I have a law degree (two actually) and practised for 9 long years before it drove me crazy. What do you do in law?
Hi:
I'm a paralegal (not sure if you have those in Canada. Actually, my dog blog has turned in to a whole bunch of different things.
Oh yes, paralegals are a great asset to the legal community and we have lots of them here. But to have your own office - you must be special! :)
I think blogs morph all the time. I have never settled on what my "Guru" blog is supposed to be.
OMG! I bought the same fabric as you made your shirt from at Fabricland, an eternity ago and made a bathrobe from it! How funny is that?!?
Linda, even though the fabric is inexpensive and there are lots of stores, I have only ever seen one woman wearing something from fabric I recognize! Where does it all go? :)
Post a Comment