When my Mum was here on the weekend, she drove me to FabricLand where I got the snaps for the jacket I just finished. While we were there, we browsed through the sale tables. Every piece that she remarked that she liked, I asked what she might make with it and she replied, “a dressing gown perhaps.” Every piece I picked up, she asked what I was thinking of making and I said, “a skirt.” It got silly when we were holding up fabric entirely unsuitable for either but we had fun.
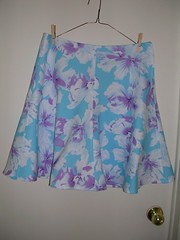
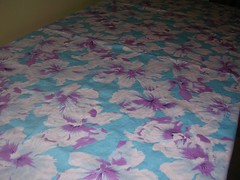
I ended up getting a remnant of cotton for a skirt. It has a nice waffle weave finish to it and I think the texture gives it a substance and three dimensionality that works for a skirt where you don’t bother with lining or slips. Yes, it’s for Summer! Maybe I am torturing myself, thinking of Summer all the time but I am enjoying the look of the fabric and imagining when it will be hot enough for bare legs. Here is the fabric on the table. You can see the weave in the third shot below.
I am using the flippy skirt pattern (New Look 6462) I used for the black with bright flowers skirt I made second to last. Again, I had to lay each pattern piece out twice, right side up and wrong side up, to get all four panels cut out of the 1.7 metres I bought. Once you get the hang of it, it’s not hard at all.

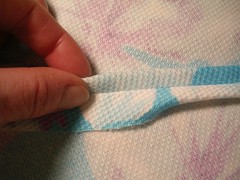
I decided to do the modified flat fell on the seams of this skirt. Here I am showing how I curl the edge of the seam allowance over in preparation for ironing it flat before sewing.
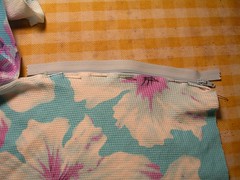
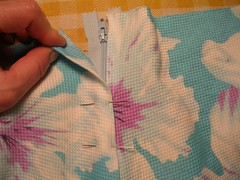
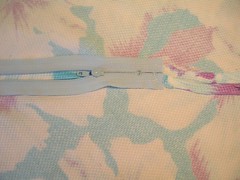
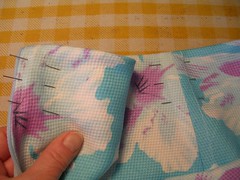
The zipper is on the side and the front fold-over or flap is larger than the one on the back side. Here, I have sewn the seam up to the bottom of the zipper and I have pinned the 1/2 inch folded seam allowance to the zipper tape. Note how the fabric has stretched and curved because it is cut on the bias.
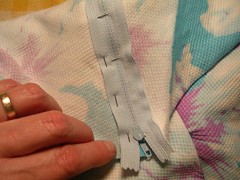
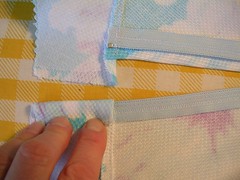
Once I have the zipper tape sewed to the 1/2 inch seam allowance, I take the other side (folded to the full 5/8 allowance) and lay it over top of the zipper, overlapping a little on to the other side. Here, I am putting pins in perpendicularly to hold the fold in the correct spot.
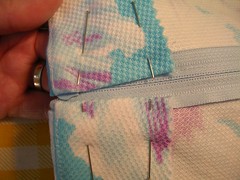
Next, I put pins in running down the length of where I will be sewing. The points are facing toward the top and the heads are where I can pull them out as I sew toward them. I am also feeling underneath with my fingers to make sure I am putting the pins in and catching the zipper tape on the wrong side.
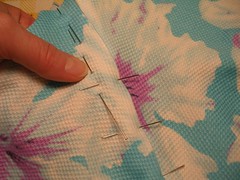
I have turned the skirt over to show how the pins are running on the wrong side, catching in the zipper tape.
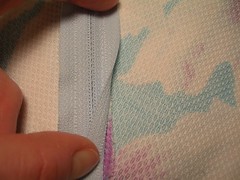
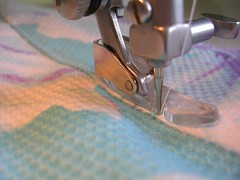
Here, you can see that I have made sure the raw edge of the seam allowance is contained in the wrong side of the garment. I have sewed the zipper from the right side of the skirt and I folded enough of the seam allowance under to ensure that I ended up sewing through two layers of the fabric and the zipper tape.
Once I was done including finishing the seam, I looked at the whole thing from the inside and saw how crooked everything had become. However, it really doesn’t show on the outside and that’s more of what matters than the inside.
After I finished all the seams, I sewed the facings on the top and then made sure they would lie flat by understitching. You press the facing and the seam allowance up, toward the facing and the top of the skirt. Then you stitch through all the layers (skirt, skirt seam allowance, facing, facing seam allowance) on the side of the facing.
Once the facings are on, pressed and understitched, you fold over the ends at the zipper.
In my case, I had to fold the one side at the bottom of the photo (the right side when the skirt is on) a little more than the other side, to make sure the top edges were even.
With the ends folded and pinned, I folded down the facing at the other seams on the skirt (the other side and the front and back seams) and pinned them down. Then I sewed along the seam lines and the stitching lines for the zipper, pressed the facing one more time and I was done. Except of course, I hemmed the skirt when no one was looking. I just ironed a double folded narrow hem and sewed it down with a zipper foot - too easy. Now it has to get warm so I can wear it. With my new jean jacket!
7 comments:
Aren't Mum's fun. Too bad you didn't have a sister who had time to do that with you too! ;)
I think it's great that you have all those people reading this blog. It really is a quality resource.
Keep up the good work!
i'm so glad i found your blog... i just started to learn how to sew! thanks for all the informative photos and details!
Hey Norah! Yes, it would be fun to go shopping with a sister. Or a niece perhaps. Should she be reading comments - let's go! I am already imagining what that jean jacket is going to look like. Fun stuff.
Welcome to my blog, Blossom! I hope it may be useful. Feel free to ask specific questions too.
i love that you include your mistakes, with pictures for those also. that is what makes your professional work so approachable to me. what are you making next?
Miriam, I think it's important to include mistakes, especially if you can fix them. I love the sewing books that are out there for inspiration but they aren't entirely practical. I think you could drive yourself batty trying to make a perfect garment, when a slightly less perfect one will do just fine. Anyway, in spite of what I tell my husband, I am not perfect either but I am just fine, so if that's good enough for me, it's good enough for a skirt!
You can do it Nana! Feel free to ask specific questions too.
Post a Comment