Here I am sewing down the flat fell around the shoulder.
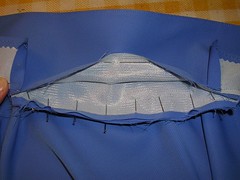
Next, I put the collar and front facings on. When pinning the collar to the shirt neck edge, you often need to make tiny cuts in the neck edge to make sure it stretches out to fit the collar without anything buckling or folding over into wrinkles. I put a ruler in the photo to show how small the cuts are.
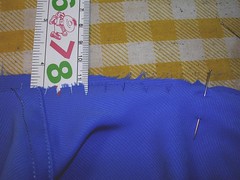
The pattern instructions say to baste the collar on first, before attaching the facings but I do it all in one go. You can see I have made those tiny cuts to the facing neck edge as well, to stretch it out too.
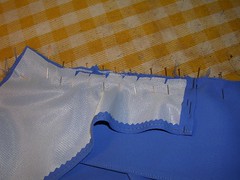
With the facings sewed on up to where they stop at the shoulder seams, the next step is to sew the collar to the shirt in between the facings. You can see that I have ironed interfacing on to both sides of the collar, to give it more body. In the photo, I have pinned the collar to the shirt neck edge and I have pinned the “facing” part of the collar (the part that gets folded down over the seam line) up and out of the way.
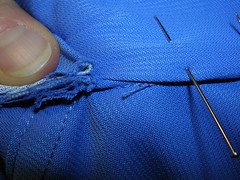
Here is a close up of where everything meets at the shoulder seam. My thumb is holding the front facing up so you can see under it and the collar “facing” has been folded under and pinned over the seam line. You have to clip the seam allowances after they have been trimmed, right at the point where they have to be tucked under the collar facing. To the left of that point, the seam allowances point in the opposite direction and lie hidden under the front facing.
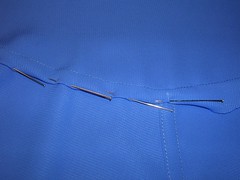
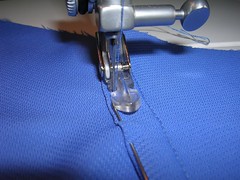
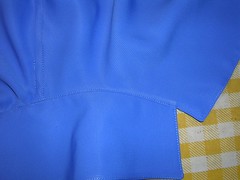
In the next photo, I have finished all the topstitching around the neck and down the front. Rather than hand stitch the facings down, I use the machine and very carefully, using a zipper foot, stitch along the seam lines on the outside. You might want to click on this photo to view the large size at Flickr.
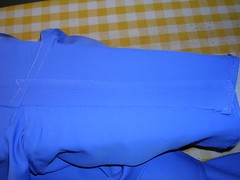
Then I stitch the shirt together under the arms and do a modified flat fell on those seams. The next photo shows one half of the seam allowance has been folded and pressed under, in preparation for sewing.
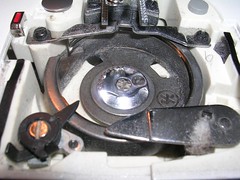
As I was sewing this shirt and top, I found that my thread broke more often than usual (for me) and I saw I was pulling up lint and things occasionally. When I was finished with the hems, I opened the machine up to clean it out. In the next photo, I have removed the actually bobbin case and you are looking into the bobbin compartment, full of lint.
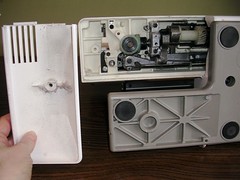
After brushing out that part, I flipped the machine on its side and removed the bottom cover. I’m holding the cover in my left hand.
Here’s a close up of the lint.

I’ve brushed it all away and I am now ready for my next project.
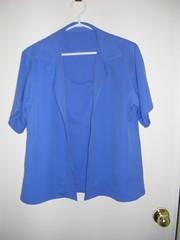
Here is the (almost) finished shirt hanging over the top. I didn’t have any blue buttons so they will have to wait until I have bike to FabricLand, which should be soon as Spring is here. Peter has to pump up my bike tyres first.
3 comments:
hi there! i clicked in from the creative fashion sewing net ring :) i love your very pro sewing blog!
Hi Nico! Welcome to my blog. I made a batch of bags to give away one Christmas but I didn't think about making them to sell - it took too long to make them. But I see you make very cute bags and other things - good for you! I think if I made a whole lot of something I could make them faster. I'm impressed with the professional quality of your stuff. It inspires me.
Hi Sharon, yes I know 'bents' are usually quite expensive, but I hoped you might find an inexpensive one. Perhaps a used bike? It's all supply and demand. I wish you luck!
Post a Comment