So. Going through the lightweight fabrics in my stash, I ran across this piece of rayon. I had made it into a cute dress (using Vogue pattern 7889) with a full skirt and a pleated midriff band. I have got a lot of wear out of the dress and really like the fabric. This remnant was a little over a meter (yard) long but it was also about 150 cm (60 inches) wide so I was able to get a sleeveless blouse cut out of it.
I’m using McCall’s pattern 3622. It’s just like some of my other blouse patterns but this one uses bias bands instead of the larger facings around the armholes. Facings are a bit of a pain to wear because they tend to fold out and stick out around the arms. I sew them down along the shoulder and underarm seams but you still have to be careful putting the blouse on. Once it’s on, they stay in their place. Anyway, I decided to go with the bias bands for this one.
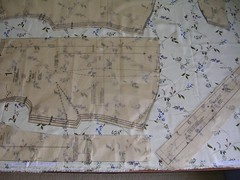
Here is how I mark things like darts on the fabric. In this case, I have the wrong sides of the fabric folded in and lying next to each other, with the right side on the outside. When you put a pin in where there is a dot you want to mark, and then you pull the fabric piece apart, you are looking at the wrong side of the fabric and you can use your chalk with abandon to mark dots and all the marks will be on the inside when you are done.
In the photo, I have put pins in from the outside, through the paper pattern piece which is still attached to the fabric. I have marked one side of the long vertical dart down the front and have taken that line of pins out and you can see the pale blue chalk marks where the pins were (you might have to go to Flick by clicking on the photo and going to the large size in order to see detail, which of course, you can do with all the photos).
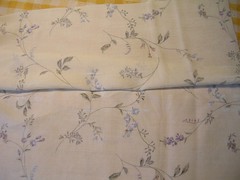
In the next photo, I have left a pin in and I am spreading the fabric apart so you can see how I drag the chalk across the bump that the pin makes in order to get a substantial mark on the fabric. This means that I am going to get almost identical marks on the mirror image pieces of fabric and so the two front darts will end up in the same location on the two front sections of the blouse. However, on one piece, the marks will show where the middle piece of the pin was and on the other piece, the chalk will show up on the ends of the pin. Doing it this way also shows you the linear direction of the dart.
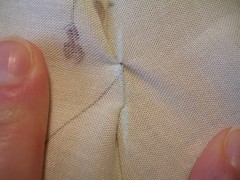
Next, I pin the dart, using the markings I made with chalk as a guide for both location and direction. Here, I’ve put pins in down the length of the dart. I can reposition them perpendicularly to the dart when I want to sew it or I can just remove then as I sew. After I have folded the fabric roughly where I think the dart will go, I stick a pin into the fabric where the chalk mark is. Then I turn it over and see if the pin is going through the chalk marks on the opposite side. In the photo, I have turned the bottom of the dart over to show how the pins and markings look on both sides.
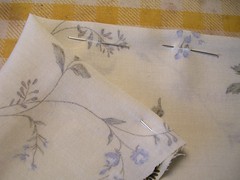
I have a mental block about doing armholes. There are people who can just cut a long strip of bias fabric and make it work around the armscye. I feel like I have to have the right size pattern piece, otherwise it won’t work. That’s why I am using this pattern for a sleeveless blouse - because it comes with the right sized pattern piece for the bias. I am also following the instructions that call for sewing up the underarm seam first and then applying the bias. In the next photo, I have started to pin the bias onto the armscye. You can see that I have pinned on one side, from the notch to the underarm seam. On the left side, I have put a pin in at the notch and there appears to be excess fabric in the piece of bias “facing”. This all fits into the armscye as you pin and slightly stretch the body of the blouse to make it fit, as I have already done on the right side.
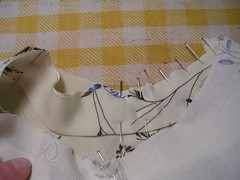
Now I am sewing the band onto the armscye. You can turn the garment the other way out and sew around the outside. I have decided to sew around the inside of the circle. I don’t think it makes any difference - it’s more a matter of preference.
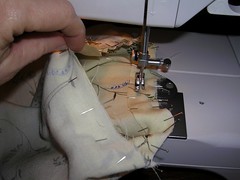
In the next photo, I have laid both armholes out so you can see that the top-most one has been trimmed and the bottom one is not yet trimmed (you can still see the notches). After trimming the seam allowance to narrower than the bias tape that will be folded over, then you iron the bias tape, first out flat and then folded over the raw seam allowance. Once it has been ironed into its final position, you sew the bias fabric down to the armscye, thus finishing the armhole.
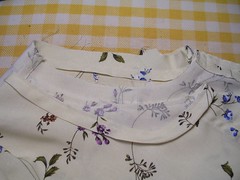
I often find that the front facings also fold outwards so I have recently taken to sewing them down as well. I laid the mostly finished blouse out on the ironing board so it was nice and flat. Then I pinned the front facing down and sewed a straight line from collar to hem. I didn’t sew around the shape of the facing. I wanted it to look more like a front band than a facing.
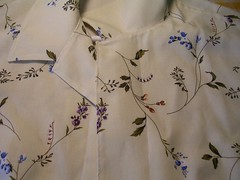
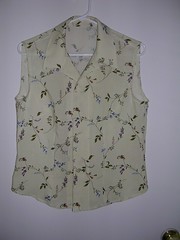
Finally, again except for the buttons, here is the finished blouse. I am just going to use plain old shirt buttons again on this one.
4 comments:
I really like your blog and the clear directions and photos you present. Yes, it maybe cold in Ottawa, but it is also cold here along Lake Erie.
Please tell me about the bias bands. Was this part of the McCall's pattern that you used or do you do this every time?
Hi Lois, welcome to my blog. The bias bands were pattern pieces in the McCall's pattern. I go for pattern pieces because I don't know how to make my own patterns and I am afraid of getting the length wrong. If the bias band is too long, I fear the armhole will look stretched out. Maybe I should just experiment but for now, I'm sticking with patterns.
In my next blog entry, I am using another pattern with bias bands. Stay tuned.
THANK YOU!!!!!!! Lois
Post a Comment