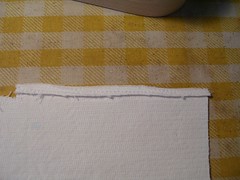
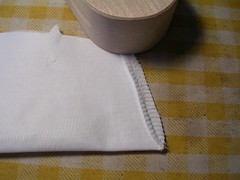
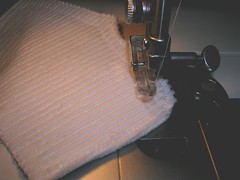
First, I completed the sleeve vent finishing. I had zigzagged the raw edge last time. This time, I ironed over a tiny fold so that the zigzag stitch would be on the underside of the vent edge and sewed it down. When you are wearing the jacket, you can’t see any of this which may be why the instructions don’t call for it. But I like to know that most of the inside of my garment is finished so I don’t get any raveling later or if it DOES ravel, it won’t ravel right into the structural stitching of the garment. In this photo, I have ironed the edge and am about to stitch it.
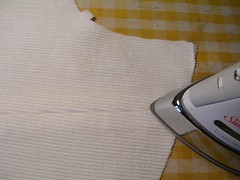
Last time, I had pinned several of the seams together and so I sewed them all, including the ends of the collar, the tabs and the pocket flaps. When I ironed the seams open on the body of the jacket, I made sure to iron down or with the nap, from the top of the piece to its bottom. In this photo, the iron is poised at the top of the back on the outside and I will iron down (from right to left in the picture).
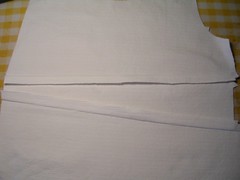
Because I am making flat felled seams, there is a lot of ironing. First on the inside to open the seam up, then on the outside, then trim one side of the seam allowance on the inside and iron the untrimmed side over, both from the inside and the outside. Whew. Finally, iron the flat fell down. In the next photo, I am showing how I have chosen to fall the seams over toward the middle piece in the three pieces that comprise each front of the jacket. The top is at the right side of the photo and the untrimmed seam allowances have been pressed toward the small, centre piece.
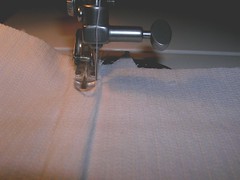
Now I will fold each seam allowance under and then sew it down. In the next photo, I have started sewing down the flat fell from the top of the jacket front, so that I sew WITH the nap. I am sewing with the wrong or inside up but I am still concerned about the nap.
Now, for pieces that you have to sew AROUND like pocket flaps, you just have to sew and not worry about the nap. The instructions call for making a double line of topstitching on the collar, flaps and tabs before you sew them to the jacket, so that is what I have done. First I turn them all right side out, after trimming the excess seam allowances. The collar is a big enough piece that I can press open the end seams a little before I turn it.
The tabs are a jolly pain to turn because they are so narrow. I spent several minutes pulling them right side out bit by bit. The pocket flaps are easier but you still have to work at getting the outside or right side of the flap so that the underside doesn’t roll out and show.
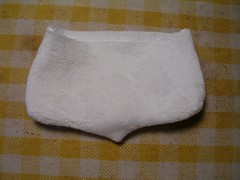
After I’ve turned them right side out, I put the underside of the flap facing up on my ironing board and I work at the edge with my fingers. I roll the edge so that the seam is flat and then I roll the underside (the damask) out to the edge but leave a tiny bit of the upperside or the corduroy showing and then press it.
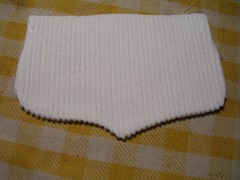
Once I have all these pieces pressed flat, then I topstitch them. The next photo shows me making the turn on the curved part of the pocket flap. I am on the second line of topstitching and have lifted the presser foot so I can make the turn bit by bit. On some curves, you take a couple of stitches then lift the foot and turn a tiny bit, put it down and take another stitch or two, and repeat until the curve has been stitched.
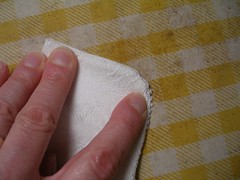
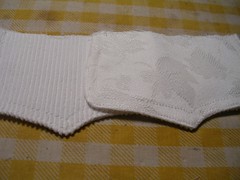
In the final photo, I have both flaps finished and have turned one to the wrong side or underside to show what it looks like.
4 comments:
Hi Julia,
enjoying your blog very much - its good to see sewing blogs, and be inspired by other people's work...!
Look forward to seeing some pictures of the finished jacket. ARe you pretty rigourous about trying as you go, or are you confident enough of your fit to just sew?
Caro
Hi Caro, glad you are enjoying the blog. That's why I buy sewing and fashion magazines - to get inspired.
I am not very good about trying things on as I go for the first time I make the thing. That is why I end up with some things that go straight to the Salvation Army, because I was too fat for them! I have a pretty average body shape and size so I know the size 12 on most patterns fits me, as long as I take the top up as I am very short-waisted. I also usually have to take the sleeves up too.
I have made this jacket six times already (yikes!) so I know it fits. Plus it is loose and boxy by design so there aren't any surprises.
I hate sewing anything with nap.. or stripes.. I'm neurotic about lining them up!
Mostly, I stick to dog collars these days. Although I'm feeling inspired seeing these pics! As soon as the machine gets out of the shop and I get my back log of collars done, I'll dig out some old patterns...
I may never come out of the sewing room!
EP you should see me with plaid! Every piece has to be cut separately and laid on top of the fabric for the cutting of the matching piece. Takes forever but it's worth it.
It's all about inspiration, I think. I love your dog collars but sometimes, you just have to make something for you. If you are a dress person, you might find more inspiration here!
Post a Comment