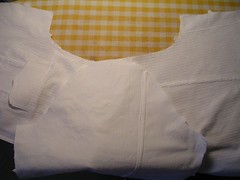
Next, I pin the two pieces together at the dots and notches. This evenly distributes the sleeve fabric around the armscye and starts the shaping process.
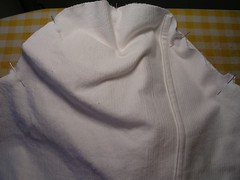
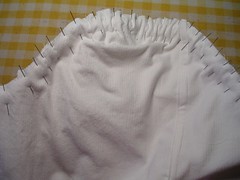
When I have the two pieces pinned together at dots and notches, it allows me to work between each set of pins on a smaller area, in order the continue fitting the sleeve into the armscye. As I have mentioned before, I rarely baste sleeves and this jacket will be no exception.
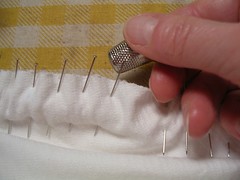
I am illustrating here the thickness of the fabric and how I had to resort to using a thimble to get the pins through it.
I sewed VERY slowly around the armscye (you can’t take pins out as you go because then the fabric will shift and bunch). Often times, I was guiding the fabric under the needle with my left hand while my right hand was manually turning the wheel on my machine that makes the needle go up and down. I know - you’re saying, “wouldn’t it be faster if you basted?” but I still don’t think so. But by all means - if you want to baste, please do!
Once I was finished sewing the sleeve on, I trimmed the jacket side of the seam allowance in order to prepare for the flat fell. I then pressed the seam allowance toward the jacket from the outside, checking after I was done on the inside, to make sure I had ironed properly and not folded over any bit of the seam allowance.
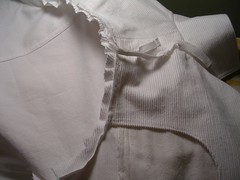
Once I was done pressing, I folded the untrimmed seam allowance (the part that belonged to the sleeve) over the trimmed seam allowance and pinned down the fold. There is more fabric to tuck in between the dots than there is near the underarm and I put the pins in perpendicularly at that section. This time, as I sewed around the armscye with my zipper foot, sewing down the fell, I took the pins out as I went. I was sewing through more layers of fabric and so I had to use more force on the needle, thus risking breakage every time I got near a pin. Plus, because I was sewing down the fell on the inside, it didn’t matter if I ended up with little tucks of fabric because it wouldn’t show.
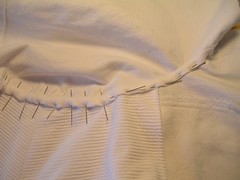
After sewing on the sleeves, I sewed the underarm seam and then made a modified flat fell, where I press OPEN the seam allowance and tuck under EACH side of the seam allowance. I start sewing at the jacket bottom edge and proceed into the sleeve, turning 180 degrees at the cuff end of the sleeve and sewing my way out again (I showed this on the shirt I made first on this blog). This time, it was tough to do because I was working with thick and stiff fabric.
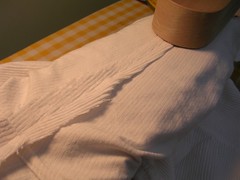
Next, I put on the bottom band and cuffs. The pattern instructions call for sewing the right side of the band next to the wrong side of the jacket. Then you fold the band up and sew the folded edge to the right side of the jacket. I used to sew waistbands on skirts the opposite way - right sides together and then you have to sew the folded edge to the wrong side or inside BY HAND so it won’t show. Since I learned the method used on this jacket, I haven’t looked back and sew all my cuffs and things on this way.
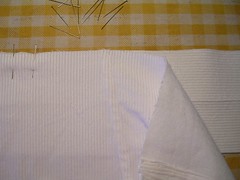
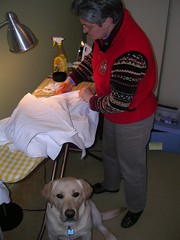
Once the band is sewed to the inside or wrong side of the jacket, you trim the seams so there is less bulk in the finished band (or cuff, as they are made the same way). I was trimming seams when Peter got this nice photo of Rockwell not really observing my work.
In the next photo, I am sewing the end of a band - in this case, a cuff. You fold over the long edge and trim its seam allowance off. Then you match the ends right sides together and sew across the end, ever so slightly outside the edge of the sleeve vent opening (or jacket fronts, depending on the piece being sewed).
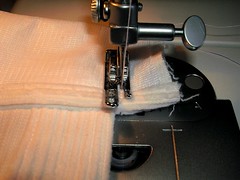
Because you are sewing just slightly outside the edge of the rest of the jacket, it will be easier to turn the band or cuff and get everything tucked in. In the next photo, I have one cuff turned and one not. Of course, I have first ironed the seam allowances toward the band and cuffs.
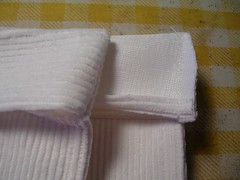
Because you are going to be sewing the cuff shut and finishing it off with the machine, you have to get all the trimmed ends tucked neatly inside so they won’t ever show when you are done. This next photo shows all those trimmed bits that are going to get sewn inside the cuff.
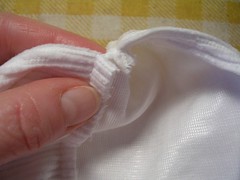
Now, in the next photo, I show how I am folding the bit of the sleeve vent UP and over the seam allowances on the cuff. This doesn’t always work (and didn’t on the other three ends of the cuff) but it does make for a smoother “catch” of the seam allowances. The alternate way which I didn’t show is folding in the vent and then folding the cuff on top of it. This way just leaves you with the possibility of showing all those seam allowance bits if you don’t sew down the fold really tightly.
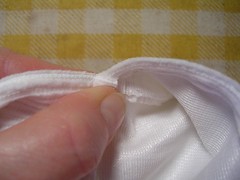
In the next photo, having tucked in all the trimmed raw edges, I am pinching the folded, finished edge of the cuff over the sewing or seam line on the outside of the cuff.
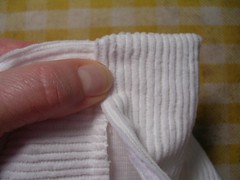
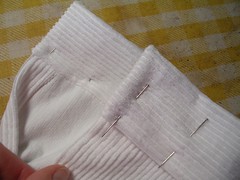
In this last photo, I have put my pins in and am showing both side of the cuff in preparation for sewing. The sewing I will be doing is effectively topstitching and I will be sewing from the right side or outside.
3 comments:
Sharon, welcome to my blog! I just bought another piece of fun summer cotton for a skirt and will start the next project shortly!
wonderful blog! thanks so much for all the pics, etc.
Thanks Anon!
Post a Comment