First I finished the zipper. I had sewed in the one half of it, to the 1/2 inch wide turned-under seam allowance. So I sewed the other half down to the other seam allowance and then I finished the seam in a flat fell.
Next, I did the hem. I went with the narrow hem folded double and sewed by machine. This photo just shows the first fold as I went around the hem. I folded it again a second time and then sewed it.
Finally, I put the facings on. I sewed the front and back together at the right side and then sewed the whole thing to the skirt. Once it was sewed on, I trimmed the seam allowance down to reduce the bulk.
Pressing is important for anything you turn and this includes the facing. First I pressed the seam allowances open to flatten them.
Then I pressed the seam allowances up toward the facing from the wrong or inside. Then I pressed them up from the right side and used the clapper to make it good and flat.
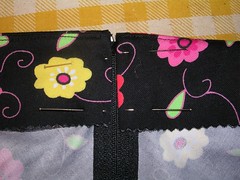
Once the seam allowances were in place, I understitched them to the facing. This keeps the facing from rolling to the outside, plus it keep the seam allowances tight to the facing. In this photo, I have raised the presser foot (note that the needle is still down in the fabric to keep it in place) so that you can see where I have stitched.
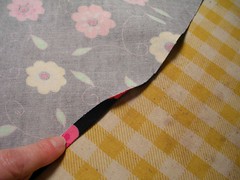
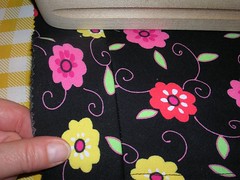
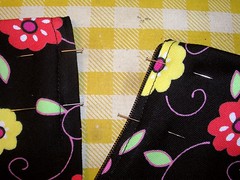
Now all I have to deal with is the ends of the facings. They come out by the zipper and you have to tuck them under and then sew them some way so they stay put. In the first photo, I have tucked or folded the end of the facing toward the underside of the facing so that all the raw edges will be hidden once I am done. I stuck two pins in to hold it down for the picture.
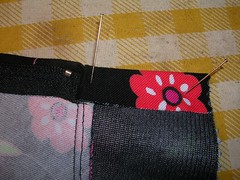
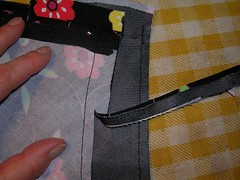
This photo shows how I have folded the ends of the facing in and then folded the facing itself down the inside of the skirt. I have zipped up the zipper to make sure the upper edges are even with each other. You can see the left hand one as you look at it is a tiny bit higher than the right and this is easily adjustable - you just fold it a little bit lower on the left or higher on the right. I have also put the pins in so that the points don’t go into the zipper area because I want to be able to work the zipper without getting stuck by a pin.
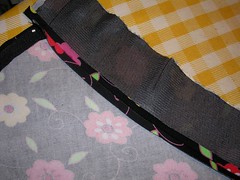
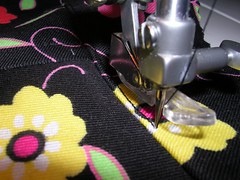
Once I have decided exactly where I am going to fold the facings, I turn the skirt over to the right side and sew by machine down the existing line of stitching, catching the facing as I go. As I have done before, I also machine sew the folded facing to the skirt at the other three seam lines and give it a final press with the clapper.
Here it is, hanging up on the door.
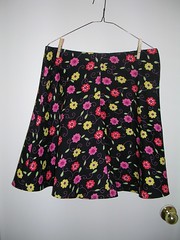
It is designed to sit below the waist, which is why it looks so wide at the top. I tried it on and it fits, especially because it stretches slightly because it is cut on the bias. I can now hardly wait to wear it!
8 comments:
Lovely! Great photos too. I'm almost tempted to take up sewing.
It's funny but people who say they don't want to sew because they don't have patience (that's the most frequent explanation I get) also do things like knit. I think knitting takes patience too! If I were to take up another craft hobby, it would be needlework or quilting. There just isn't enough time for all of them. Besides, my mother knits and makes me great sweaters!
The skirt is great! Something I'm learning, slowly, is that taking the time to do thing correctly yields a terrific piece of sewing and a lot less frustration.
Thanks Sandy! Taking the time to do it right is something we all struggle with, especially when we want to be starting something ELSE. This skirt took no time at all, so I couldn't even start to get impatient.
I googled "layout of patterns for bias cut skirt" and found you! Thanks for putting up such clear photos and instructions, which are so useful for me as I am learning to sew a bias cut skirt.
Erin, welcome to my blog! I am just about to start making another one of those skirts, as the first one turned out so nicely.
I love your skirt! It looks to be a real wardrobe-building piece, because if you did it in black gab it'd be professional too...but I do love the cotton floral. I'm partial to retro prints myself.
Love your blog too! :-)
Thanks Sara! Now that it's Summer, I'm wearing this skirt almost every other day. I love it - it's so comforable, you don't have to wear a slip, it's wide enough that I can get into a truck or van easily (most of my other skirts are narrow). And it's fun to wear solid colour tops that go with one of the bright flowers in it. Win, win all the way! I'm going to make again (the third time) it in another fabric too.
Post a Comment