Sew the cuffs to the sleeves. Trim the seam allowances to about 1/4 inch. You won’t want any bulky fabric inside the cuff once it is finished, when you go to sew the buttonholes.
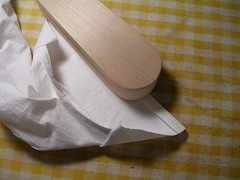
Press the seam allowances toward the cuff. Now press the other side of the cuff making a folded edge that will get sewed over the stitching line in a minute. This photo shows the clapper in “action”. I have pressed the seam allowance over and am using the clapper to make a sharp edge. Trim the seam allowance of the other pressed edge.
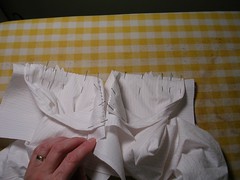
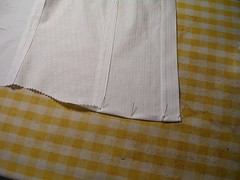
Now fold the ends of the cuff, right sides together and pin them in place. You want to line up the folded edge so it will just cover the line of stitching. I show the cuffs from the inside and the outside in the next photo.
Stitch the ends of the cuffs and trim the seams again, making sure you get closer to the stitching line on the corners so that you don’t get bulky fabric on the inside. This way, you get nice flat corners too.
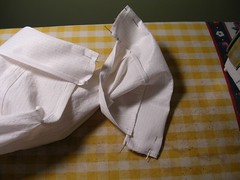
Turn the cuffs right side out and use your point turner to poke out the corners nice and sharp. I find I don’t need to press the little side seams on the cuffs at this point, before stitching down the folded edge. They can be pressed successfully after stitching.
Now carefully pin the folded edge of the cuff “facing” over the stitching line. Change your presser foot to the zipper foot so you can get close to the edge as you sew. Stitch down the edge over the previous stitching line. Cuffs are done!
I decided to do the hem next because I was running out of bobbin thread and I hate to have it run out in the middle of buttonholes, especially because I have an automatic buttonholer attachment on my machine. If it runs out in the middle of a buttonhole, you have to fill the bobbin and then get a scrap of fabric and finish the interrupted buttonhole before you can start over. A pain.
I make a narrow folded hem on shirts (and other things) and I use the machine to sew it. For the purposes of this blog, I decided to pin the hem to the ironing board cover to hold it in place and show what I’m writing about. I have now discovered an easier way of making hems! You can carefully slide the iron over the pins (which are put in at an angle) and then remove the pins as you press the fabric flat. Press up about 1/4 inch of fabric (or as little as you can get away with) all along the hem. Trim bits that protrude past the 1/4 inch, like where the seams and darts are. Then press up 1/4 inch again, making a double fold, tucking the raw edge inside the fold. If you press properly and use the clapper, you shouldn’t need to pin the hem down before sewing it.
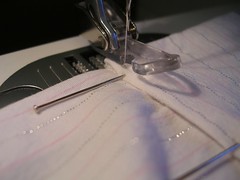
Using the zipper foot again, sew down the hem. In the photo, I am pulling on the thread tails as I start the hem, to help feed the fabric through the machine.
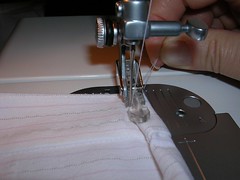
Especially because it is thick at the bottoms of the front bands, it can be a little hard to get the shirt to feed evenly when you start sewing the hem. Gently but firmly pulling on the thread tails helps. Now you are almost done the shirt!
2 comments:
Just wanna say thank you for sharing your ideas.
You're welcome!
Post a Comment