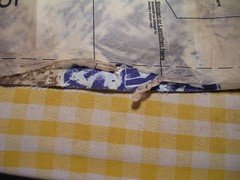
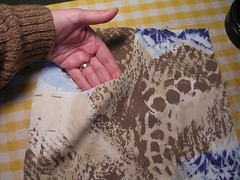
It took a while between cutting and starting to sew and the photo following shows what happens when you leave a piece hanging from the chair with the pattern still pinned to it and don’t keep the door closed with a nosy puppy about.
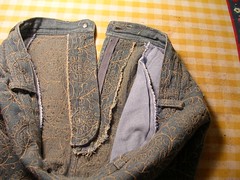
Before I get sewing, I like to have a look at pants I’ve made before so I know where I’m going. I also like to know where I should finish raw edges on things I don’t often make, like the fly.
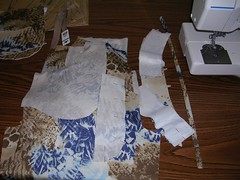
So now I’ve marked all the pieces, dots, darts, where the zipper goes. I’ve also ironed on the interfacing - in this case, it only goes on the waistband of the pants and the facings on the skirt. As I remarked on the shirt part of the blog, I like to pin as many things together as possible and line them all up to start sewing. I don’t know if it is, but it feels more efficient that way. Once I’ve sewed everything I can, then I iron all the pieces at one time too. In this photo, I’ve pinned the skirt facings, the fly, pants pocket facings and skirt darts (I think).
When I fold the pocket facing over to the right side, I like to make sure I see the seam line a little on the inside of the pocket before I iron it flat. Then when I top stitch the edge of the pocket, I know none of the facing will be showing on the outside.
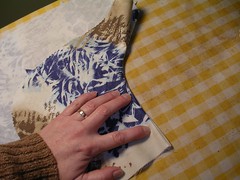
Continuing with the pockets, I stitch the pocket itself to the pocket facing along the raw edge that I’ve pinked to keep from raveling. When you lie the pocket flat on top of the facing (which is attached to the pants front), you will see that the side seam allowances do not match up. That misalignment will allow the pocket to curve out from the body when it is finished. Once the bottom of the pocket is sewed, turn the pieces right side up and smooth everything nice and flat on the ironing board. Then, move the side seam allowance edges so they line up and pin them all together (there are three layers - the pocket, facing and pant front). The photo shows how there is more fabric on the pants front than on the pocket. Baste the pinned edges together.
I am making things out of the order in which they are presented on the pattern instructions, mostly because I can because I have experience and because of my penchant for efficiencies. I show the back pockets next because they are easy to make and set aside until they are needed and you can do that mass ironing that I mentioned.
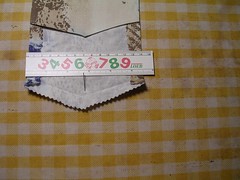
I have sewed down the raw upper edge (even though it gets sewed down again when finishing the pocket) because then I don’t have to worry about it becoming unfolded. I have turned the pocket right side out and ironed down the side edges. Now I have to make the point in the middle of the bottom edge. I iron one slanted edge and then open it out and iron the other edge. To make sure the point ends up in the middle, I use a ruler. Fold up the ironed edges and tuck the excess fabric in the point gently to one side or the other or fan it out so it doesn’t make a bulky point.
No comments:
Post a Comment