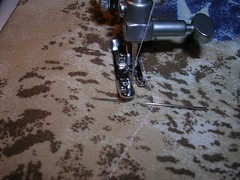
I started by topstitching the back pockets. I made the first line of stitching on the wrong side, stitching close to the folded edge of the “facing” (the turned over “v” shaped part). Then I turned the pocket right side up and stitched close to the first line of stitching. I didn’t use the zipper foot but I could just as easily have used it. I also put a pin in the point of the “v” so that on the second line of stitching, I would know exactly where to turn so that the two lines would match at the point.
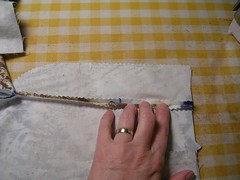
Then I put the zipper in the skirt. I rarely baste zippers in first, unless the fabric is fussy and unforgiving. First I pin the zipper to the opened seam allowance from the wrong side. This lets me line it up accurately between the seam allowances and the top of the skirt.
I flip the skirt over to the right side and put pins in to secure the zipper because I am going to sew it from the right side.

Notice that the pins are pointing the same way up both sides of the zipper. I will be sewing from the top of the zipper to the bottom on both sides. This necessitates switching the zipper foot from one side to the other but I think you get a better finish this way than if you sew down one side and up the other all at once. Sew down the one side and then across the bottom.
Now start again on the other side at the top and sew down to the bottom. This time, you will notice that the fabric starts to pile up a little and you are going to have to finesse this by holding the fabric down with your left hand and sewing slowly while smoothing the fabric out as it goes under the presser foot. When you get near the bottom of the zipper, you will have to carefully smooth out that little bump otherwise you will get a fold of fabric like a pleat at the bottom. Then turn and sew across the bottom again.
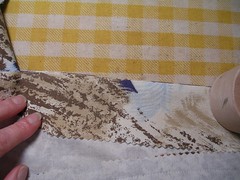
The fly is a complicated thing so if you’re going to make it, you have to follow the pattern instructions. Here are a few tips to help along the way. Any time you have to turn fabric right side out along a seam and make it flat, first press the seam open.
This works even if you are turning the fabric right side out, along the seam line. If you press open the seam allowance first, it flattens the fabric along the stitching. Then, when you fold it along the stitching right side out and press it flat again, it will be even flatter than if you didn’t do this. Now this part of the fly is ready for topstitching.
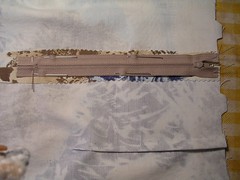
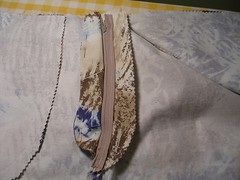
On the next photo, you see the fly as mostly constructed, from the inside of the pants. I have pinned back the fly on the left so it doesn’t get caught in the stitching on the right. There are chalk markings for where to topstitch the fly but they are on the wrong side of the fabric and they are under the fly facing on the right side as you look at the photo.
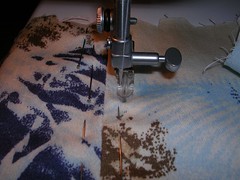
In the next photo, I have folded up the fly facing and put pins in where the chalk markings are. When you turn the pants front right side up, you will be able to see where the markings are because the pins will show through to the right side.
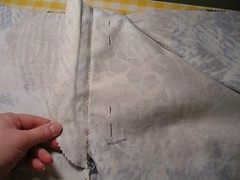
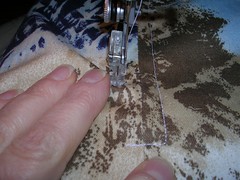
On the right side of the pants front, you can now mark the stitching line with chalk based on the pins you put in on the other side. This way, the chalk will be fresh and in the correct position. If you marked the stitching lines at the very beginning when you cut out the fabric, not only would they be worn off with handling but they might not follow exactly where you have to stitch, based on where the zipper ended up. Sewing is certainly not an exact science and things move around as you go on. In fact, once you mark the stitching line on the outside in chalk, you are going to have to put things together the way the pattern instructions tell you and you may find (as I did) that you have to move the stitching line over a little bit to ensure that you catch the zipper with the second line of topstitching. If you have a pair of purchased pants to use as a rough guide, you will see how the fly needs to look when it is completed and you can use that to help decide exactly where to stitch.
2 comments:
sorry,, but youve used the worst fabric color for the demo one could barely understand it,or see it , next time use a plain colored material like (denim jean)
m.c
I agree with marie I couldn't unterstand or see because of the fabric
Post a Comment