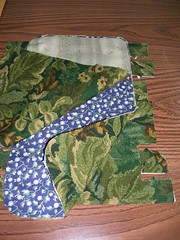
I've been thinking ahead to making bias tape for the piping and it's a conceptual thing. You have to imagine how those pieces of fabric have to go together so you can make a tube and then cut out one continuous strip of fabric on the bias. To help me with the imagining, because it has been a long time since I've done this, I went to the internet and Googled "making bias tape". All the hits on the first page dealt with cutting many strips of cloth diagonally and sewing them all together, end to end, one after the other. Ack! What is that? A make-work project? No, no, no. You can make a tube of fabric by sewing two pieces together (only two seams), press those seams open and then start cutting. Here's how to do it.
Start with a square of fabric. You can probably use a rectangle but it's easier with a square. I had bought about a half a yard of the quilting cotton. When I measured it along the selvage edge it was 21 inches. I folded this selvage edge along the cut edge and cut the fabric lengthwise, making a 21 inch square.

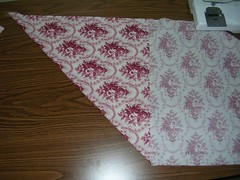
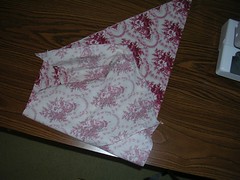
Then I carefully cut along the diagonal fold, making two triangular pieces.
Next, I put the two triangular pieces right sides together, pinning them together along the straight or selvage edges and then sewing the first seam.
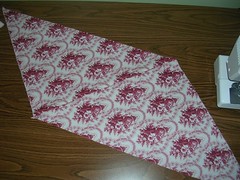
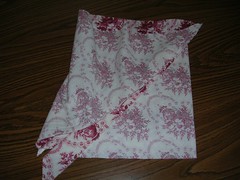
Once the seam was sewed, I had this
parallelogram shaped piece of fabric.
I pressed the first seam open.
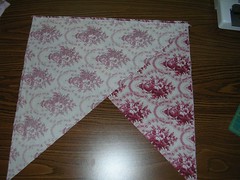
The next step is the only difficult part and it's not that bad. You have to bring the bottom edge of the parallelogram up to the top edge and pin the edges together, right sides together. At this point it doesn't really look like a tube.
If you relax the edges and just lay the fabric on the table, you can see that it will become a tube when the other two edges are sewn together.

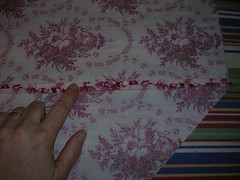
However, when lining up the edges to make the tube, make sure you off-set the edges by the width of the tape you want to make. I want to make 1 and 3/4 inch wide tape, so I set the one corner back by 1 and 3/4 inches, pinned the edges together and then sewed them.
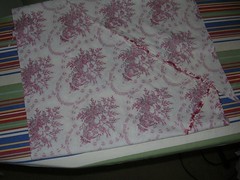
Once the second seam is sewed, press it open.
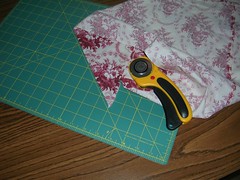
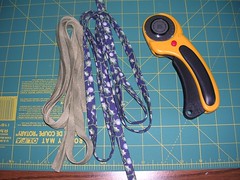
And now for the self-healing cutting mat and rotary cutter! I used to cut the bias tape out with regular scissors, eyeballing the width. Now I have this mat.
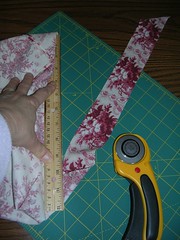
Once I got the hang of it, I was away to the races. You line up the diagonal (bias) edge with one of the lines on the mat. Then you lay your straight edge along the other line (hidden by the fabric) and carefully push the rotary cutter long the straightedge. This is where I discovered that if you don't pay attention and don't cant the cutter in slightly toward the edge, you can wander off into the bias tape and make it narrower than planned. However, that wasn't a crisis, as I really don't need a full 1 and 3/4 inches of tape.

You can only cut about a foot at a time and then you have to reposition the fabric. I wasn't limited by the size of the mat but by the size of the tube of fabric.
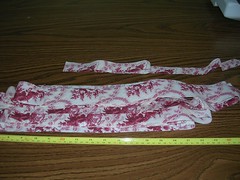
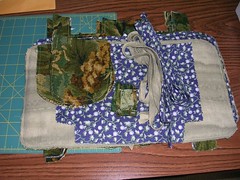
When I got to the end of the tube of fabric, I had a left over piece of bias tape that was about 20 inches long and one inch wide. But from the 21 inch square piece of fabric, I got over 6 yards of 1 and 3/4 inch bias tape. Much easier than cutting eleventy-seven pieces of bias strips and then sewing each one of them to the next one, over and over again. I learned this trick from my sister when we were sewing curtains and pillows back in the 80s. Thanks Norah!