Sunday, May 31, 2009

Prom dress continues, stuck at the zipper

Well, I thought I could fake the invisible zipper as I have done once before, without the proper invisible zipper foot, but I was wrong. sigh. Let's start where we left off last time.
prom dress IV
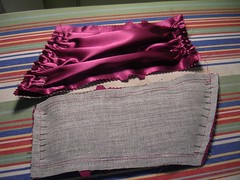
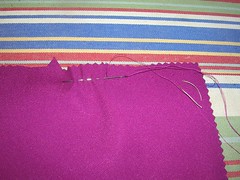
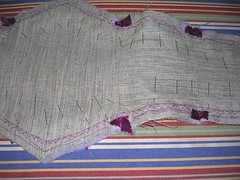
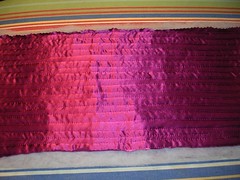
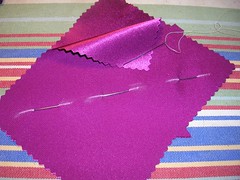
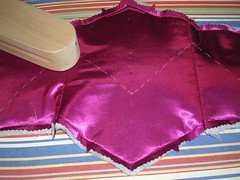
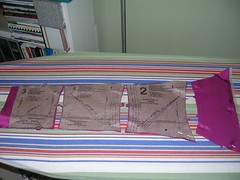
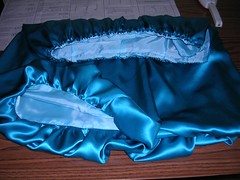
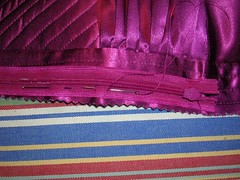
I added the vertically quilted pieces to the back, where I needed a little extra width. They were quite a bit wider than I needed but I wanted to give myself wiggle room. I also noticed that putting the zipper in might be easier with the simply quilted piece, rather than trying to sew the zipper to all those layers of hair canvas interfacing, so I think that part turned out for the best.
prom dress IV
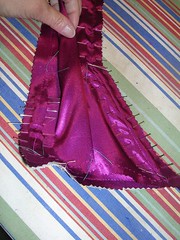
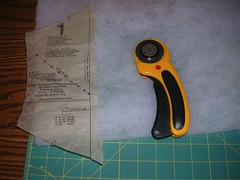
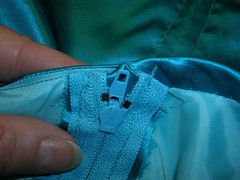
I trimmed those pieces up a bit more and here, I am illustrating what it will look like once the zipper is in. I have been hoping this "fix" will look like a "design feature" and I think it will!
prom dress IV
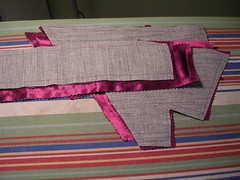
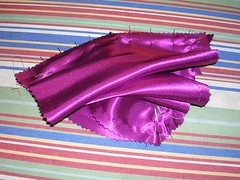
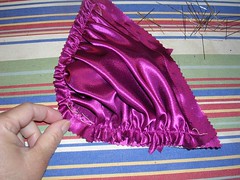
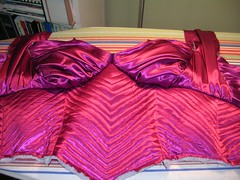
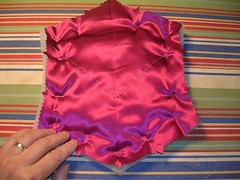
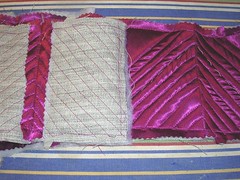
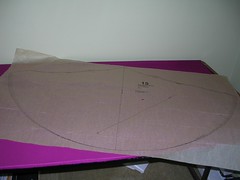
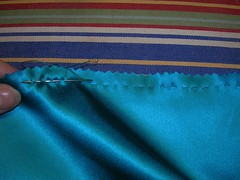
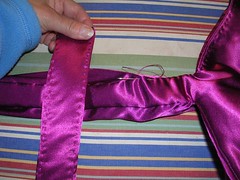
This is just one panel of how odd the construction of the skirt seemed, before I actually followed the instructions and sewed all four of the skirt pieces together.
prom dress IV
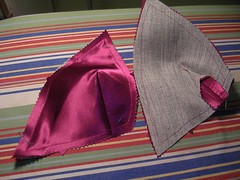
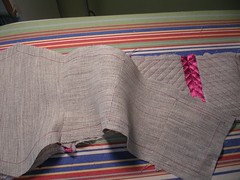
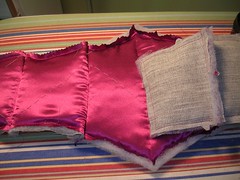
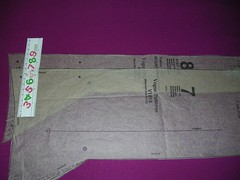
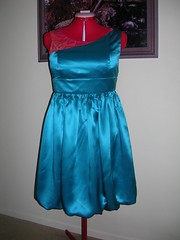
Here is the dress, just hanging around the neck of my judy, which is why the skirt looks oddly wide (because it's not actually ON the judy). But it does look exactly like the pattern instructions.
prom dress IV
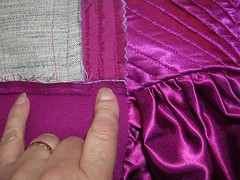
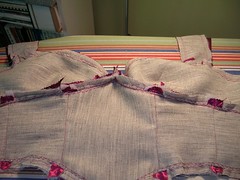
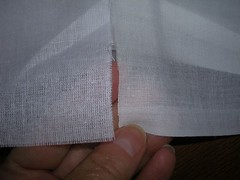
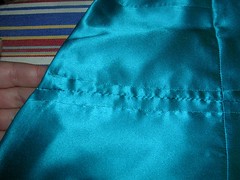
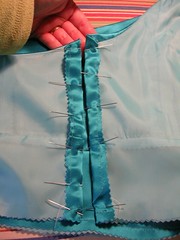
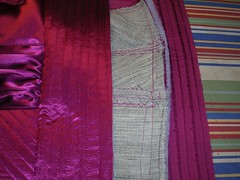
Once the skirt is sewn onto the bodice, you have to press the seam allowance UP, into the bodice, so that it can get concealed by the lining. This is difficult because of the layers of interfacing that have to be folded up. So I decided to sew up the seam allowance by hand (instead of just pressing it up), taking some internal stitches here and there but also making pick stitches right through to the quilting on the outside. This is turning into a true couture garment, with all this hand sewing.
prom dress IV
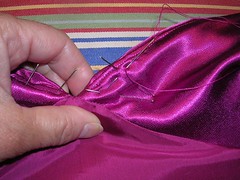
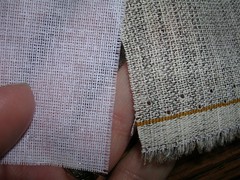
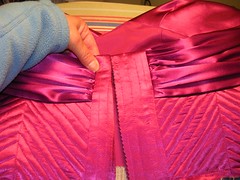
The instructions also called for understitching the top edge of the bodice as much as possible by machine, which I did. But it still tended to roll out so I pick stitched the entire thing around the inside, including the two "drape" pieces (the things that go around the neck to make the halter).
prom dress IV
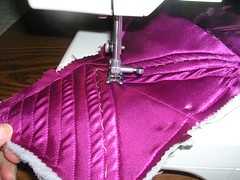
These pick stitches are all on the inside and never show on the outside.
prom dress IV
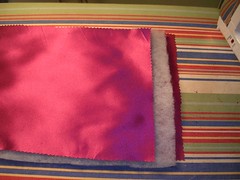
So then it came time to put in the invisible zipper. I basted it all in by hand first (of course!). Then I tried cheating with a non-invisible zipper foot and couldn't get the zipper teeth to roll out far enough to give it the proper "invisible" effect. So now I have to call my sister (my niece's mother) and see if she has this foot attachment on her machine. If so, I can go over and first do a fitting and then sew it up. If not, I will have to go find one. But I'm almost done!

Friday, May 29, 2009

Prom dress continues

I was glad I made that draping piece "#9" larger - it would have been a disaster if I'd cut it according to the pattern piece.
prom dress III
Here it is, with the corresponding piece turned over, showing the interfacing. On both pieces, I have pinned the drape and it would have shrunk the underlying "10" piece by a considerable amount, if I'd had to "stretch" the drape to fit, as the instructions said. I have been trying to follow the instructions to the letter but I just knew something was wrong with this piece. And it did NOT stretch one bit.
prom dress III
Here is the draping pinned to the piece that goes up and around the neck. They actually call this whole piece "the drape" (to distinguish it from upper bodice and side bodice and stuff.) You can see that the underlying, interfaced piece has curved up a little, because the draping overlay is a little bit smaller. Here, those instructions work but not on the back!
prom dress III
Backing up a little, here are all the bodice pieces with their corresponding interfacing pieces stitched to them.
prom dress III
These pieces are obvious! Looks like something Madonna would have worn. The interfacing makes it very structured.
prom dress III
This is the drape that goes on top of the piece.
prom dress III
This is how I gathered all the draping pieces - by hand.
prom dress III
Here's the draping piece pinned on the ungathered edge.
prom dress III
And here it is, all gathered up and basted on.
prom dress III
Back to the midriff - I finished the quilting to the interfacing and then the instructions called for a double layer of interfacing to be hand sewn into the midriff.
prom dress III
The instructions called for a catch stitch so that's what I used to sew in the extra midriff interfacing.
prom dress III
The bodice also called for two layers of interfacing to be sewn in there too. This is the bodice and the midriff, sewn together.
prom dress III
The bodice and midriff, from the right side. I had not, at this stage, sewn the interior or lining on the piece. When I did and after I fitted it on my niece, I had a major problem - it did not meet at the back! I had to devise a way of adding an inch or so of fabric to the back where the zipper will go, without making it look odd.
prom dress III
I decided to quilt a piece of fabric to some lining so it would look like the midriff. We're only talking an extra inch here but I made a good 8 inches (in width) of quilted fabric so I would have room to manoeuver.
prom dress III
prom dress III
Next, I have to attach the extra strip of quilted fabric to the back and then attach the skirts. Whew.

Monday, May 18, 2009

Prom dress II

Oy, this dress IS a lot of work! After I had cut out the dress, I went to buy interfacing. The pattern calls for "hair canvas" so I checked it out at the store. They had it and it was actually looser in weave compared to the heavy duty interfacing, but I over-thought it (the word "hair" bothered me even though it shouldn't have and I worried that it was used in men's suits) and bought the regular interfacing. This kept me up at night, worrying that the bodice wouldn't work if I used the wrong thing. So I went back and bought the proper, called-for hair canvas.
prom dress II
This is lightweight, sew-in interfacing on the right and the heavy duty sew-in interfacing on the left. You can't really tell from the picture but the tighter weave lightweight stuff is thinner and more pliable than the stuff on the left.
prom dress II
The heavy interfacing is on the left again. It is surprising to me that the hair canvas, which I had imagined to be thick and unwieldy, is actually more pliable than the regular interfacing. It is used in several layers in the bodice which is why I was worried about the finished product. But then I figured that the designer of the dress should know what he is doing.
prom dress II
Here are all the pieces of the bodice and the midriff that are cut out of the hair canvas. Yikes.
prom dress II
Here's how I marked the topstitching lines on the midriff. I put pins in, along the stitching line shown on the pattern piece. I marked them on the wrong side of the fabric with chalk. Then I marked the mirror image piece the same way. Then I separated the pieces and sewed along the chalk lines with contrasting basting thread so the line would show up on the right side when it came time to topstitch.
prom dress II
I got a brainstorm to cut the quilt batting with my rotary cutter on the mat. Whenever I have pinned pattern pieces to batting in the past, the batting distorts the pattern piece. Cutting it with the rotary tool eliminated that fussing.
prom dress II
I also thought I'd get less distortion if I hand basted the fabric to the batting and I was right there too. It's a lot more time consuming but way less frustrating.
prom dress II
However, after I pinned the hair canvas pieces to the fabric and batting pieces, I machine basted them together because the hair canvas acted as a backing and sandwiched the batting between it and the fabric.
prom dress II
This is the midriff, all sewed together but not pressed. Very poofy.
prom dress II
Here, I've pressed the midriff three times and used the clapper on it.
prom dress II
Here, I've started the machine quilting. They just call it "topstitching" in the pattern instructions.
prom dress II
I've got a lot more of the quilting done but still haven't finished. And it will need a good pressing when I'm done too.
prom dress II
After I'm done the midriff, I am going to start worrying at (about?) the draping on the bodice. In this photo, you can see there is a small discrepancy between how long the stay piece is and how the draping piece is a little bit shorter. It says "stretch" on the draping piece.
prom dress II
However, there is a huge discrepancy between this stay piece (number 10) and the draping piece (number 9). In the muslin, the draping piece pulled the stay piece up and puckered it. On the other however, I didn't use interfacing and hair canvas and all that in the muslin. I hardly have any of this fabric left so whatever happens, I am going to have to MAKE this work. I did take the liberty of cutting this draping piece wider than the pattern calls for and so we shall see how it will work. I'll do all the other draping pieces first.

Tuesday, May 12, 2009

The next prom dress

My niece came over to get the dress and she tried it on and I think you'll agree - so cute! Her, not the dress. Well okay, the dress too but she really is. She's still not sure what to do with her hair - all up, part up, curled?
prom dresses
The engineering (or lack of it) allows the dress to sag a little on the side without the shoulder to hold it up. She and her mum are going to figure out what to do about it. I lean toward a small safety pin attaching it under that arm to the bra. We wondered if reefing it tighter would work but there wasn't much room for that maneuver and all that would do would make it tighter. In any event, it's not a deal breaker and I think the pin would work fine.
prom dresses
Now I am onto the next dress. The skirt pieces are large and single layered so I will cut out the smaller bodice pieces first. The straight of grain arrow shows that the skirt is cut on the bias and I am not sure how I am going to work this out on my cutting table. I may have to work on the floor for these pieces.
prom dresses
For all the layers in the bodice, only the midriff is lined. The upper bodice is faced with the the fabric itself. More as it happens!

Sunday, May 10, 2009

Prom dress finished!

I'm done! And it all came together smoothly, much to my relief. Not that I expected trouble but when you are sewing for someone else, you kind of hold your breath.
prom dress
Even when sewing the midriff lining down, on the inside, I tried to keep the stitches tiny and invisible.
prom dress
I put the zipper in exactly the way the instructions said and it went well too. In this photo, the zipper allowances are still basted together.
prom dress
This is what the zipper looks like on the inside, with the tops of the tape tucked in and the top edges of the bodice folded under. I took some tiny hand stitches to secure the edges even more and then added a hook and eye at the top.
prom dress
And here is the dress, on my judy. It doesn't zip up the back because my niece is narrower than I am. And it will look even cuter on her, as she is cute too! I am going to request a copy of a photo of the dress in action but that won't be until June. And now for the Vogue dress!

Prom dress almost finished

Into the home stretch!
prom dress
First, I had to adjust the back, where I had added an inch extra width "just in case". Not only did I not need that inch, I had to take the back in by another half inch on both sides.
prom dress
I sewed a new line of basting where the zipper will go and basted the raw edges together and then cut off an inch and a half on both ends of the back. Unfortunately, this made the tops of the two back pieces no longer line up, because they are not mirror images of each other.
prom dress
I thought about taking the side that was higher all apart, which would include undoing the understitching and everything. Then I thought I would never get it lined up as well as if I just folded it over so that's what I did and sewed it down with tiny stitches. After I press it carefully, it should be invisible on the outside.
prom dress
Now you can see how the top edges will line up properly once the zipper is in.
prom dress
Next I hand basted the upper and lower edges of the bubble skirt, so that I could make the gathers evenly. That went surprisingly quickly.
prom dress
I pinned the soon-to-be gathered skirt to the skirt lining.
prom dress
And the gathers were remarkably easy to make too. I may have to consider hand basting all my gathers from now on. The thread is much looser than if it was machine basted and so it is easier to pull.
prom dress
Here, I've sewn the skirt to the lining around the bottom and given that seam a bit of a press in anticipation of understitching the lining.
prom dress
Here's the bubble skirt, sewed top and bottom to the shorter, narrower lining. I'm ready to attach the skirt to the midriff and the last step will be putting in the zipper!