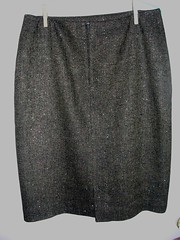
Today, I added some notes to my pix at Flickr, so if you want to see detail and have it pointed out, click on the pix and then you can see more at Flickr. As you can see, I have finished the skirt - that's the easy bit. I made it shorter than the long skirt that I often make for Winter and longer than the skirt I have been making that hits above the knee cap. Once a woman reaches a certain age, I don't think many people want to see more kneecap, even if mine still look pretty good. Also, it's about proportion.
So I knew going in, because I have made this jacket a few times before, that I was going to have a struggle with the front facings. And I did. As usual, when it came time to pin the facings to the jacket, the facings were more than a quarter inch shorter. But, again I followed instructions and eased the jacket front along the facing edge.

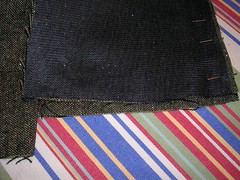
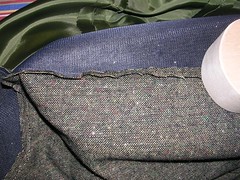
In this photo, I've exaggerated the easing up of the jacket - it wasn't that much ease. I pinned it down using LOTS of pins (so it wouldn't shift and pile up) and then sewed the whole thing.
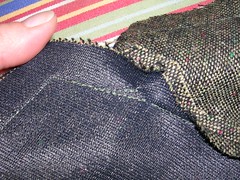
You sew one seam around the collar and then you sew another seam down the front. These two seams meet at the point where the collar and lapels meet. I never can quite match all those "large dots" and so I have to turn the garment over and see on the other side where I went wrong and then sew it again. It usually works out in the end.
Sometimes, after I am finished the jacket and it's all pressed, I might decide to take a few small stitches by hand to close up the tiny hole where my seams didn't quite meet.
Pressing is everything! I can't emphasize that enough. Once the facings are on, I press the seams open from the wrong side, even though they eventually get pressed back together. By pressing the seams open, you flatten the sewed part along the stitching line and so, when you turn it right side out, it comes out to where it should be, instead of caving in to a dent. If you haven't ever pressed a seam like, this, it may be hard to understand. But if you have done this before, next time, press it open from the wrong side and see how easy it becomes to press it once you get to the right side.
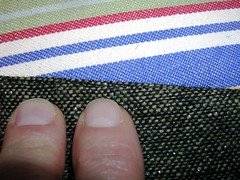
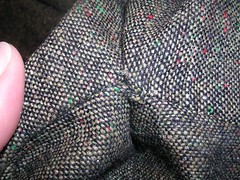
Here is the edge of the lapel, just before I press it. It's a bit hard to see the seam line but it's there and with my fingers, I'm about to "roll" it slightly (or push it into place) just as I come in with the iron. This way, the seam line ends up exactly on the fold.
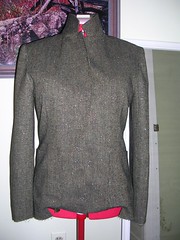
Unfortunately (and as usual) the front of the jacket has ended up being pulled slightly to the inside of the jacket by the slightly shorter facings. I'm going to let the jacket rest on the dummy for now (tonight's an "Ugly Betty" night anyway) and then fix it with judicious pressing, but I am always annoyed that it doesn't work out better than I think it should.
2 comments:
Hi Julia,
I noticed that you didn't do much interfacings and taping along the front edges, or did I miss that stage? Anyways, I am wondering if you are trying to achieve a softer tailored style as against a more classic style. Will the sleeves hold up without sleeve heads? Did you make your other jackets without sleeve heads too? They are all beautifully done, just wondering.
Cheers,
Heather
Hi Heather, I fear I crave comfort over everything and so I don't "construct" my garments as much as commercial jackets. I gave up shoulder pads after the 80s passed :) And I have never done a sleeve head. I don't tape seams, although I did do interfacing. I'm sorry but I skipped that stage, as sometimes I think it gets boring and repetitive to see the same steps over and over. I am just trying to highlight the interesting bits these days. Especially since I've started yet another new blog.
Post a Comment