SO! I have started two skirts that I want to be able to wear to teach next week. I got the fabric on the day that my friend took me to the Sewing Machine Hospital. We went to C&M Textiles and I saw much lovely fabric there, especially silk at $40/metre and up. However, what did I do but raid the remnants bin and I got two pieces of "wool" for I think $5 and $6 each. The purple was labeled as real wool and the orange just felt wooly. Each was about .7 metre but then I washed and dried them and they shrunk amazingly down to about .5 metre. I therefore determined that I would make them using this pattern I have for a skirt with a yoke and hope to make them as long as possible. They are for Winter after all and I want to keep my knees warm when I walk over to school in minus 20C winds.
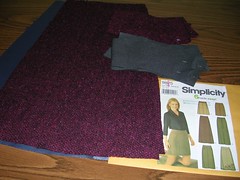
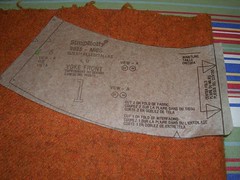
You can see the pattern better if you click on the photo and go to Flickr and look at the large size. It's Simplicity 9825 and has four "gores" and a yoke at the top. I barely had enough wool for one side of the yoke so I used that grey flannel I had left over from the previous suit jacket and used that for the yoke facing.
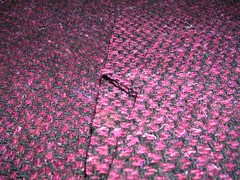
I quite liked the purple wool and it has a nice texture to it too. I think I went with the side on the left in the photo as the "right" side. I raided my lining box and found some bluish stuff that you wouldn't see anyway and cut out the gore pieces in lining. Then I made the mistake of sewing the lining right to the skirt pieces as I had done with the coat.
As I sewed down from the top of the first gore, attaching the lining right to the skirt piece (before constructing it), I realized that the wool was stretching as I went and I ended up with a longer wool piece than the attached lining piece. Rather than pick out the stitching I had done so far, I just went and sewed all the vertical edges from the top down and said "to heck with it." I was only less than an inch longer in the wool pieces so I just went with the flow. But now I knew better for the second piece of "wool"!
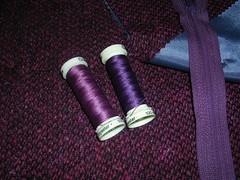
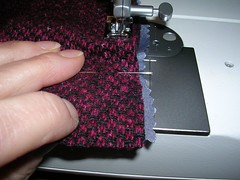
I also got to use up several ends of different purple threads I had in my sewing box.
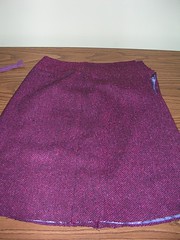
The skirt went together very quickly and here it is, before I put in the zipper. You can see the blue lining because I haven't hemmed it but once I'm done, you won't see the lining at all. It's also interesting how my camera does some shots with a warm cast and some are cooler and there doesn't appear to be any reason why. Sometimes the colour is more accurate one way and sometimes the other. I think this shot is a more accurate representation of the purple than the slightly redder colour in the other shots.
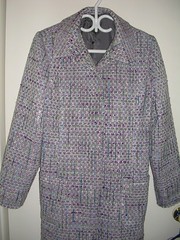
Meanwhile, I finally trimmed the seams and turned the coat right side out and pressed and pounded the seams flat. I think it is looking pretty good! And you can see the pockets in this photo.
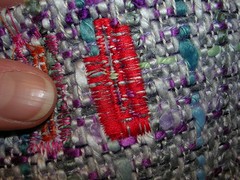
I tried another buttonhole experiment and made the stitches as close together as I could, given that the buttonholer is automatic. I saw when I was done that the stitches weren't skipping - they were just shoved to one side by the bulging wool lumps in the coat fabric. I also did a plain, wide zigzag around the buttonhole and made those stitches really close together and I am pleased with the result.
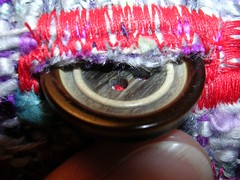
When I stuck a button through the hole after I cut it open, and I tried to pull the coat fabric apart, it seemed quite firmly anchored by the stitching, so I am thinking if I find the right buttons, I may just go for buttons and buttonholes.
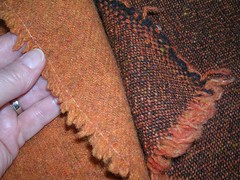
With the hem pinned up on the purple skirt and ready for hand sewing while watching tv, I decided to get out the orangey wooly stuff I had got as a remnant and see what I could do with it. (It's the dark brown and orange weave on the right in the photo.) I did plan to make the same pattern as the purple but I thought it had seemed a little longer and hoped I could get a longer skirt out of it. The purple skirt is only 24 inches long from waist to finished hem. To my surprise, while it was longer as expected, it was also narrower and I would have to sacrifice the length in the gores for the yoke. I went searching through my stash and came up with the very same orange Italian wool that I had got at Darrell Thomas's a few years ago. I had made a lovely jacket from this wool and in fact, that was the jacket I thought of while I was debating whether to get this darker orange remnant.
The much more expensive Italian wool is a different texture but a very similar weight so it could serve well as a yoke. However, I was just now thinking that it might draw attention to the one spot that I really dislike on my body (my stomach) and so I might look for a darker fabric instead. We'll see what I dig up next time.
2 comments:
Julia,
I remember reading something years ago about buttonholes on difficult fabric. The author was having a similar problem. I think she did a row or two of straight stitching around the buttonhole area before doing the zig-zag stitching. She said it made the buttonhole stronger and less likely to stretch. Worth a try, anyway.
Thanks Patsijean, I remember that tip too, now that you mention it! With both the front and the facing interfaced, I think that will help too.
Post a Comment