Saturday, April 15, 2006

Pink Shirt Finished

Except for the buttons, I have finished the pink shirt. Even though it wrinkles pretty easily (it is 97% cotton with that tiny bit of spandex), I think I will get a ton of wear out of it. The pix that follow don’t show every stage of the making because I have made this shirt before (it was the first thing I made when I started this blog).

The first thing I show is the inside of the collar, after I have sewn the one side of it onto the shirt. I sewed the collar to the wrong side or inside of the shirt so that I could sew the folded over edge of the collar facing around the outside by machine. In this photo, you are looking at the trimmed seam allowance and the folded under edge of the collar facing.
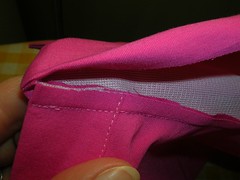
inside collar
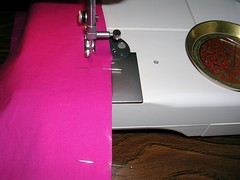
Next, I show the collar facing has been pinned to the shirt, just covering the line of stitching. As I sew this fold down with the zipper foot, I will make sure that the line of stitching is concealed and that I get as close to the fold as possible.
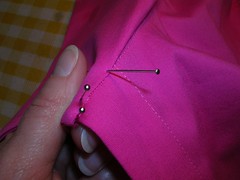
pinned collar facing
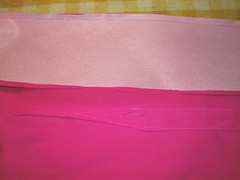
In this next photo, you can see the inside of the shirt (on the right) and the outside (on the left). You can compare them to see the difference. The line of top stitching on the right side (outside, the left part) is just above the fold on the collar facing. On the wrong side (the inside, on the right), you see the bobbin thread has tracked just below the fold of where the collar was sewed to the shirt. You can also see this same difference in the stitching on the front band.
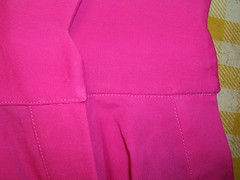
collar inside and out
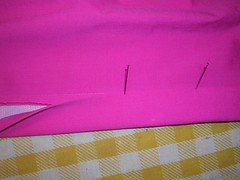
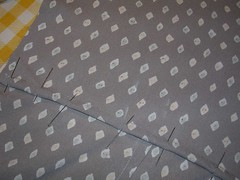
The shirt as it is hanging up needs a good pressing. I have marked with pins where the buttons are going to be sewed on later this evening, while I am watching tv.
My next project will be posted as one big blog entry. I am making something for my husband and while he doesn’t really read this blog, he does notice when I post new pix to Flickr and I want this thing to be a surprise for him. When I am done that, I will make the yellow shirt just like the pink one.
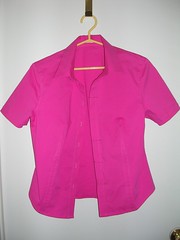
finished pink shirt

Tuesday, April 11, 2006

Bright Shirts - getting started

I started working on the bright blouses and then got sidetracked by some other things (not sewing). Then Peter came down with a cold last Thursday and now I have the stupid germ. Anyway, I shall persevere.

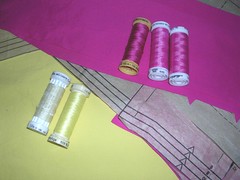
I got both the yellow and pink cut out in short sleeves in that pattern I seem to use for everything (Simplicity 9877). Then I discovered that I had pink thread but not enough yellow.
thread colours
So I’m sewing the pink first. I do my usual assembly line kind of thing, cutting out everything, marking pieces and ironing interfacing on all the pieces, pink and yellow. Then I start pinning things like the darts. Unfortunately, the pink doesn’t show up very well in photos. In this next photo, I have sewed the front vertical dart from the bottom up and am nearing the point. Most of the dart is sewed at a 5/8 seam allowance because it is slashed in the cutting process. When you get near the point, you have to taper to less and less.
dart
This shirt has front bands (which I prefer) instead of facings. In the next photo, I have attached a band to the front and you can see it (the right side of the band is sewed to the wrong side of the front) and the inside of the front dart. I fold over the seam allowances on the dart and sew them down in a flat fell. At the point of the dart, I sew in from the seam allowance and turn 180 degrees at the stitching line and sew back down again.
dart inside
The front band gets folded over itself and the folded edge overlaps the stitching line.
front band
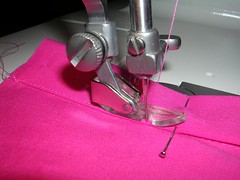
Then you sew the band down to the front, using a zipper foot and getting as close to the folded edge as you can.
front band sewed

Monday, April 03, 2006

Buttons

I finally tried on the grey dress and was muchly relieved to discover that it fit around me, as I had made it in the size 12 and that only fits when I’m not carrying those extra pounds that I am always trying to lose. Unfortunately, it was too SHORT in the bodice! This never happens. I am very short waisted. I have a 30 inch inseam but I am only 5’2”. So I automatically take everything UP in the upper body and this new pattern that I had not made before was no exception. When I put the dress on, the waistline was a good inch above my natural waistline and as a consequence, the belt loops were too high. So I had to pick them off very carefully (the fabric is quite thin and shows every needle hole) and reposition them lower. A jolly pain as you can imagine. (In the following photo, the belt carrier is still in its original position, well above the waist seam according to the directions.)
grey buttons
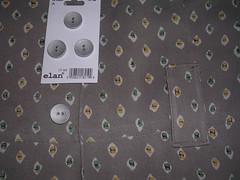
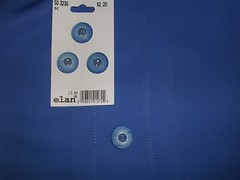
I did however, manage to find some nice grey buttons in a flat finish and now I have made the buttonholes for them and will sew the buttons on while watching tv. I also got blue buttons for the blue shirt I’d made last before the grey dress and will sew them on this evening too.
blue buttons
In the meantime, I got two lengths of plain cotton broadcloth (no polyester in it but happily, a little bit of Lycra) in a bright yellow and bright pink, to make into little short sleeved shirts to wear with summer skirts (or anything else for that matter). I don’t know why, but I tend to gravitate toward muddy brown fabrics and I want to get some more bright colours into my wardrobe.

Saturday, April 01, 2006

Dress finished except for buttons

I have been puttering away at this dress and now I am done, again except for the buttons. When I went to sew the facings down the front, I realized I hadn’t finished the waist seam so I did that. In this photo, you can also see the faint chalk marks on the inside (or wrong side of the fabric) where the carriers will go on the outside.
waist flat felled
When I cut the 14 inch long flattened tube apart into four pieces to make the carriers, I also decided to zigzag all the raw ends so they wouldn’t unravel later. Usually, the pattern instructions don’t mention doing this kind of finishing work and this one is no exception. In this photo, I have sewed the bottom ends of the carriers to the dress in the spots marked and I have folded up the one on the right side, in preparation for sewing the top of it to the dress. I have not done any pressing.
belt carriers
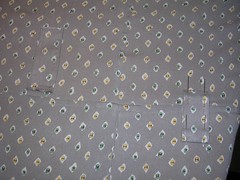
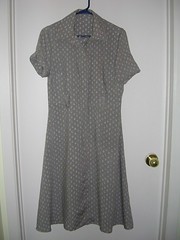
Hanging on the door is the almost-finished dress. I hemmed the sleeves and I have turned up the one on your left and pinned the tab up where it will be buttoned, after I get buttons. I have not done a final press anywhere. I am thinking I will look at grey buttons but keep my options open for yellow and green buttons (or maybe even white) also. {Must remember to get blue buttons too, for last project!]
dress almost finished