Friday, August 29, 2008

Buttons

Votes are split between the shiny brown plastic button and the larger shiny gold button. I myself am still leaning toward the smaller, duller gold button. I need more votes! Four does not a survey make.
Buttons
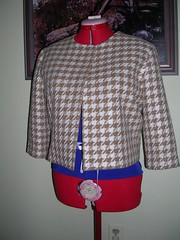
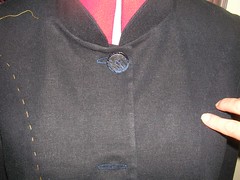
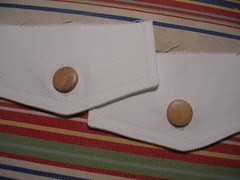
Here they are again, pinned on to the neck of the jackette.
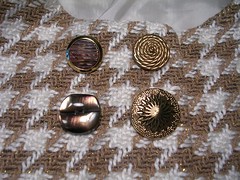
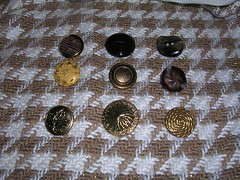
First the shiny brown.
Buttons
Next, the large gold.
Buttons
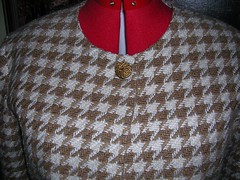
Then the smaller gold.
I suppose I could make the largest size of buttonhole and then switch out the buttons from time to time. More votes!
Buttons
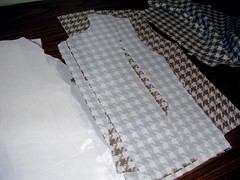
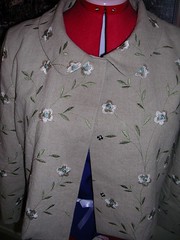
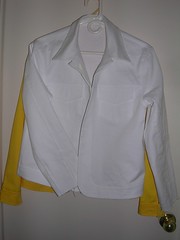
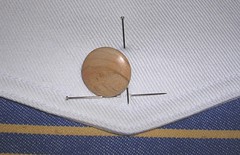
Speaking of buttons, I finally got some for the embroidered linen. It was a tough contest at the store, with Darrell and Carmen going their ways and me going mine. Carmen didn't care for my final choice (too sparkly) but Darrell picked it out as a possibility so I guess he's okay with it.
Buttons
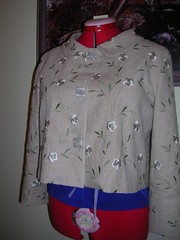
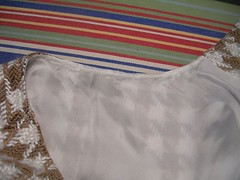
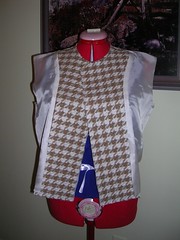
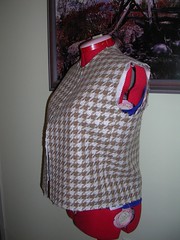
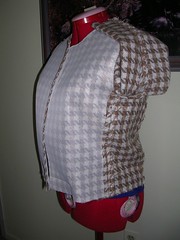
I settled on making the stripes in the "shell" go horizontal and the metallic stripe goes up toward my right shoulder, instead of the way it is in the previous close-up. The buttons are a little oddly paced in this pic because I had just pinned them on. Now I have sewed them on but I was too lazy to put the finished jacket back on Rose.
silk top
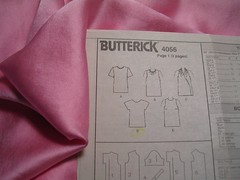
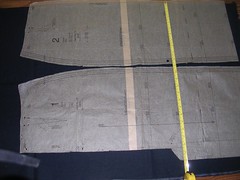
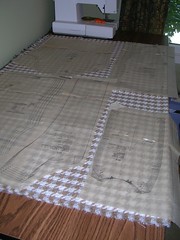
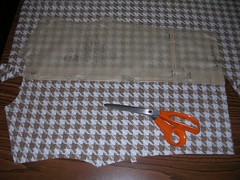
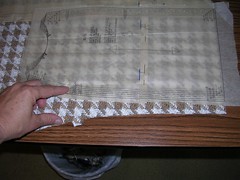
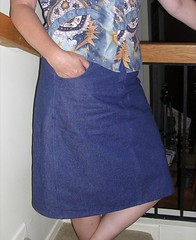
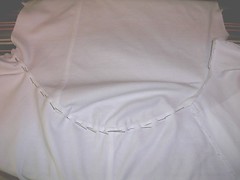
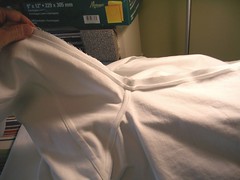
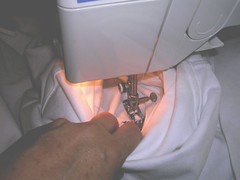
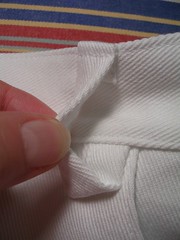
While I am prewashing some oatmeal coloured wool for a skirt, I am going to quickly sew up another top in some silk charmeuse. I love silk next to my skin and have decided to have a few tops to be worn under a jacket. Since it is so small, and since I have modified the pattern, it only takes one meter to make, as long as the fabric is at least 112 cm wide. It's a squeaker!

Thursday, August 28, 2008

Woolly jacket

Nearly done!
woolly jacket
I decided to topstitch around the back of the neck only. The fronts are all interfaced so I don't have to worry about the seams coming unravelled. But at the back of the neck, the thin lining fabric is sewn to the loosely woven woolly fabric and I feared an early dismantling of the neck due to fabric failure. I sewed a second line of stitching beside the first but then, after I had turned the jacket right side out, I put a line of topstitching on to reinforce everything.
woolly jacket
It fits and doesn't bind anywhere. Maybe they fixed the pattern after earlier complaints? Maybe that little side piece went missing? It is very small - a "jackette". The sleeves are 3/4 and the hem hits only a few inches below my waist. But I did only have 1.1 metres of fabric! But I like it. It's light and shouldn't make me too hot while I wave my arms about in the front of the classroom.
woolly jacket
Now I just have to choose the button. There's only one button at the neck. Carmen suggested yesterday in the comments that she liked the largest gold button, in the lower right in this pic. I like that big button too but I am also leaning toward the shiny plastic brown button in the lower left. The big gold one is really big and almost sparkly. Maybe I should go for the smaller, duller gold one in the upper right?

Wednesday, August 27, 2008

Woolly jacket

I really put a push on to work on this jacket last night, as I knew I was heading to Darrell's today for his one-day-only 50% sale. And I got some lovely wool too! So now I really have to get cracking.
woolly jacket
Last night, I got all the pieces together. Here are the sleeves, one right side out and the other wrong side out. I got the horizontal stripes lined up as sharp as can be.
woolly jacket
I got the lining and facing pieces together.
woolly jacket
And I got the jacket pieces together, before I put the sleeves on. I tried it on and it didn't seem like I was going to have problems with the armpits.
woolly jacket
Then I put the sleeves on and tried it on and still no problems. This picture doesn't tell you much! But I thought I'd see how I could do a solo photo, holding the camera at arm's length, standing in front of the bathroom mirror, so I could see what was on the camera screen. Anyway, then I attached the lining jacket to the jacket, around the edges of the front and neck. The pattern instructions called for some other, more complicated way of putting it together and I bailed, because I know how to make a lined jacket without fiddling around.
woolly jacket
Here's another shot of the jacket inside-out, but after I attached the lining to it. I have lifted up one sleeve. It looks like it bags under the arm but it doesn't bind. Maybe the problem mentioned earlier came from how that small side piece under the arm was handled? I can't say.
woolly jacket
Here's what the seam looks like where I attached the front to the facing. Even though I lined up the bottom stripe, the stripes don't match all the way up. Weird. It won't matter because there are no lapels and so you won't see how the stripes don't match. Of course, I haven't ironed the seam open and haven't turned the jacket and haven't ironed it flat again. So maybe it will be okay. I'll know when I run back upstairs now, to finish this jacket, so I can sew something else!
woolly jacket
In the meantime, this jacket (it's so small I want to call it a jackette) calls for one large button at the neckline. Here is a collection from my stash. Hmm.

Tuesday, August 26, 2008

Woolly jacket

I had a lovely parental unit visit over the weekend, but with that and trying to squeeze that last of the Summer out of the last of Summer, and school starting next week (I teach), I have not been sewing!
jacket pieces
Even though this jacket is really a muslin (and if it doesn't work, it'll go to the Sally Ann), I am compelled to finish the inside as well as if it wasn't. And if it does work and I do wear it, then I will be glad I did finish the inside. I used pinking shears to cut the lining pieces. The "wool" is loosely woven so I have zigzagged all the edges that will be ironed open at seams. The shoulders will be zigagged and trimmed after they are sewn so I didn't do those ahead of the construction. The entire fronts are interfaced and I used iron-on interfacing so I didn't need to zigzag those edges. And the front facings are also interfaced. This is one of the few times I have put interfacing on the entire front (not just the facings) so I am looking forward to how that works and feels, assuming I end up wearing the jacket.

Friday, August 15, 2008

Little woolly jacket - we hope

First, cleaning up leftovers.
basic skirt
I had quite a bit of the navy linen blend left over so I decided to make a plain skirt. I had made a long, high-waisted skirt to match the short navy jacket. But like white shirts, I don't think you can ever have too many navy skirts. So I used the reliable, slightly below the waist, waistband-less skirt and hemmed it at the knee. This also allowed me to verify how much fabric I need to make one of these skirts, so I can get 0.8 metres of some plain wool to make a few more. I seem to have a lot of wacky jackets and print shirts so I need plain skirts to go with.
little jacket
Next, a new jacket pattern.
In a previous post, I was warned in the comments against using this pattern. Marji said she and other people had ended up throwing out the jacket after they made it, due to problems under the arm.
little jacket
I laid out the pattern pieces and overlaid them with tried-and-true pieces from other patterns. Nothing seemed too amiss. And since I had this piece of acrylic that I got as a remnant just sitting there in my stash, I decided to be reckless and make the new pattern.
little jacket
I had exactly 1.1 metres of this acrylic stuff. I got the remnant thinking I would make a skirt but the more I looked at the loose weave, the less I liked the skirt idea. I decided to make the view with no collar at all and three-quarter sleeves and I just squeezed all the pattern pieces on to the fabric.
little jacket
In the hopeful anticipation that the jacket will work, I cut each piece out in a single layer so that the houndstooth will match everywhere and be straight. I even cut the back out, which is normally on the fold, by cutting out one half and then folding the pattern piece over and cutting out the other half.
little jacket
Rather than trying to match the notches, I cut out the front and back and side pieces with the bottoms lined up with a white stripe.
little jacket
When I got one piece cut out, I laid it down on the fabric, right sides together and lined up all the stripes and pinned the pieces together and cut out the corresponding other piece, so they would be identical mirror image pieces. Now for the interfacing and lining and then we shall see if this thing goes together or not.

Monday, August 11, 2008

White jacket and other things finished

I got bored with sewing the white jacket and violated my Rule and made a navy denim skirt in the meantime. In my defense, I had had the navy denim hanging over the railing since Spring, planning to make the skirt. It was after I finished the white denim skirt and realized what a good job I'd done and how much I was already wearing it, that I caved and interrupted the jacket to make the other skirt.
navy denim skirt
It's like my navy denim jacket - something I have always wanted but never had until I made it for myself. It has pockets, a "waist"band, front fly and flat felled seams. A classic.
pocket lining
To cut down on bulk, I lined the pockets with some craft cotton I had, just for fun.
snaps
Since I was on a roll with finishing projects, I sewed three snaps to the embroidered linen jacket. I didn't cover them because, when I tried putting even the thin silk over the snap, it snagged and made the unsnapping difficult. I will probably always wear this jacket done up anyway. Now I just have to find new buttons.
pick stitch
Next, I pick-stitched the facings to the front of the navy linen blend jacket.
pick stitch
I used navy thread and you really can't see the stitching, which is what I wanted in this case.
white denim jacket
Finally, I also finished the white jacket. I really like the accent of the wood buttons. What next!?

Wednesday, August 06, 2008

White denim jacket

white denim jacket
If I can put the sleeve in around the shoulder, before I sew up the underarm seam, I will. It makes the finishing flat fell so much easier. And flatter.
white denim jacket
I flat fell the underarm seam as well. Here, I have trimmed off the seam allowance on the back part of that seam, in preparation for ironing it so I can finish it. First I iron the seam open. Then I iron it closed, with the untrimmed seam allowance overlapping the other. Then I turn it right side out and iron it all again with the clapper. Then I turn it back, wrong side out and iron the untrimmed seam allowance folded over the other trimmed seam allowance, and also use the clapper. That's four separate presses of the same seam.
white denim jacket
I haven't shown this shot in a while. To sew down the flat fell, you have to have the garment turned right side out, even though you are sewing from the inside (or wrong side). You start at the bottom edge of the jacket and, up to the armpit, the sewing is easy. Then you have to keep sewing the folded-over seam allowance but now you are sewing inside a "tube" which is the arm itself. Once you get to the wrist (which is where I am in the photo), you are done but you are also down in a "well" of fabric that is the inside of the arm. I was quite excited the first time I ever did that!
white denim jacket
I like it when a garment starts to look like what it is supposed to be. That usually isn't until after the sleeves go on, with a jacket. The jacket is hanging in front of the first one I made in this pattern. It is all wrinkly from being bunched around under the needle of the sewing machine - but the seams are good and flat! Next - cuffs, the rest of the hem, buttonholes and buttons.

Monday, August 04, 2008

White denim skirt

Working on the skirt. I have made this pattern a few times before.
skirt (waistband)
I always put on the belt loops, even though almost all of my belts date from when they went around the waist itself, and so they are 6 inches too short for going around the below-waist area now. I really need to get over to Winners and get a couple of longer belts. AND I need some more leotards (tights) for the Fall. I know! It is too early to think about putting leotards on! I haven't even worn this white summer skirt yet! But, I DO need leotards, more than pantyhose.
skirt (waistband)
Now that I have discovered how to put a waistband (or collar, etc.) on without hand-sewing the facing to the inside, it is a more straightforward procedure and takes less time. (You sew the band on to the INside of the skirt and then sew the band to the outside with topstitching.)
skirt (waistband)
Then you figure out where you want to place the belt loops.
skirt (waistband)
I tack the loop down about a half an inch onto the body of the skirt, so it won't stick out later. Then you sew the band down, catching in the bottom of the loop.
white denim skirt
After that, you fold over the top of the belt loop and get it ready to be sewn down to the band but the line of topstitching at the top of the band.
white denim skirt
Voila! A finished band and belt loop.
white denim skirt
I was going to blog just about the loops when I realized that all I needed was a button at the top and to hem it, and the skirt would be finished. I am only tucking my shirt in to show the top. I am glad fashion these days does not call for tucking things in because I am so short-waisted that the proportion does look better without the shirt tucked in.
(edit: I just realized that I am wearing a smallish belt and so the skirt is riding higher than if I had on a longer belt.)
Next - keep working on the jacket.

Friday, August 01, 2008

White denim jacket and skirt

So I got some plain wood buttons. There wasn't a huge choice so I settled on some shank buttons because they weren't very dark, or very big or very textured. Sort of like the Baby Bear's middle of the road choices.
white denim outfit
I wanted to get them now because it is far easier to put a buttonhole on the pocket flap before you sew it to the jacket.
white denim outfit
Here, I've made the holes and set the buttons on the flaps, with the shank in the buttonhole.
white denim outfit
The other decision I made was about the skirt pocket facing or lining. I didn't want to use the denim because then the pockets would be too thick and look weird. I had some almost white lining but then I remembered the thinner cotton I used to make the last two white shirts I made so I used that instead. You can't really tell from the photo but the denim is in the middle, the lining on the left and the shirt fabric on the right.
white denim outfit
The skirt zipper is a mock fly - a real one is more complicated.
white denim outfit
The zipper itself is too long, even at the regular skirt size, 18 cm length, because the waistband is supposed to sit just below the waist. So I sew a zigzag stitch in one spot as a new stop, above the original metal stop at the bottom, and cut off the excess zipper tape.
white denim outfit
Here's the fly with just the one side sewed down.
white denim outfit
Here's the fly with both sides sewed down. Not too exciting but simple is good too.