Monday, December 31, 2007

A gold party blouse

Happy New Year's Eve! I am pleased that I can still sew quick-like-a-bunny. I found the GOLD fabric and ironed a tiny corner of it. The gold feels like plastic and I didn't know if the whole thing would melt or what. But it ironed like a dream. Turns out I had bought 3 whole metres of it so I had plenty for the top and now no idea what to do with the rest of it. What was I thinking?

Pushing pins through the fabric was another story - it felt like plastic then! I got out a new machine needle called a "sharp" and it must be dull now. But anyway, I cut out both the front and back on a fold and then I cut strips of cloth diagonally and sewed the strips together to make enough bias "tape" to go around the neck so I wouldn't even have to make facings. Then it was just a matter of sewing side seams and shoulder seams and hemming and I was done. I simply pressed open all the seams and didn't finish them at all - heresy for me - but the fabric doesn't ravel at all and doesn't need finishing.
gold blouse
A friend says it looks like "warrior woman"! I say, look at those boobs gleaming in the light! I plan to wear a smooth bra (I may have to take the black bra off my dummy) and maybe a smooth camisole under it and a jacket over it. What the heck - it's a party.

Sunday, December 30, 2007

Comparing patterns and making a muslin

Since I just have hand sewing and the buttons to go on the brown jacket (and therefore I am not really breaking my rule), and since New Years Eve is Monday and I don't have anything to wear that I haven't worn already (we go to the same party every year), I decided to see if I could still sew "quick like a bunny". I also wanted to see if I had a pattern in my collection that would work for this shiny sort-of-knitty gold fabric I bought on a whim several years ago. I didn't think I wanted to make a regular blouse/shirt with the shiny gold fabric because I thought the structure of the collar and plackets wouldn't work. I have a lot of patterns and from many of them, I have only tried one view. I also have issues with shirts where the sleeves dig into my upper arms. I don't think my arms are fat necessarily but I have these issues. Anyway.
blouse patterns
Here are the two patterns I wanted to compare. I have used the tank pattern on the Vogue Tamotsu #2454 many times. It is simple and fits. There are no facings (you cut some bias strips of fabric instead) and I can get it over my head so I don't even put the button opening at the back. I have only used the B view (the mauve tank with the neck gathers) in the Butterick pattern (#4056) once and it was fine. However, I have decided as the years go by that once one reaches a "certain age", slightly covered up is better than bare. So I wanted to see how the D view (the pink one) in the Butterick would work.
It has a round neck which is not very low and cap sleeves which cover a little but don't bind like set-in sleeves. I rummaged around and found some polyester (I don't know why I ever buy it) but in a pretty pale green colour. It also has these raised flowers printed on it which act like plastic when you iron it. Man! Polyester is annoying enough to iron but when you add sticky plastic flowers, it's a good thing I was treating this as a muslin.
comparing patterns
I laid the Vogue tank pattern piece over the cap sleeve piece and saw that it should fit nicely. I cut two inches off the bottom of the Butterick pattern piece because I don't want to have to tuck in the blouse when I wear it.
back placket
I had a feeling that I would be able to pull this blouse on over my head but I made the back placket anyway. I was right and so I won't make the placket next time. This also means that I can cut the back out on the fold too and only have underarm and shoulder seams - so simple! I think I will just sew some buttons right to the placket and not even bother to make buttonholes for this green muslin top.
sample top
Here it is, almost finished. I sewed it up in just a couple of hours, including all the comparing and cutting out parts. I still have to machine sew the bottom hem, press the sleeve hems, sew on the buttons and re-press the neckline but that won't take long. I may even try to make bias strips instead of the facings that the pattern calls for and which I did make for the green top. Even though it is a muslin, I think I will try wearing it under a suit jacket to work at least once. Polyester and my body chemistry do not mix well so it may turn out that I will have "pit issues" wearing it. If that happens, I will wash it and put it in the give-away bag for the Sally Ann. But at least I know the pattern works.

Saturday, December 29, 2007

Almost finished the brown outfit

Still working on the brown skirt and jacket.
skirt hem
The skirt is hemmed and completed now. I sewed seam binding around the skirt and then pinned up a fairly narrow hem. I let the skirt hang for a while and then turned up the lining hem to be about an inch shorter than the skirt and sewed it by machine. I sewed the skirt hem by hand.
flat felling the armhole
I'm really pleased with how nicely this fabric handled. It raveled a fair but but didn't go crazy when I was handling the raw edges and in fact, folded over easily and smoothly and didn't even bunch up like some fabrics. I got it from the sale table - the please-take-this-away table - but it has behaved itself like expensive fabric. I flat felled the armhole because the inside of the jacket only has a partial lining. I started folding over the sleeve seam allowance, having trimmed the jacket seam allowance.
flat felling the armhole
I went around the armhole very methodically, folding in tiny increments and pinning down the fold in preparation for sewing by machine. Once I was done, it looked very nice. Now I have to sew the edges of the partial lining by hand and then all I have left is to decide on the buttons.

Thursday, December 27, 2007

Happy holidays

Time flies by when there are other things to do.
our tree this year
I wish you a merry Christmas and a happy New Year.
the jacket
I asked my Dad for a lift to the fabric store when they were here over the holidays, because they have a car and it is just so much easier to get there with a car in the winter. I was in need of seam binding and used up a whole package on the hem of the jacket, its sleeves and the skirt. The sleeves are on but I haven't finished the armholes yet.
button selection
I have to choose some buttons for this jacket. These are the only buttons I have in my collection that might work but when I asked my Mum, she suggested I cover some with the same fabric. That's a good idea but I don't have any forms for covering, which would mean a trip to the store without the benefit of Dad's car. I think the gold is too gold and the wood buttons don't do much for me. What do you think?

Once I get over this hurdle. then I have to decide what to sew next. I want to make the faux Chanel jacket, especially as I found some pale rose satin that will be perfect for the lining. But I am hoping for a serious job interview and the navy Chanel wool would be perfect for that. Hmm.

Thursday, December 20, 2007

Beautiful fabrics for Christmas

a day shopping
I had such a nice day yesterday, I have to share it with you. Peter told me that this year for Christmas, he wanted me to get some really nice fabric from Darrell's. I have some very nice pieces that I wear a lot, made from fabric I had bought at his shop years ago, when I had more money. Peter knows how much I like them and how much I like really nice fabric so that was his present to me. In fact, in the above photo, I am wearing a shirt made with some lovely cotton I got at Darrell's years ago and the buttons on my faux fur coat are from Darrell's too.
a day shopping
Also, Peter wanted me to invite my friend Carmen so she would provide the necessary moral support for spending that much money. And so we also had lunch together which totally added to the fun.

You really should visit Darrell's web site (if you can't make it to the store). I totally forgot until now to include it in my links on the right - I haven't changed my links in years, sorry. So now it has a top spot. It is a high end store with some designer fabrics selling for hundreds of dollars per meter. But if you want to make something really nice, that you will wear a lot because it is so nice, I would go there. Also, Darrell himself is very knowledgeable about fabrics and sewing and you can even take classes there. And no, I didn't get a discount for saying this. :)
a day shopping
Here are the fabrics I got at this visit. From the left: plain white cotton (you can never have too many white shirts), striped cotton with a little bit of Lycra, steely blue pure wool (almost a crepe), and pure wool plaid. I plan to make matching skirts and jackets with the wool and it is light enough weight that I can probably wear them most of the year although probably not in the middle of summer.

Now (and this is the time to look away if you are reading this, Darrell) I am going to prewash all the fabrics! A gentle cycle with cold water and then a short time in the dryer to really shrink it. Much industrious pressing afterwards. But then I can wash the garment in cold water and lay flat to dry and I won't have to go to the dry cleaner. I figure if the wool was once on a sheep, it can take a little washing.

Tuesday, December 18, 2007

The skirt continued

I am still plugging away at the skirt and jacket, working on the skirt to get it finished first. I am liking this fabric more and more and it is a really nice brown without being dull. I have a feeling I will get a lot of wear out of these pieces.
the skirt
Here are the two halves of the skirt - the inside and the outside. The inside has the interfaced yoke and lining and the outside has the zipper. Now I have to sew them together around the top edge of the skirt (yoke).
the skirt
This is what it looks like sewn together around the top, with the wrong sides outwards. Once the skirt is turned and the wrong sides lie against each other, it will be finished inside and out.
the skirt
As usual, I press open the seam around the top, even though it will get pressed back together again. But this way, you get a sharp edge, with no fabric sinking into the seam.
the skirt
Next, I understitch the seam allowances to the interfaced yoke facing. This will make the seam lie flat but you won't see the stitching on the outside or right side of the yoke.
the skirt
Finally, here is the top of the skirt. I haven't pressed it yet. You can see the yoke on the top and underneath it, peeking out the top, is a view of the inside of the yoke, showing the understitching.

Saturday, December 15, 2007

Continuing with the skirt and jacket

Everything takes twice as long (or longer) when you obsessively finish the inside as well as the outside of a garment.
continuing project
With the flat fell, each seam has to be sewed three times. On my modified flat fell, I turn each seam allowance under and sew it down on each side of the seam. So, seam plus two fells equals three runs at each seam. I'm not complaining - I like to do it this way - but I don't blog very quickly because of it.
continuing project
Here I have draped the lining pieces half sewed over the sewing machine and stacked up the other pieces to sew down the fells on the left. I am also using up left-over beige thread and so I have three different spools of thread standing around, depending on what I'm sewing. I can use up the pale beige on the lining but I need the colour I purchased (more of a brown) to do the topstitching that shows.
continuing project
I am attaching the lining to the skirt yoke/facing, thus making two "skirts" that will be attached to each other around the very top.
continuing project
With wrong sides together, all the raw bits will be hidden. Not that there are many raw bits, with all my seam finishing. But around the zipper it can get a little messy.
continuing project
I have made two pockets and may attach them to the jacket. But I can never seem to get the pockets completely square to the warp and woof, unless I am using striped fabric or I obsessively pull threads along one side. I'll have to think about whether I do use these. I suppose I can always pull threads on some fabric I have left over.

Sunday, December 09, 2007

Skirt and jacket project

skirt and jacket project
I have laid out and cut out a skirt and jacket, using the plain beige fabric that is complimentary to the raw silk.
complimentary fabrics
Here are both fabrics.
skirt and jacket
I am using some tried and true patterns. I have several of these little jackets (Simplicity 4698), in various of the lapel configurations. This time, I am making the one with the notched lapels (view A in the blue/grey on the envelope). The last time I made this jacket, I made it without lapels and in the three-quarter sleeve in black cotton. As it turns out, I didn't take a photo of that one finished, nor the previous one in the curved lapels in black and white houndstooth! What is wrong with me?
skirt and jacket project
I like this skirt with the yoke and will line it for ease of wearing (Simplicity 9825). I'm going with the length that hits me just below the knee. Now for the lining and interfacing.

Friday, December 07, 2007

thinking about the next thing

My dog, I am easily distracted. Last night on Ugly Betty, Wilhelmina Slater was wearing a beautiful outfit and I decided I wanted to make one just like it. Her dress was a black and white print with about 50% of each colour. On top of it, she had a short jacket in a smaller black and white print with more white than black. Simple but really nice.

In the meantime of course, with two feet of snow out there, I am going to make a longish, lined skirt in the complimentary plain fabric to the raw silk. I think I have to go look at more jacket patterns to be sure before I cut the silk. And I want to get something really nice for the lining, like a subtle satin print. If such a thing exists.

Tuesday, December 04, 2007

Still thinking about the silk

I am getting inspired by a re-read of Couture Sewing Techniques. Chanel's techniques are discussed in there and it isn't so much that the jacket had a certain silhouette but how it was made, that marked it as Chanel. My raw silk fabric seems to fit the bill for the shell but I will need trim and a much better lining if I want to "go Chanel".
finished purple skirt
In the meantime, I did finish the purple skirt. Plain and serviceable. I haven't worn it yet, preferring the below-the-knee version in real wool for yesterday's foray into the snow and wind. And today, I think I'll wear the pants whose zipper I fixed. But that lets me also wear Christmas socks which will show a little when I change into shoes at school.
vent completed
Here is the back vent of the skirt, as finished. The lining stays well out of the way and you won't be able to see it as I walk but it still hangs loose all the rest of the way around the hem.
complimentary fabrics
While I was thinking about that raw silk (which IS mixed with some other mysterious fibers), I remembered a piece of mystery fabric I had in my stash and got it out to compare them. They are similar in colour tones which you can also tell from the warp and woof threads at the cut edge. I don't think I have enough of the silk to make a skirt too, now that it shrank so much after I washed it. But it is a loose weave and probably the other plain stuff will be better for a skirt. I always planned to make a skirt out of it anyway.
old collarless jacket
I have a couple of patterns for collarless jackets. This one I made several of before I got tired of it.
old collarless jacket
This pattern is collarless AND unlined but I think I had got the Couture Sewing book when I got the fabric and so I was inspired to line it after a fashion. I cut out each piece of the jacket in satin as well as the wool and then stitched the satin and the wool together around the edges. Then I assembled the jacket according to the pattern instructions. And THEN I finished the insides.
interior detail
There are shoulder seams, side seams, sleeve seams and seams around the armhole (armscye). With each seam, I trimmed the wool and then folded over the satin and tucked it under so no raw edge showed and then hand slip-stitched all the way along the seam. It was a lot of hand-work but I have got a ton of wear out of this jacket that goes with everything.

Anyway, a Chanel jacket is not Chanel because it doesn't have a collar. So I am still going to think some more about what shape I want this jacket to take.

Sunday, December 02, 2007

Another winter skirt, finished

finishing the purple skirt
Here is the back vent on the skirt and in the lining. I want to attach them to each other so that the lining still hangs freely everywhere else and so that the lining doesn't show at the vent on the outside.
finishing the purple skirt
I've pulled the lining into place and made sure that it won't be pulled too low and bunch up the back of the skirt. The vent folds to one side and I'm folding that side on the lining under.
finishing the purple skirt
I've folded the other side of the lining vent under too, but it won't be sewn and attached under the vent - just folded. I'm pointing the scissors at where I will be sewing the vent at the top of the vent.
finishing the purple skirt
Here is the line of basting where I will sew through both layers of the vent and the lining folded under the vent. I have actually done this now and the skirt is finished, ready to wear in the sub-zero weather we are expected to have tomorrow!

In the meantime, a zipper replacement

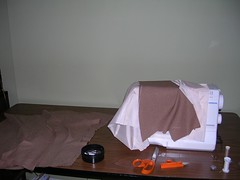
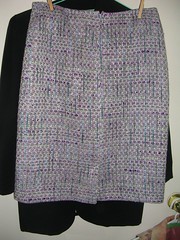
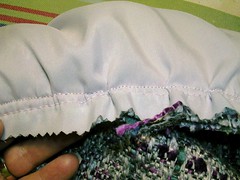
While I was thinking about my next project and not working on hemming the purple skirt, I decided to tackle replacing the broken zipper in the lined pants.
zipper replacement
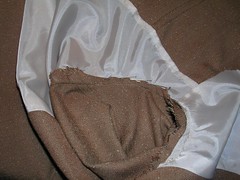
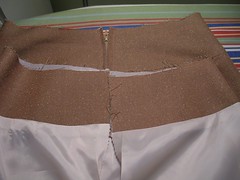
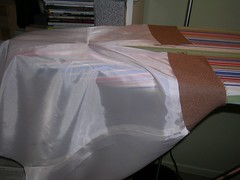
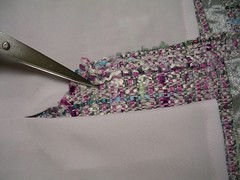
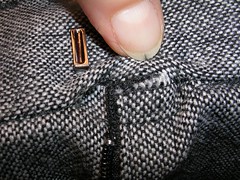
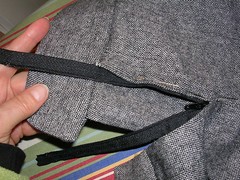
Here's what it looked like first. The teeth had parted company below the slide and I couldn't get them to line up for love nor money.
zipper replacement
I took a photo of the "before" - what it looked like before I ripped it out - so I'd know how to put the new one in, in case I forgot.
zipper replacement
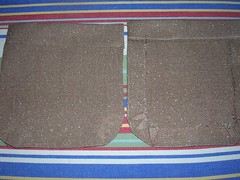
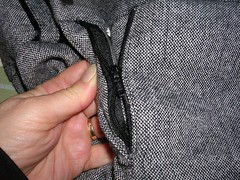
I started ripping out just the stitches around the zipper itself. I didn't want to reconstruct the pants themselves and they are fully lined, which complicates things a little.
zipper replacement
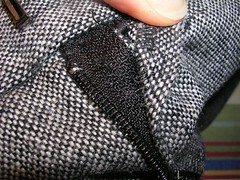
And I kept on ripping the stitches out.
zipper replacement
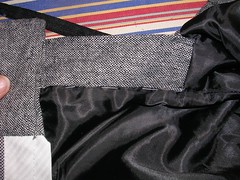
I got one side ripped out and started on the other. I just eased out the tops of the zipper from the waistband, thinking I could slip the top of the new zipper into the gap.
zipper replacement
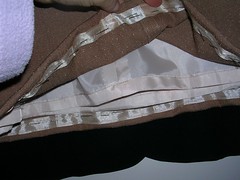
The lining had been caught in the stitching on the inside of one side of the zipper, so it came apart when I got the zipper out.
zipper replacement
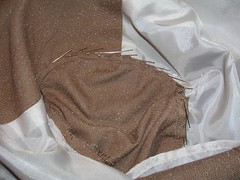
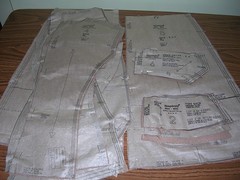
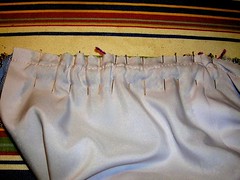
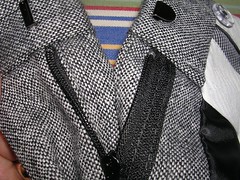
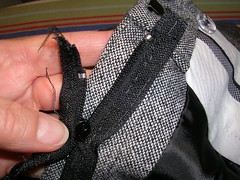
Once I got the whole broken zipper out, I started by pinning one side of the new zipper in place, tucking the bottom into the hole where I had extracted the old zipper. I cut the excess off the tops of the zipper tape and tucked those ends in under the waistband.
zipper replacement
I abandoned pins early and basted everything so I could manouever it without sticking myself. Also, it helped me place the new zipper in as accurately as possible. Before I sewed it on the machine, I turned to the inside and basted the lining to where it would be caught by the machine stitching.
zipper replacement
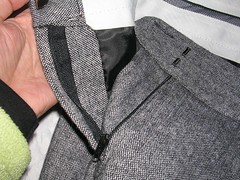
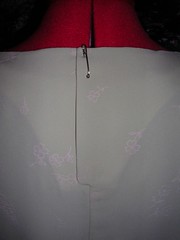
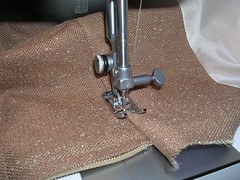
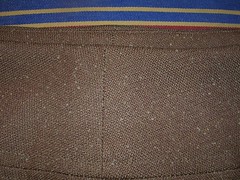
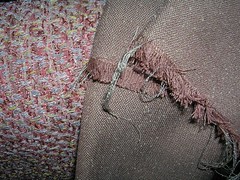
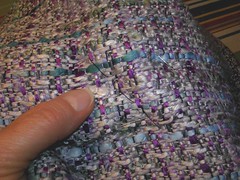
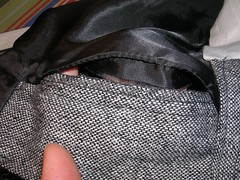
I sewed the side with the zipper teeth right next to the fold first and then tucked the ends in and basted the other side, which went under the overlap. Instead of disassembling the entire front, I cheated and just sewed the tape down under the tab overlap, right down the middle. The stitching shows on the right side but since I normally wear a shirt tail out or a sweater over the waist, it won't show much.
zipper replacement
In any event, it doesn't show even when you look it it fairly closely. Anyway, I can always go back in and hand stitch that side of the zipper and take out the machine stitches if I don't like it. I just feel that a machine stitched line is firmer and more sturdy than hand stitched. And now back to the skirt.

Another winter skirt, continued

another winter skirt
This is a very simple skirt. I got the side seams on the skirt and on the lining sewn up and so the two pieces were now tubes that I could put together, wrong sides together, and stitch around the top. I am going to finish the back vent at the very end, after I have hemmed the whole thing.
another winter skirt
In the meantime, I decided not to do darts. The fabric is loose and it wouldn't look as good with hard darts sewn in. Instead I convert darts to ease, after having learned I could do this from a useful book I bought some time ago.
another winter skirt
It is from the Taunton Press which is the company that also publishes Threads magazine. And it is calledCouture Sewing Techniques.
another winter skirt
My understanding, having done this several times now, is that you just take the excess fabric where the dart would normally go and spread it out into tiny little wrinkles called "ease". The top photo of my skirt shows how I have pinned the excess fabric to the facing.
another winter skirt
This photo shows what it looks like after sewing the lining and skirt (attached to each other by a line of machine basting which you can also see in this photo) to the facing.
another winter skirt
This is what it looks like on the right side, before pressing. My hand is holding the facing.
another winter skirt
This is what it looks like after I pressed it all flat (I haven't pressed the facing to the inside yet). And I also have not done the understitching.
another winter skirt
Here it is, all finished along the top. The ease is right under where the clothespins are. With this fabric, you really don't notice it at all. Now I have to hem the fabric and the lining and then stick the vents together.