Wednesday, August 08, 2007

Handlebar bag finished

And we're ready to rock and roll. I got a length of soft braid (they had shinier stuff but mine seems to be made of something cottony) to act as the shoulder strap.
handlebar bag
I had to figure out how to insert it between the zippered top and the body of the bag so that it would end up on the outside where it belonged but that wasn't too difficult. Here I've pinned the zippered top to the bag and the shoulder strap is inside the bag about 2 inches so I can sew it down for extra strength.
handlebar bag
The handlebar itself is packed so I used a lamp to simulate the bar. It doesn't show very well here but my plan is to loop the whole strap over the handlebar and then snap the loops onto the bar as well, creating a redundancy. This bag will contain all the little things we want to keep handy while riding (like the camera and money) so I don't want it to fall off.
handlebar bag
I figured that I could use an 8 inch loop over the handlebar on each side so that's where I placed the hammer-on snaps. Here is the bag hanging up, with the loops snapped shut. I'm pretty pleased with it even if I won't get to test it in action until we get to Halifax. I've put a few notes on the photo if you want to go see them at Flickr - nothing exciting.

Tuesday, August 07, 2007

bike bag redesign

Well I am cleverer than I look because the bike bag worked with the measurements I gave it! It only connected with my knees when I was pedalling into the wind or when we hit a really big bump. We biked about 30 kms with it and I loaded stuff into it and was pleased with it. I think I'll use it again on treks to the market or elsewhere.
at the Lansdowne market
As I did on Sunday! Here I am in one of my rayon bike shirts. You can just see part of the bag behind my right hip. More importantly, there are horses in the background!
at the Lansdowne market
Here's Peter in one of my shirts, and you can see the bag hanging from the stoker's handlebar. In spite of its success, I had decided to redesign it anyway, especially as the zipper was not easy to operate one-handedly.
handlebar bag
So I am basing the bag on the tote bag pattern I have used many times (especially for gifts). I am using the smaller of the sizes and modifying it a fair bit. I wanted an exterior pocket that was easily accessible so I could whip out the camera at a moment's notice while pedalling. I decided to make a gusseted pocket to accommodate the bulk of the camera and prevent the bag itself from being distorted when the camera was in the pocket. Of course, I couldn't make a pocket on only one side so I did a matching one for the other side of the main bag. In this photo, on the right-hand side, I have stuffed a kerchief into the pocket before the bottom has been sewn down. On the left, I have sewn the bottom of the pocket down.
handlebar bag
After I tested the pocket, I realized that the camera would not be totally secure and decided to close it with some velcro. I tried closing the pocket top with the velcro attached directly to the inner edge of the pocket but the top of the pocket buckled too much. So I sewed the bit of Velcro to a bit of a tab and then I could secure the open edge of the pocket to keep the camera from falling out (if the bag tipped badly) but still have easy access to it.
handlebar bag
Here is a finished pocket, stuffed with the handkerchief. Then I applied two interior flat pockets and sewed the sides of the bag together.
handlebar bag
Here is the bag before I put on the zippered top and attach the handle. The handle is going to be the really clever part, although I have only designed it in my head so far.

Friday, August 03, 2007

Bike bag template finished

Wow, that bike bag is HUGE.
handlebar bag
First, I got all balled up at the corners because I was fitting half moon pieces into straight pieces. Not my usual "so tidy on the inside" at all. When I turned the bag right-side-out however, it looked fine so I guess I can live with it.
handlebar bag
Next, I saw that the straps or loops were too small to put buttons on so I went for some left-over snaps I had. I think I may go for snaps in the finished product also. Then I stuffed the bag FULL of every hand towel I own (it is very capacious) and went to the garage.
handlebar bag
As I planned, I slid one fixed loop over one end of the handlebars and then slid it to the middle to get the other loop over the end of the bar. That went well.
handlebar bag
Then I centered it and snapped the middle loops shut and there it was - the biggest handlebar bag I've ever seen. I think it will connect with my knees as I pedal but I won't know for sure until we go for a ride or at least until Peter holds the bike for me while I sit on it. It sure didn't seem very big with the dimensions I wrote down, nor while I was making it. So I am glad I made this template and will go back to the drawing board after a test drive.

Brief bike interlude

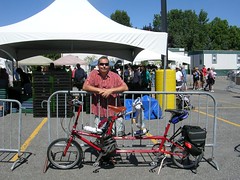
So there I was, sewing away on the black 3/4 sleeve unlined jacket and thinking that black is sure hard to photograph, when it occurred to me that I needed to make a handlebar bag for the tandem. First, where I have got to on the jacket.
four front pieces with interfacing
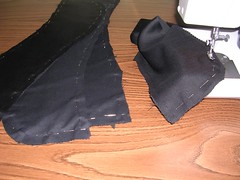
The instructions call for all four front pieces (two fronts, to facings) to be interfaced. All I had in black was sew-in interfacing but I thought it would be best to use that in any event, as the iron-on stuff still seems to bubble and I am not convinced it is the best choice for large pieces like these. Plus, I am going to use it (sew-in) for the navy wool (whenever I get to it) and it's good to practise.
unruly flat fell
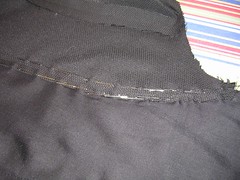
I'm sewing all the vertical seams and flat felling them in the modified fell, mostly because the jacket is only partly lined. Even though it is cotton, this fabric doesn't take a crease very well, and it frays and sheds, so the flat felling has been awkward. Here, you can see two seams, one unfinished at the top and the other is the seam between the interfacing front piece and the front side piece. I had to resort to pinning the curves after I ironed the seam allowances. Anyway, it is coming along but first, the bike bag.
sketch of bike bag
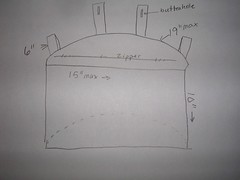
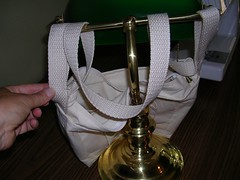
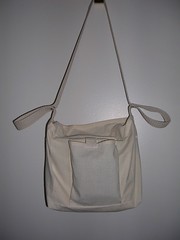
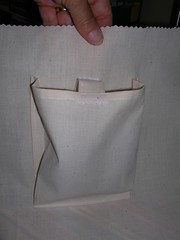
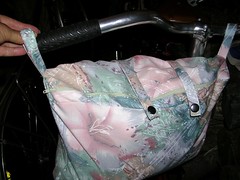
I made a sketch of what I wanted and filled in dimensions after going into the garage to measure distances between handlebar ends, stems and water bottle cages. I figure I can slip the sewn-in loops over the ends of the handlebar (first one side and then the other) and then secure the middle tabs or loops once the bag was hanging from the bar. A zipper the entire width of the bag would allow easy access.
bike bag with zip
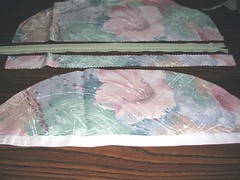
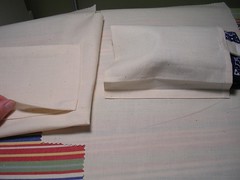
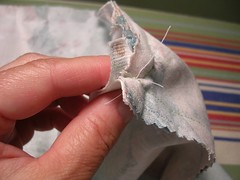
The bag is effectively a muslin because I'm going to have to use it on a ride to determine what changes might have to be made. I'm also going to have internal pockets and an external zipped pocket on the finished model. Here are the top and bottom of the bag. You can see I have split the top and added seam allowances in order to allow a zipper along the front (close to me the rider) edge.
bike bag top and bottom
Here are the top and bottom again, without the zipper yet. The bottom (I left the white selvage on it) is folded back on itself.
upper seam where I forgot the tabs
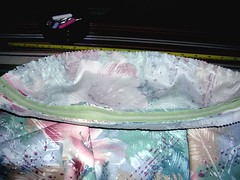
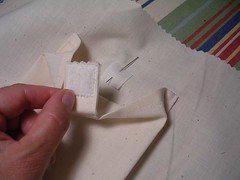
After I installed the zipper, I cut a piece for the curved back and without thinking, sewed it on to the top. I was so concerned about how I was going to fit a curved piece onto a flat piece that I totally forgot I wanted to sew in the four tabs that are needed to secure the bag to the bar. Stupid. Now I have to pick the seam apart in four places and insert the tabs. Grr.