Wednesday, January 31, 2007

A summer shirt

Last day of January, although not of Winter, I know. Erin at DressADay is waiting for summer and I have decided (at least for now) that so am I. I have been thinking about this shirt I made some years ago and how comfortable it is and have decided to make another. It is what LLBean might call a camp shirt - short sleeves, spread collar, straight (not fitted) body. I wear this shirt a fair bit in the Summer because it is cool and not fitted but it also isn't too baggy. I made it out of something that is probably rayon although, since I got the fabric as a remnant, it didn't say what it was.
old camp shirt
The problem comes from not remembering which of my patterns I used when I made it. I got out the most likely pattern and laid the paper over the shirt and it seems to be the one, Simplicity 9210 (not the puffy sleeves version!)
new shirt fabric
So then I went looking through my own remnants and rediscovered this rayon from which I had made a dress even more years ago. At the time, I was wearing dresses to work every day and I made "several" (read "many") using this one pattern that was so easy and nice to wear - McCall's 8017. However, I also made them fairly short and now that I am several years older, I find myself approaching (if not already at) an age when skirts above the knee don't really work for me any more. Which is to say, I may not wear the dress made from this fabric any more so I am okay with making a shirt out of it.
dress pattern
As far as my Mum goes, she's still in hospital and still asleep. Her doctors call it it a real conundrum but they are all interested in how to get her back to normal and working really hard at it. I think it helps the doctors to work harder because all kinds of family visit her every day and it is clear that many people care about her very much.

Friday, January 26, 2007

A new skirt

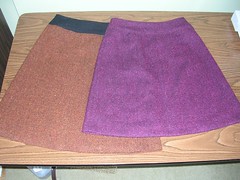
It's been a heckuva a week, with my Mum in hospital with no clear diagnosis or prognosis. So I kept myself busy and, among other things, finished the skirt.
finished skirt
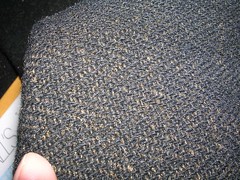
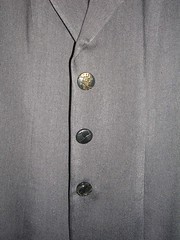
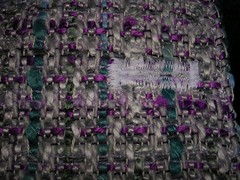
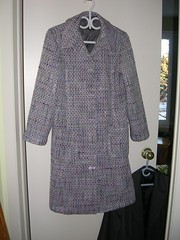
You can't see any detail because the fabric is so dark but I wore it to teach on Thursday and got Peter to take a photo when I got home. Those are the tall suede boots I wear when it's below 20 below. And the jacket I made (of course) from some lovely thick wool that Mum got me years ago. I don't sacrifice warmth for fashion!
skirt piece with lining
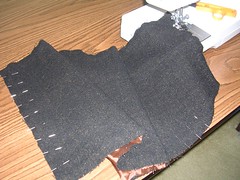
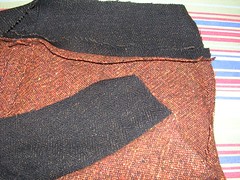
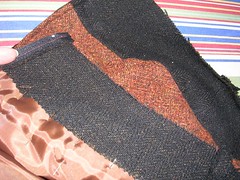
First, back to the beginning. I sewed a piece of lining to each fabric piece - there are only three pieces for the skirt - one front and two back. I made the darts first.
lining being attached
I put pins in about every inch-and-a-quarter, so the fabric wouldn't have a chance to stretch and go into folds as I sewed it to the lining. I used a wide zigzag stitch close to the raw edge to stitch the two pieces together, except at the top where I used a straight, basting stitch because I knew I was going to trim the seam when I was finished attaching the facing.
zip prep
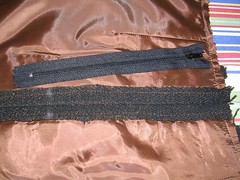
Once I had all the lining attached, then I sewed the two back pieces together and hand basted where the zipper would go. I chose hand basting this time because I thought when it came time to rip out machine basting, I might find myself snipping the wool fabric itself because the fibres are so loose. It also gave me the opportunity to use a contrasting thread so I could see it better. Then I pressed the seam open and pounded it with my clapper to get as sharp a folded edge as possible.
zip finished
Because the fabric is so loose, I also basted this zipper in before sewing it, something I don't often do. I can be a bit of a lazy sewer and don't do much basting but it does pay off if you want to be careful.
zip close up
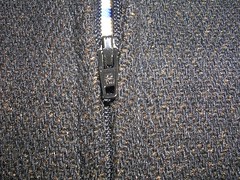
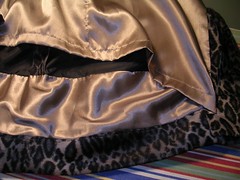
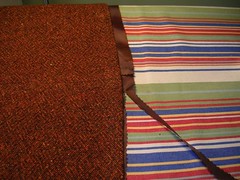
I had bought a dark brown zipper the last time I was out at the fabric store but I also picked up a black one while I was at it and when it came time to choose the zipper, I went with the black one, as the fabric really is very dark.
vent inside
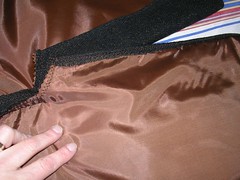
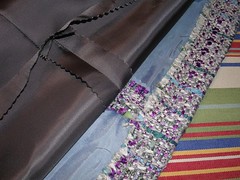
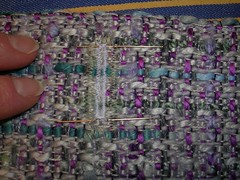
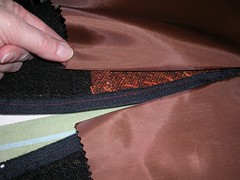
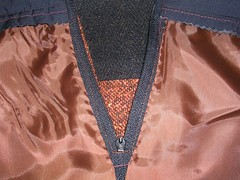
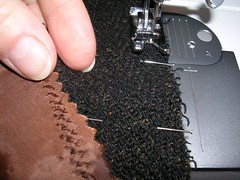
With the vent at the back, I made chalk marks on the inside (or right side) of the lining, so I would be able to see where to stitch. In the photo, my fingers are pointing at the chalk marks and I can see them but they are pretty faint for the viewer, sorry. I also folded over, pressed and stitched the long edge of each side of the vent to finish the edge.
vent outside
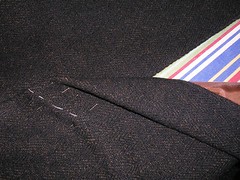
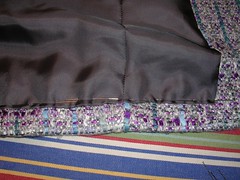
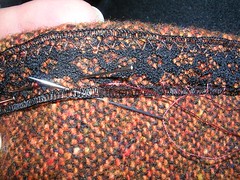
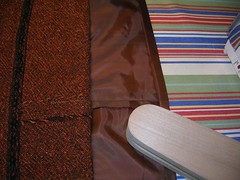
I folded the vent over to one side following the pattern instructions and stitched a line of basting along where I had put pins to mark the stitching line. I also pinned the vent into the proper position and took the pins out as I sewed the vent. For the hem, I machine sewed some of that lace seam binding along the raw edge of the skirt and then folded the hem up and sewed it up by hand.

In wearing the skirt, I can see faint evidence that the wooly fabric wants to behave differently from the lining and there is a little bit of bagging because of the way I stitched the lining directly to the fabric. But I found that I can just twitch that away when I stand up and anyway, the fabric is so dark, that you hardly notice anything happening. For a remnant, I think I'll get a fair bit of wear out of this skirt and it doesn't owe me anything.

Thursday, January 18, 2007

An old coat

Just a tidbit until I blog some more about the skirt - stuff to do in the meantime, unrelated to sewing.
old fleece coat
I made this coat maybe 5 or more years ago, out of some fleece that was on sale (no! imagine that!). I lined it but it's not double-lined so I wear layers under its roominess for warmth. The cuffs are folded up on purpose - I could have put contrasting fleece there - and so they are an extra source of warmth. It's the perfect size and length and everything. And I made a headband out of the left-overs. I also made the pale mauve fleece I'm wearing underneath and my Mum knitted my mittens (which I'm not wearing in the photo). If I ever learn to knit, I may never leave the house.

Wednesday, January 17, 2007

And now another skirt

I can't believe I don't have enough shirt buttons in my stash! I have finished the candy striped shirt except for the buttons.
shirt except for buttons
So cute! Anyway, until I can get to the store for buttons, I have turned my attention to the big remnant of brown fabric that I used for the yoke on the orange skirt I just made. The only thing I could think to make with it, because it is quite thick, is the plain, straight skirt of which I have already made many. That is McCall's pattern 3830 and I generally make the second longest view B.
much used skirt pattern
The fabric totally didn't show up in the first shot, so here it is in closer and with better lighting.
brown fabric
I've already got it cut out and some lining too. In spite of what happened with the purple skirt, I am going to sew the lining directly to each skirt fabric piece only I'll be better prepared for the potential stretch. With a long vent in the back of this skirt, arranging the lining so it doesn't show can be tricky. If I sew the lining right to the skirt pieces before they are assembled, then the lining moves directly with the skirt.

Saturday, January 13, 2007

A blouse in the meantime

Well, thanks everyone for their compliments. I still went to the gym today (finally!) and lifted weights. I get a fair workout getting there and home again, what with the 20 minute walk and the same going home but carrying groceries. Anyway, I think I have broken my bad habit of not going and hope that those 10 pounds that make me squeeze into the coat will disappear before it is warm enough to wear the coat. And yes, I know it is more about what I eat than how much I exercise! It's the actual doing of it that's difficult.

In the meantime, I have been wondering what new project to start. I have all kinds of stuff here to work on without buying anything new, although I did get a gift certificate for Fabricland for Christmas! (Thanx, N!) While that has been percolating, I have still be debating about the buttons for the grey jacket. Here they are, pinned to the jacket to make them seem more realistic.
buttons pinned on
And here they are in extreme close up.
button close up
I know you guys didn't like the one on the right with the gold band, but I am still thinking about it.

In the other meantime, I have had a length of cotton hanging over the upstairs railing since way before Christmas, when Mum bought it for me off the extreme sale table. I wanted to make a shirt from the pattern I have used many times before and I thought it would be a good type of shirt to take to Florida. It is all cotton with a little bit of Lycra so I can make it in the close-fitting pattern and still have room to breathe. I decided just to cut it out and get going on it.
shirt pattern
The pattern is Simplicity 9877 and advertises itself as a cowboy shirt but if you don't add embellishments and just make a shirt out of it, it is a very easy pattern. Plus, when I was cutting the fabric and my scissors were slicing cleanly through it and not getting hung up on fuzz and there was no shredding and fraying, I totally relaxed and knew I'd have the shirt made in no time, just for the fun of it.
shirt fronts
I completed the shirt fronts with bands and darts in no time.
shirt collar
When you have Lycra in the fabric, installing the collar is a snap because you can just stretch the fabric instead of clipping it.
shirt half done
And so here it is, about half done. I am flat felling the seams (of course) and will put the sleeves on next so I can fell the shoulder seams more easily, before the underarm and side seams are done.

Wednesday, January 10, 2007

And the coat is finished!

Ta Da!
finished coat
And with a large square scarf that I have had for years but whose colours work so well with this coat:
finished coat with scarf
And now I see I really DO have to lose 10 pounds. At least.

Tuesday, January 09, 2007

Coat almost done and a button question

coat hem
The hem in this coat is done (according to the instructions) like the hem on a lined suit jacket. Which is to say, you sew the lining hem to the coat hem and all the insides are sealed in. I decided to do it that way, partly because it was in the instructions but also because of how the fabric frayed. I sewed up the coat fabric hem first, taking large stitches that hid among the loose weave of the fabric on the outside.
coat lining hem
After I pressed the hem flat, I pinned on and sewed the lining hem to the coat hem, like I would in a suit jacket.
fur coat hem
Several years ago, I made myself a fake fur coat using a different pattern. This pattern instructions called for a free-hanging lining and suggested I do a couture type hem on the coat, which I did. First, I had double-lined the fabric as I did with the current wooly coat I am making, by sewing identical pieces of lining fabric directly to the coat pieces before I sewed them together. (And boy, is this coat warm!) Then I sewed a long, slightly bias strip of the "real" lining to the coat hem so that when I turned up the coat hem, I was turning up a good six inches of fabric. In the photo, you can see the gold lining which is free from the coat at the bottom. You can also see the hem of the "fur" part which has been sewed to a strip of the gold lining. I put this in as a contrast in methods.
button
Now for the buttons and the buttonholes. First I found the nice, plain mottled purple buttons. Then I made normal buttonholes with my automatic buttonholer. Because I feared all the threads of the coat fabric would pull away when I cut the buttonhole open, I zigzag stitched all around the nice buttonhole and got this mess:
first bad buttonhole
Yuk.
coat and jacket
I let it hang there on the door for a day, looking at the white blob every time I went by. Finally, I decided to pick out the threads (I used a seam ripper) and start over with a darker thread.
finished buttonhole
Much better. Now, I hadn't cut the holes open yet and when I did, as I feared, I cut half the original buttonhole threads (too much fluffy wooly stuff in the way) so I had to go over most of them and stitch them down again (a photo on that later). The next entry will be about the finished coat and hopefully, I will be wearing it! I'll be sewing the buttons on tonight while I'm watching the new CBC show "Little Mosque on the Prairie".
buttons for grey jacket
Finally, I still haven't done the buttons on the grey suit jacket I was sewing before Christmas. I'm going to use one of these buttons from my stash but am still undecided. What do you think?

Monday, January 08, 2007

Fleece and a great bike ride

This entry isn't really about sewing but it is partly about clothes. Yesterday was so mild - it got up to 4C and it was sunny - that we decided to bike to the MEC to look at sports clothing. That's a 20km round trip -- in January! I wore my old but favourite Pearl Izumi sports pants (the kind with an ankle zipper) and a fleece jacket I had made over a turtleneck, all under a GoreTex bike jacket. I also wore an ear band, mitts and a neck gaiter, all of which I took off on the ride home. I was ostensibly looking for new stretchy pants to bike in but I always keep my eye open for "technical" clothes that I don't or can't make myself. I like making my clothes but sometimes, it is nice to buy some that someone else made. And I can't always find the "technical" fabric, like really good fleece that doesn't pill. Since I don't have a serger, I also rationalize buying things like t-shirts.
my MEC haul and other things
Here are the clothes I got at the MEC - two long sleeved t-shirts and a fleece jacket a lot like the one I made. I especially loved the green of the fleece and the t-shirt. Also on the bed is the mauve fleece jacket I made (even if you look closely, you can't really see the pilling but it's there). I was also lucky to finally get some YakTrax in my size. Peter has been looking for them but they have been sold out everywhere. Yesterday after we were finished at the MEC, we stopped across the street at the Expedition Shoppe and he found YakTrax! I am tired of falling on my ass during episodes of freezing rain, and after I passed 40, I realized I don't bounce like I used to and it hurts more to fall.

Last evening, I sewed up the hem on my coat and expect to finish it today. I got buttons on Saturday and will show photos and blog about the coat in the next entry.

Wednesday, January 03, 2007

Two Skirts Finished!

orange skirt pieces
I always feel clever when a plan comes together. Here are all the pieces of the orange wool skirt, laid out and ready to sew. It's a nice simple skirt pattern so there are four gores in each of the skirt and lining, three yoke pieces and three yoke facing pieces, plus of course, interfacing.
orange skirt yoke
You have to sew the yoke to the skirt before you can put in the zipper. In spite of the slight differences in fabric weights and stretch, the dark brown sewed to the orange "wool" just fine.
lining
Because I didn't want to go to the store, I just used the 23cm black zipper I had, instead of getting an 18cm dark brown skirt zipper. I am sure it will work out fine. Then I attached the lining to the bottom of the yoke by pinning it to the now ironed-open seam allowances where the yoke is attached to the skirt. I have to topstitch the seam allowances on the right side and I figured I could secure the lining with that topstitching. First I pinned the lining on the inside, to make sure it was properly lined up with the seam allowances. Then I put pins in around on the right side, so I could take them out as I sewed. I have decided it is bad for my machine to keep sewing over the pins as I have done all these years and although it slows me down a bit, I now remove pins as I go.
attaching lining
Here is the lining pinned both from the inside and the outside. Once all the pins were shifted to the outside, I sewed two lines of topstitching around on the yoke and skirt and the lining was attached. After that, I sewed the yoke facing (in black broadcloth) to the skirt and stitched it down by sewing in the "ditch" - the actual seam on the right side, between the yoke and the skirt.
hem
I sewed the hem by hand. Often, especially on cotton and casual skirts, I sew a narrow machine hem but on these wool skirts, I decided to go by hand.
excess lining hem
Once the skirt was finished and pressed, I cut off the excess lining fabric that showed past the finished wool hem. I had cut the lining gore pieces to the same size as the wool pieces so the hem of the lining would show if I just hemmed it up like the skirt. I had to make the lining shorter than the skirt and I decided to cut off fabric and make a narrower hem, rather than folding up the lining and making a wide hem.
skirt lining
I ironed up a fold of the lining and then a second fold and then I just sewed around it on the machine because it doesn't show.
lining around zipper
Because the lining was only attached around the yoke, I decided to sew it to the zipper tape on the inside so it wouldn't get caught in the zipper when putting it on or off.
two skirts
Finally, here are both skirts! You can see the purple one is shorter than the orange one and I am glad I used the dark fabric for the yoke, both for the extra length but also for the look. Now it's back to the winter coat!