Tuesday, January 31, 2006

New project- pants and shirt

Pants! And a shirt!

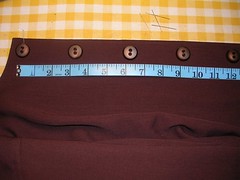
Okay, I’ve been thinking I have to refine my dress pants pattern. I keep hearing on “What not to Wear” that dress pants that go straight down are the most flattering cut. I really like the casual jeans pattern I have and it fits but the legs are tapered AND it doesn’t look dressy. I have several pants patterns (included in patterns with whole outfits of jackets, skirts and stuff) that have no waistband. Some have a side zipper or a back zipper or even a front fly but the key is that they don’t have the waistband AND they go straight down. Not only can you tell from the pattern piece, but you can tell because the width at the bottom of the leg is wider than on the jeans. My pants are 13 inches wide at the bottom of the leg on tapered pants and jeans, but they are 18 inches wide on the dress pant.

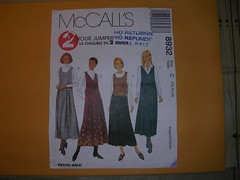
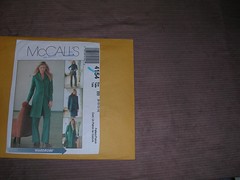
I have made the pants in McCalls pattern 4154 once before and they fit nicely. I rarely wear them because I used some material that was very flowing and bright blue with flowers on it. But they did fit well. So I am making them again.
pants pattern
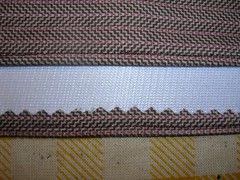
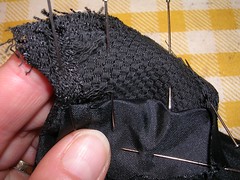
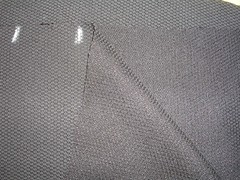
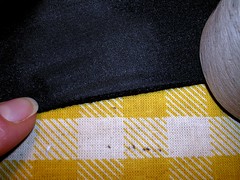
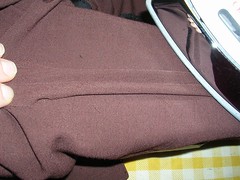
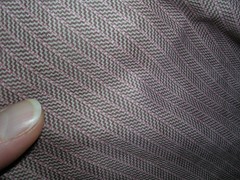
Speaking of being challenged about fabric, I was going to use some plain grey stuff I didn’t even remember buying but instead, went with this really odd stuff I do remember buying because it was on sale - probably $2/meter. It has Lycra in it too - a bonus! But it really is odd. The wrong side is plain white and looks like a knit. At last I will be making something where you can tell the right from the wrong side. The right side is a subtle stripe with a sort of herringbone look to it. The main colours are brown and off white and there is a red thread running through it too. Overall, it has a pinkish look to it. It also has a nap. The finish is more than peached - it is brushed and so I had to cut all the pieces facing the same way “up”.
fabric
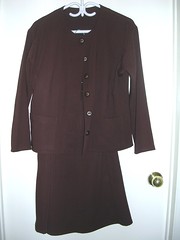
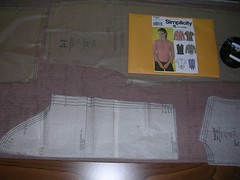
When I laid out the fabric with the pants pattern pieces on it, I realized I had enough extra to make something else so I decided on a shirt. This shirt pattern has facings on the front and a spread collar so I am thinking I could wear a t-shirt or turtleneck under it, so it works more like a jacket than a shirt. I think it would be entirely TOO much of the fabric to ever wear both the pants and the shirt at the same time, however. I have made this shirt before on several occasions and I usually leave out the darts in the back so it fits more loosely. I am also making the 3/4 length sleeves.
shirt pattern
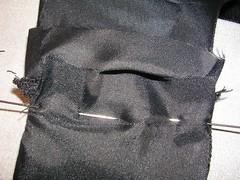
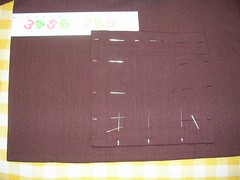
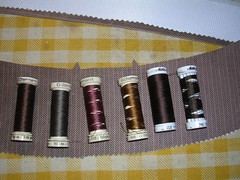
Next, I had to decide on the thread colour. With white on the back and brown and red on the right side, it was difficult. I laid out six spools of brown thread I already had to see what looked best. I refuse to buy new thread while I am sewing with “ugly” fabric that I am merely trying to use up. I eliminated the three spools on the right and plan to use up the three on the left. I am also going to use white thread in the top or the bobbin, depending on what piece I am sewing.
thread colours
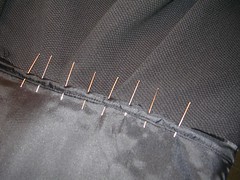
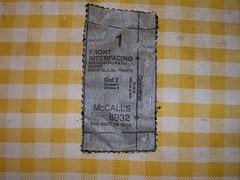
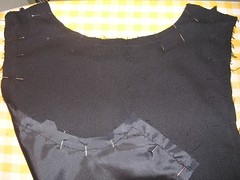
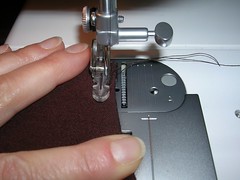
I ironed on the interfacing where required and started assembling the pieces for sewing. I was going to sew all the darts at once, so I decided on brown thread for the bobbin and white for the top thread. The brown would show up on the inside which wouldn’t matter for the pants but might show on the top. But I decided not to worry about it.

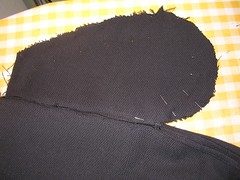
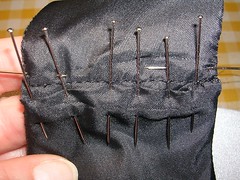
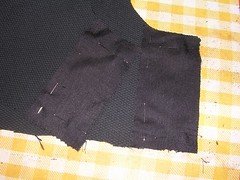
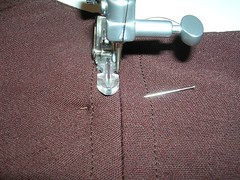
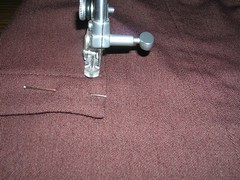
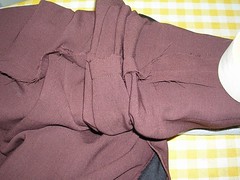
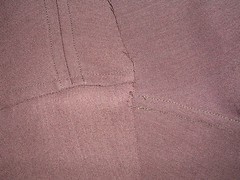
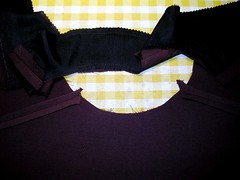
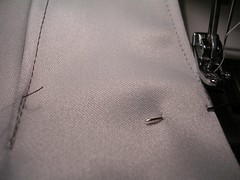
The next photo shows two darts made in one side of the pants back. The first one has the brown bobbin thread showing and the one I have just finished shows the white top thread.
dart points
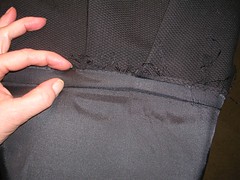
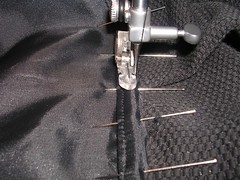
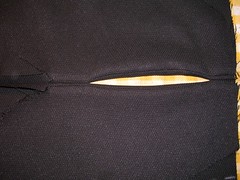
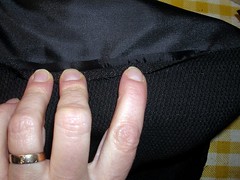
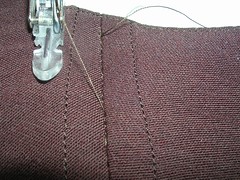
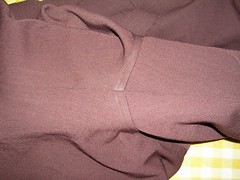
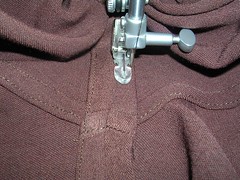
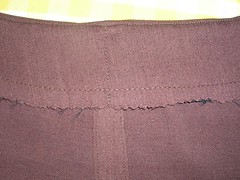
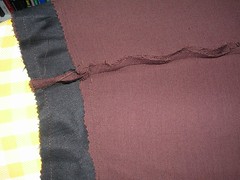
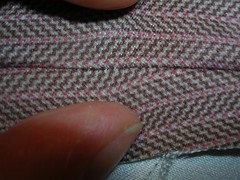
When I used the same thread combo on the split dart on the shirt front, I opened up the “seam” and took a picture of what the threads will look like once the seams have been pressed open. You can see two colours of thread but you really have to look closely.
mixed threads
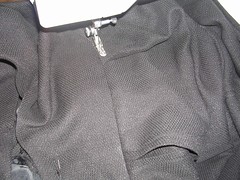
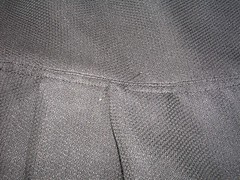
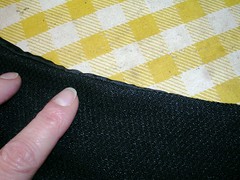
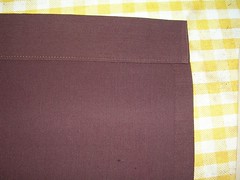
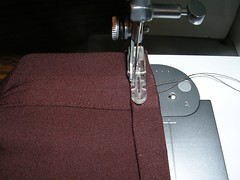
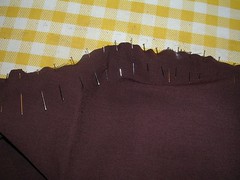
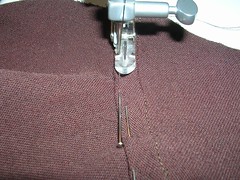
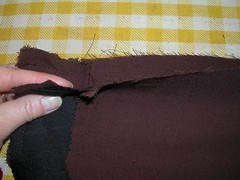
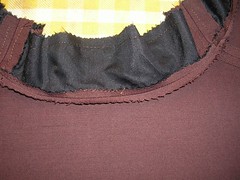
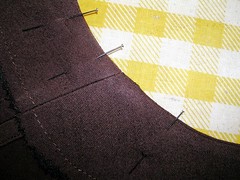
Finally, I finished the raw edge on the facings for the front of the shirt. I already pinked the edge to prevent fraying but I also ironed over the raw edge and sewed it down. In the last photo here, you can see what brown thread looks like as topstitching. I changed the top thread to brown and sewed the facing edge with brown on both threads. Although I didn’t make a big effort to sew totally straight, it doesn’t look too bad.
facing edge

Saturday, January 28, 2006

Jumper finished

It took me another 2 hours to finish the jumper and now I’m done.

First, I finished the pockets by sewing together the two pieces.
pocket
Then I sewed the bodice to the skirt according to the instructions, making deep pleats as I went. When the top and bottom were sewed together, in places I had nine layers of fabric - where the bodice sides overlapped (3 each) and met the pocket and the skirt (3 more). The cotton fabric frayed quite a bit and so did the lining (as usual), and I really didn’t want a messy finish on the inside so I decided the trim the cotton layers and fold the thin lining seam allowance over all the raw edges.
waist mess
I could see as I trimmed that I should have made the lining seam allowance deeper than the rest to give me more to work with. Next time! I may add a 1/4 inch to the lining at the bottom or I may just sew a 3/4 inch seam, as the jumper is plenty long enough to allow for this manoeuver. However, before I did anything, of course I ironed the waist from all angles. First I ironed open the seam allowance. Then I ironed all the seam allowances down toward the skirt, from the inside and the outside. Then I decided I would topstitch on the outside, using a zipper foot, very close to the seam. This would force the seam allowances down and make them flat and prepare for the finishing on the inside.
waist topstitch
Once I was done the row of stitching on the outside, I turned the garment inside out and started working the lining into a tiny fold over top of the trimmed cotton seam allowance. I didn’t press it (it is on the inside after all and it will get pressed later from the outside) and I used pins to hold the fold down so I could sew over it.
waist pinned
Even though it is usually better to topstitch from the right side, I had to sew from the wrong side to make sure I caught the edge of the folded lining.
waist finish
Sure enough, when I was done, I looked at the right side and I had caught one of the pleats up in the stitching. I used my seam ripper to cut the stitch that held the pleat up in the wrong position and smoothed the pleat down to where it belonged. The I sewed a few stitches from the right side to complete this part of the second line of topstitching.

I stuck a pin in the pleat to remind me which one it was. You can see from the next photo that the two lines of stitching are not perfectly straight but considering the fabric, I think it is pretty good and I also don’t think it will show much once I am wearing the garment. Also, I can always sew some trim over top of the stitching if it ends up bothering me.
pleat
Finally, I machine sewed a narrow hem, sewed on the buttons at the side (I made buttonholes according to the instructions but I am sure these buttons are purely decorative and I will be able to pull the whole thing over my head to put it on). As “Anonymous” remarked in the last project, the final photo is so dark, you can’t see much of anything (except on the right, the button catches a tiny bit of the flash). I will get Peter to take a picture of me wearing it whenever I do wear it and post that later.
jumper
For my next project, I am going to try to choose something a little brighter!

Jumper bodice, skirt side seams

I’m now up to 1 hour and 45 minutes in the time it is taking me to make this jumper so I am pretty sure “they” didn’t include ironing time in the sewing time. But I just don’t know how anyone can make something if it isn’t ironed properly.

So we’ll start with the shoulder seams. The pattern instructions call for making the front and back of the bodice separately. Since they are lined, you have to leave them open at the shoulders and then sew the fabric pieces together first and them sew the lining gap together. They suggest that I sew the lining pieces by hand but again, I have chosen to sew them by machine. As you will see, this doesn’t always work out perfectly but it wasn’t so bad that it isn’t acceptable.

First, I pinned the shoulder pieces together. I have pinned the lining down out of the way so it won’t get caught when I sew the first part of the shoulder seam. I also lined up the edges so I would sew right across where the lining leaves off.
shoulder seam pinned
Once I sewed the seam, I trimmed the edges and ironed that part of the seam open and flat. Then I started tucking the lining seam allowances in. First I pushed one side of the lining shoulder seam under the other side. Then I folded the other side and laid it on top of the tucked-under side.
shoulder seam
Once I’d made the fold and tucked in all the loose ends, I pinned the folded edge down in preparation for sewing. I sewed from the RIGHT side, in the ditch of the seam. When I turned the shoulder over to look at the wrong side (the lining side) I discovered that I had NOT caught the folded edge in the sewing. This meant that I would have to sew a second line of stitching from the wrong side, to make sure the lining was sewed down securely.
shoulder lining
When I sewed the second line of stitching, I made sure it was parallel to the first line so it would look like a “detail” and not like I’d made a mistake. In the next photo, I have one shoulder right side up and the other lining side up and you can see the parallel lines of stitching (you might have to view the larger photo at Flickr to really get the detail). Once I press the heck out of this, it will look just fine.
shoulder seams
Now that the bodice is done, I started on the skirt. It is very simple - a tube with pleats and side seam pockets. First I sewed the pocket pieces to the side seams where indicated. Then I sewed the side seams, skipping the pocket opening of course. The pattern instructions call for sewing around the pocket edge but I wanted to do a modified flat fell on the side seam to finish it first. I pressed open the side seam allowance and then pressed under each side, to make the flat fell.
side seam pocket
When I sewed down the flat fell on each side of the seam, I stopped tucking under the seam allowance at the pocket and just sewed the raw seam allowance down. The extra line of sewing will help keep the seam allowance from raveling where the pocket is placed but it won’t encase the raw edges like the fell does. But I couldn’t figure out how to continue the fell under the pocket so I just sewed the seam allowance edge down. If I’d sewed the pocket itself down, thus encasing the raw edge, it wouldn’t have allowed the pocket to hang freely on the side and the end result would have been an obvious opening on the side, instead of a hidden opening for the pocket. So I will have a little bit of the raw seam allowance hiding under the pocket but I can live with that.
pocket detail

Thursday, January 26, 2006

Update to the skirt and jacket outfit

the skirt/jacket outfit
Here I am, wearing the finished outfit, together with a shirt I made some years ago. I have no reason to look so "happy" because I just came down with a cold last night but I was posing so what can I say.

Jumper - getting started

New project!
So I have these four pieces of old-fashioned double-knit. Remember that stuff? Heavy weight, stretchy in both directions, looks knitted. Looks like it is made out of polyester (because it is). Indestructible too. Three were given to me by someone who got them from her mother and she didn’t know what to do with them and didn’t want to throw them away. One was given to me by my mother and ditto. I keep thinking that I will suddenly imagine some garment that I can make using the double-knit and it will look good when I am done! So those are the pieces I have been staring at for a while, trying to come up with what I will sew next.

I have also been looking at my patterns to help with the inspiration. Since it is the dead of winter, I am thinking about warm garments and I dug out a pattern I have never used. It is for a jumper. I don’t actually own any jumpers but I used to wear them as a child. They are comfy and roomy and you can pile several layers of turtlenecks under them. This one is so long it comes down to below mid-calf, good for fending off those winter winds if you wear tights and slips and knee high boots. It has a dropped waist bodice and so it is pretty much shapeless -- not the kind of thing men like but when you are trying to lose the weight you have gained over the winter, it makes for a versatile garment.
jumper pattern
Note that it says right on the front that you can make the jumper in 2 hours! This one doesn’t have the disclaimer that the newer patterns have, that this is sewing time only, but I am sure that is what they mean. More on the timing later.

I had sort of settled on the jumper but not the fabric until I remembered some black cotton I had bought on sale. It is mid-weight with a slight waffle weave finish to it. One side shows the waffle more and the other side (the one I have decide will be the “right” side) has a bit of a sheen to it. Based on the last set of photos with the brown fabric, I had low hopes for getting any detail with this black stuff but it seems to work with the texture. I have already cut out the pieces and marked the pleats with chalk and took the next photo to show the difference between the right and wrong sides of the fabric.
right/wrong sides
The pattern calls for interfacing just the spot where the button holes go on the bodice but I decided to put interfacing where the buttons will be sewn also, for a little added security. I cut out four pieces of the sew-in interfacing using pinking shears so the inside edge (the edge that doesn’t get sewn into a seam) won’t fray.
interfacing

I started timing myself after all the pieces had been cut out, marked and unpinned, including the lining for the bodice and the interfacing. “Sewing time” has to include putting the pieces together and I include attaching interfacing in that stage.

Here, I’ve got the interfacing pinned on to the wrong side of both the front and back pieces of the bodice.
interfacing pinned on
Next, the pattern instructions say to attach the lining to the front and back of the bodice. The pieces are cut from the same pattern piece and so I put them right sides together, pinned them and then sewed them along the armhole edges and around the neck, according to the instructions.
lining bodice
After trimming the seams and clipping the curves, the next step is to turn the bodice halves right side out and press them. Because pressing is so important to a finished garment, I first press open as much of the seams as I can on the wrong side. This allows you to make the finished fold on the outside as flat as possible.
pressing seam open
Once I turn the garment right side out, I continue to press the seam edges carefully, rolling the lining side slightly inside or under the cotton fabric side. In this way, the lining shouldn’t show on the outside. In the next photo, I show the opposite of what I want to achieve. The bodice is showed from the right side and you can see the lining coming out from under the edge.
bodice edge
After I press on the right side, I turn the piece over to press it from the lining side. Now I can carefully pull the lining so that I make sure I see a bit of cotton all around the edge as I press. You might have to go look at the larger image of the next photo on Flickr to get the detail I am writing about. Note that I am also using the clapper to make sure this last press is nice and flat.
lining side
Up to this point, I timed myself as having taken 45 minutes and I haven’t finished pressing the front of the bodice, never mind the back of it. I fear their “2 hours” timing does not include pressing either. But since pressing is a major component in making a garment, I am including mine in the timing.

Tuesday, January 24, 2006

Project finished

And I’m finished!
Okay, let’s back-track a little. The jacket was coming together. The next step was to tack down the facing around the neck. I chose to machine sew the facing to the shoulder seams, as I had done with the skirt facings. In the first picture, I am starting to sew the facing from the right side of the jacket (to make sure the stitching is “in the ditch”).
jacket facing
When I was done, I pulled the jacket out from under the presser foot to get a better look. You might note that there is a zipper foot on the machine but that is just because I couldn’t be bothered to change it for this little job.
jacket facing2
Next, I ironed up the bottom hem on the jacket. I chose to make a narrow, folded hem as I did on the skirt. Then I sewed it down using the zipper foot.
jacket hem
Finally, it was time to put the pockets on. First I measured where they should go, based on the marks on the pattern. I hadn’t marked the fabric, mostly because I knew the chalk would wear off so I just measured and then placed the pockets. I use lots of pins to make sure they lie flat for sewing. And I generally put the pins in so the points face out, toward the line of stitching so that I can pull them back a little and sew right by them.
pocket pinned
In the next photo, I am sewing up to the top of the pocket. You can see how I will be able to ease that pin back and out of the way of the needle. I just use a single line of topstitching to attach the pockets because they are more decorative than functional.
pocket
Second to last, I decide where the buttons will go, make the buttonholes and sew on the buttons.
buttons
And finally, I try on the jacket to see how much I should take up the sleeves at the bottom. I also made a narrow, folded hem on the sleeves. I had to cut off 3 cm and then I folded up 2 cm, ironed it and stitched the “cuff”.
jacket cuff
Here are the two pieces, hanging up!
jacket and skirt

Saturday, January 21, 2006

Skirt hem, underarm seam

The skirt is done! After last time, all I had left was the hem. I like to make narrow machine sewed hems, especially on flared skirts so I don’t have to gather excess fabric and work it into the hem. Here, I have already ironed up about a quarter of an inch of fabric and am ironing up the second fold (so the raw edge is encapsulated in the hem). I am also using a clapper to make it flat and so I don’t have to bother with pins. After this, I just sewed it close to the upper side of the fold with a zipper foot.
skirt hem
Next, I pinned the front and back together at the side and along the sleeve, since I had already sewed the sleeve to the jacket at the shoulder. Once this seam was sewed, I pressed it open using a sleeve board. I always gather up the garment in the sleeve board and start at the narrow end, un-gathering as I iron.
sleeve seam
I iron the seam open on the inside. Then I turn the sleeve right side out and iron using the clapper on the outside. In the next photo, I am showing the underarm seam at the armpit. You can see the flat fell around the shoulder.
armpit outside
Next, I turn the sleeve back to the inside and iron the seam allowances under on each side of the seam. This is the third time I’ve ironed this seam but all that work is worth it, to have a nice finished seam when you are done. Once I finish ironing the seam allowances (and using the clapper again to make sure they lie flat), I am ready to sew them down in a modified flat fell.
sleeve flat fell
In the last photo for this entry, I have sewed down one side of the underarm seam, turned at the wrist, and am sewing my way out. I have paused at the shoulder seam to show how this works.
armpit flat fell

Friday, January 20, 2006

Shoulder seam and skirt facing

After the front and back of the jacket were sewed together, the sleeves went on. This sleeve is not set-in and has a very flat line where the shoulder attaches to the body of the jacket. Consequently, I can get away with fewer pins than I normally use instead of basting, to attach the sleeve before I sew it.
sleeve pinned
Once it is sewed on (and always after ironing), I clip one half of the seam allowance to about 1/4 inch and fold the other half over it in a proper flat fell. In my case, I prefer to clip the seam allowance that belongs to the body of the jacket and fold over the seam allowance that belongs to the sleeve. There is no seam in the sleeve and it generally lies flatter that way.
In the next photo, the sleeve is on the right. You can see that this sleeve seam allowance is folded over, on the left of the seam itself. I am sewing the fold down onto the body of the jacket to the left of the seam.
sleeve felled
In the next photo, you can see the modified flat fell of the shoulder seam in the left third of the picture (I have folded each seam allowance under and sewed it down, so you get two lines of topstitching). You can see the shoulder seam and the proper flat fell of the shoulder seam (although I have only stitching down the fold and have not made a second line of stitching down the seam line, as I would on a jean jacket). I folded up the right side of this assembly so you could see the underside (the wrong side) of the sleeve shoulder seam all in one photo. That’s why it looks a little odd.
shoulder seam
Finally, I am showing the inside of the skirt where I have machine sewed down the facing to the body of the skirt. I find that hand sewing the facing is rarely satisfactory as the hand sewing comes undone after a few washings. If you sew from the right side of the skirt into the gutter of a seam, you can hardly notice it and then the facing stays put. I left the raw edge of the facing the way it was. It will fray some after washing but not enough to irritate me and this way, there will not be an obvious line on the outside of the skirt, as there would be if I had folded up the raw edge of the facing.
skirt facing

Wednesday, January 18, 2006

Jacket neck edge and final skirt seam

In the next photo, I’ve pinned the skirt facings to the skirt front and back. I had to stand on a chair to take the picture and it still isn’t great. And you can’t see where I felled the seams, even though you are looking at the right side or the outside of the skirt here. Anyway.
skirt facing
Once I sewed the facings to the skirt, I pressed the skirt toward the facings and understitched both facings to make them lie flat. Now I can sew the final skirt seam. It is the right-hand seam (the zipper is on the left). By doing it this way, I can take the skirt IN when I lose a few more pounds :) and that will be easier than if I sewed the facing all the way around as the instructions say.
skirt side
In the next photo, I haven’t pressed the seam open or felled it but that’s coming.
skirt side seam
I continued work on the jacket too. I saw the flash go off for all the photos but some turned out very dark. I tried “enhancing” them too and sorry, but they just aren’t very good. Anyway.

This jacket is unlined and the facing gets sewed all in one piece and then it is put right sides together with the body of the jacket and you get a finished neck edge. In this photo, the facings are sewn together and you can (barely) see that I am doing a modified flat fell on the shoulder seams.
jacket neck
In the next photo (nice and bright, don’t know why), I have pressed open the neck edge seam. This is so it will end up being as flat as possible.
neck facing
Once the seam is pressed open, you fold it over closed (wrong sides together) and press the finished neck edge using the clapper to get in really flat. The next photo shows the neck edge from the inside (you are looking at the facing) and I have put a couple of pins in to make sure all that pressing doesn’t unfold before I can topstitch it.
topstitch prep
Here, I am starting the topstitching and I am stitching from the right side of the jacket because that is the stitching that will show. If you stitched from the facing side, you risk a wobbly line once you turn it over and look at the right side. Also, I am only stitching the neck edge. I will save the front edges for later, after I have done the hems (you’ll see).
topstitching